Hyundai Tucson: Smart Key System / Smart key antenna

ŌĆó Take care not to scratch the crash pad and related parts.
1.Disconnect the negative (-) battery terminal.
2.Remove the crash pad center panel.(Refer to Body - "Crash Pad Center Panel")
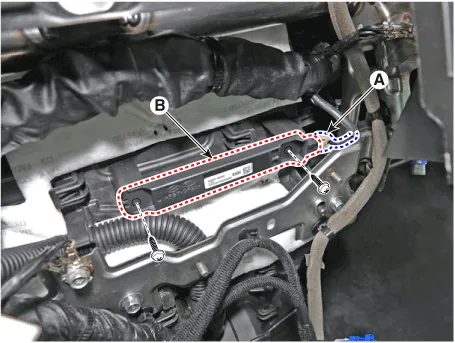
3.Remove the interior 1 antenna (B) after loosening mounting screws and disconnect the connector (A).
1.Disconnect the negative (-) battery terminal.
2.Remove the console floor console assembly.(Refer to Body - "Floor Console Assembly")
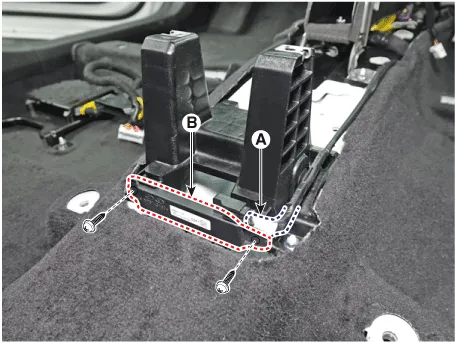
3.Remove the interior 2 antenna (B) after loosening mounting screws and disconnect the connector (A).
1.Disconnect the negative (-) battery terminal.
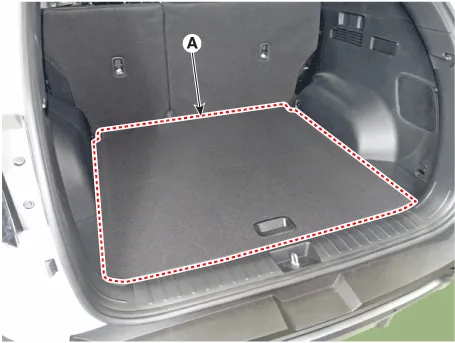
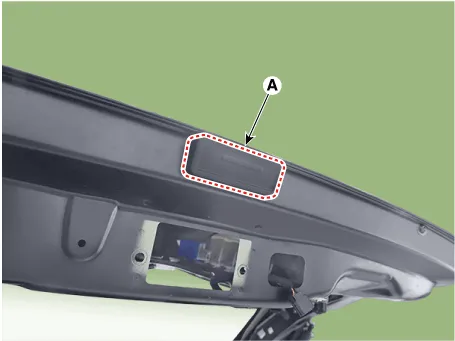
2.Remove the luggage mat (A).
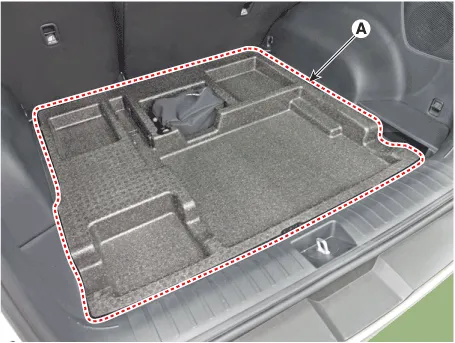
3.Remove the luggage floor tray (A).
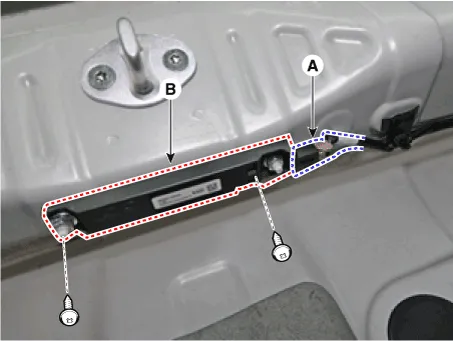
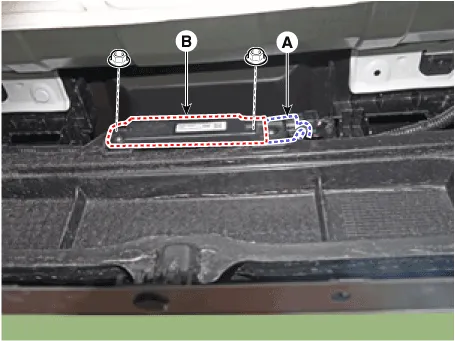
4.Loosen the mounting clips and remove the rear transverse trim (A).
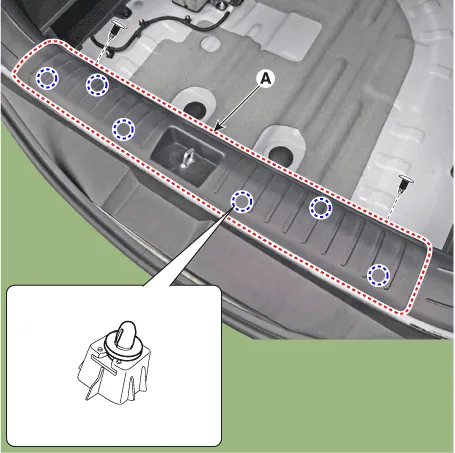
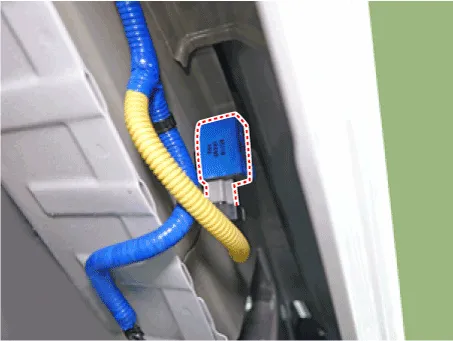
5.Remove the liftgate antenna (B) after loosening mounting screws and disconnect the connector (A).
1.Disconnect the negative (-) battery terminal.
2.Lift the vehicle.
3.Disconnect the antenna connector (A) from the rear bumper.
4.Remove the antenna (B) after loosening mounting nuts.
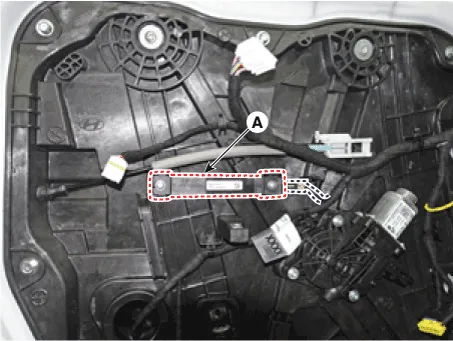
1.Disconnect the negative (-) battery terminal.
2.Remove the front left wheel guide.(Refer to Body - "Front Wheel Guard)
3.Disconnect the connector, then remove the buzzer (A).
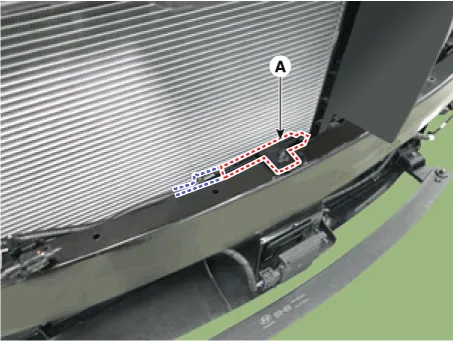
1.Disconnect the negative (-) battery terminal.
2.Remove the front bumper assembly.(Refer to Body - " Front Bumper Assembly")
3.Remove the front antenna (A) after disconnecting antenna connector.
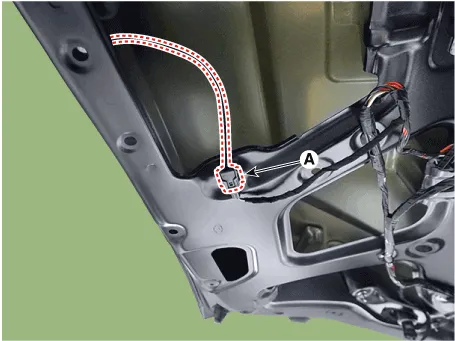
1.Disconnect the negative (-) battery terminal.
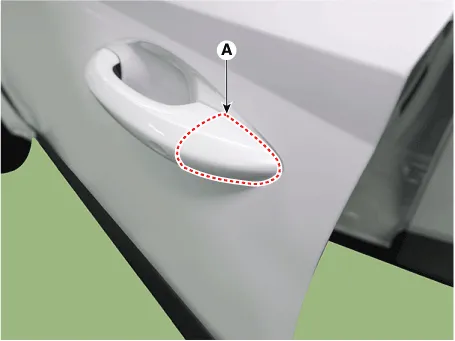
2.Remove the front door trim.(Refer to Body - "Front Door Trim")
3.Remove the door antenna (A) after disconnecting antenna connector.
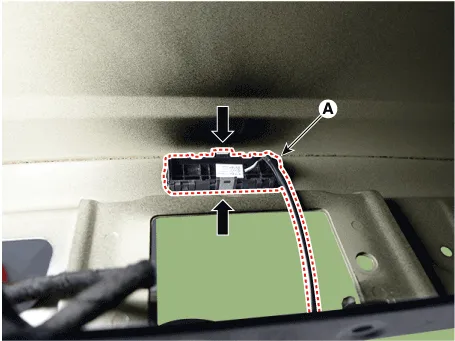
1.Disconnect the negative (-) battery terminal.
2.Remove the liftgate latch.(Refer to Body (Interior and Exterior) - "Liftgate Latch")
3.Disconnect the liftgate open switch connector (A).
4.Remove the liftgate open switch (A).

ŌĆó When removing with a flat-tip screwdriver or remover, wrap protective tape around the tools to prevent damage to components.
ŌĆó Put on gloves to prevent hand injuries.
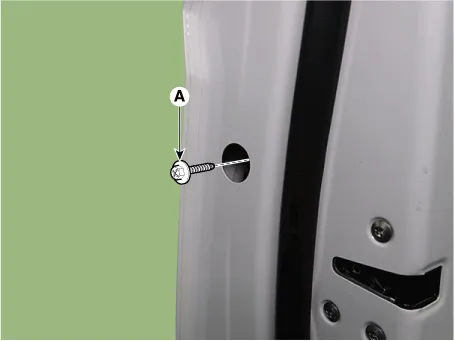
1.Remove the door outside handle cover (A)
2.Remove the plug hole (A.

3.Loosen the mounting bolt (A).
4.Remove the front door lock assembly (A).
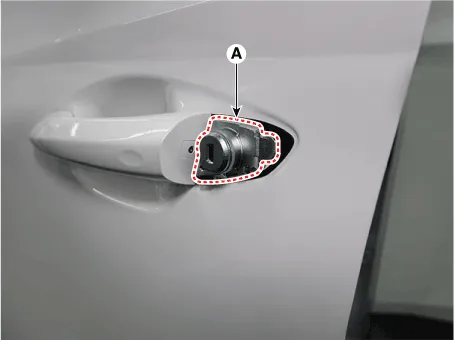
5.Remove the front door outside handle (A) by sliding it forward.

6.Disconnect the front door outside handle connector (A).

1.Install the interior 1 antenna.
2.Install the ecall unit.
3.Install the negative (-) battery terminal and check the smart key system.
1.nstall the interior 2 antenna.
2.Install the console rear complete assembly.
3.Install the negative (-) battery terminal and check the smart key system.
1.Install the liftgate Antenna.
2.Install the rear transverse trim.
3.Install the luggage floor tray.
4.Install the luggage mat.
5.Install the negative (-) battery terminal and check the smart key system.
1.Install the exterior bumper antenna.
2.Install the rear bumper assembly.
3.Install the negative (-) battery terminal and check the smart key system.
1.Install the outside handle.
2.Install the front door trim.
3.Install the negative (-) battery terminal and check the smart key system.
1.Install the liftgate open switch.
2.Install the liftgate latch.
3.Install the liftgate trim.
4.Install the negative (-) battery terminal and check the liftgate system.
1.Install the door antenna.
2.Install the front door trim.
3.Install the negative (-) battery terminal and check the smart key system.
1.Install the front antenna.
2.Install the front bumper assembly.
3.Install the negative (-) battery terminal and check the smart key system.
 Smart Key Unit
- Components (1)
Integrated Body Control Unit (IBU)
Connector Pin Information
NoConnector AConnector BConnector CConnector D
1Speed_input-ECU groundBlower motor operate_output
2-Rear washer ...

Other information:
Hyundai Tucson (NX4) 2022-2026 Service Manual: Alignment
- Adjustment
When using a commercially available computerizedwheel alignment
equipment to inspect the front wheelalignment, always position the
vehicle on a levelsurface with the front wheels facing straight
ahead.Prior to inspection, make sure that the frontsuspension and
steering system ...
Hyundai Tucson (NX4) 2022-2026 Owner's Manual: Fuses
A vehicleŌĆÖs electrical system is protected
from electrical overload damage by
fuses.
This vehicle has 2 (or 3) fuse panels, one
located in the driverŌĆÖs side panel bolster,
the other in the engine compartment.
If any of your vehicleŌĆÖs lights,
accessories, or controls do not work, ...
