Hyundai Tucson: Automatic Transaxle Control System / SBW Control Unit(SCU)
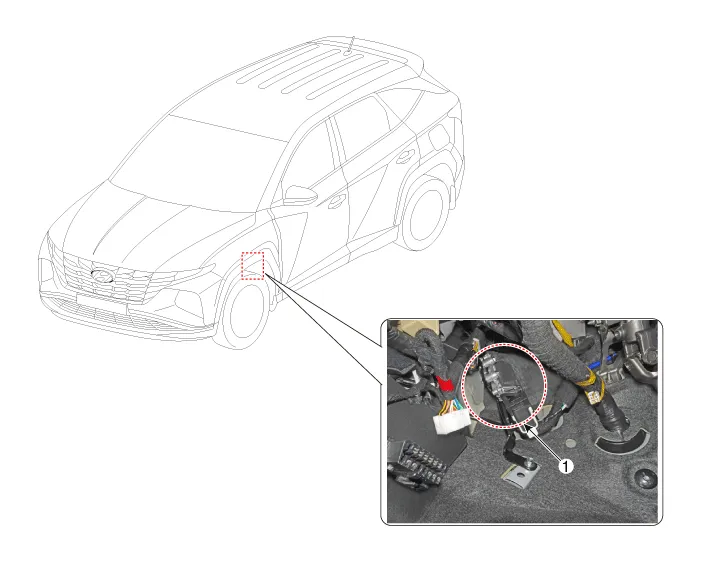
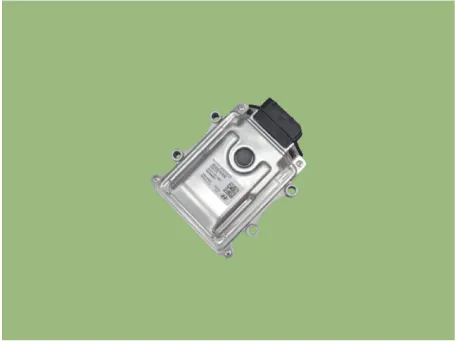
1. Shift by wire Control Unit (SCU)
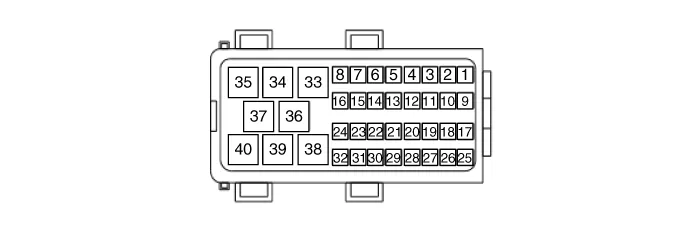
| Pin | Function | Pin | Function |
| 1 | Power | 21 | - |
| 2 | Ground | 22 | - |
| 3 | H-CAN High | 23 | - |
| 4 | H-CAN Low | 24 | - |
| 5 | P-CAN High | 25 | - |
| 6 | P-CAN Low | 26 | - |
| 7 | Position sensor ground | 27 | Position sensor signal 1 |
| 8 | - | 28 | Position sensor signal 2 |
| 9 | - | 29 | P position output signal |
| 10 | Position sensor power 5 V | 30 | - |
| 11 | Electronic shift actuator sensor power 5 V | 31 | Back-up lamp signal |
| 12 | IG 1 | 32 | - |
| 13 | Electronic shift actuator sensor signal 2 | 33 | Electronic shift actuator motor U |
| 14 | Electronic shift actuator sensor signal 1 | 34 | Electronic shift actuator motor V |
| 15 | Electronic shift actuator sensor ground | 35 | Electronic shift actuator motor W |
| 16 | - | 36 | Power |
| 17 | - | 37 | Electronic shift actuator power |
| 18 | - | 38 | Ground |
| 19 | - | 39 | - |
| 20 | - | 40 | - |
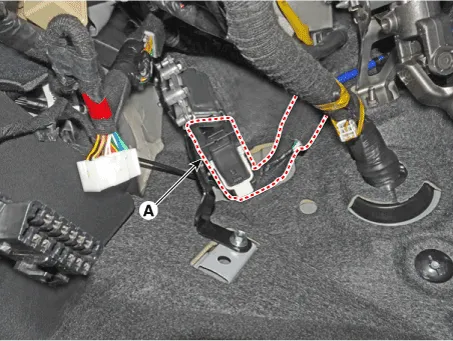
1.Turn ignition switch OFF and disconnect the negative (-) battery cable.
2.Disconnect the SBW control unit connector (A).
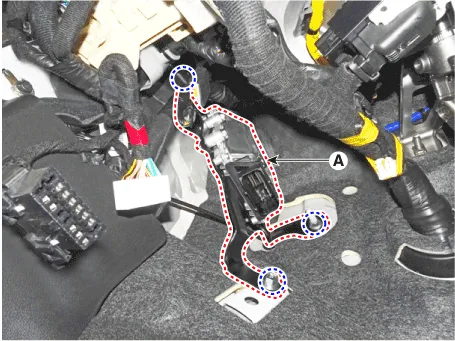
3.Loosen the nut and bolts and then removing the SBW control unit bracket assembly (A).
Tightening torque :9.8 - 11.8 N.m (1.0 - 1.2 kgf.m, 7.2 - 8.7 lb-ft)
4.Loosen the bolts and then removing the SBW control unit (A) from the bracket.
Tightening torque :9.8 - 11.8 N.m (1.0 - 1.2 kgf.m, 7.2 - 8.7 lb-ft)

1.To install, reverse the removal procedure.
 Transaxle Control Module (TCM)
- Description
ŌĆó Monitoring the vehicle's operating conditions to determine the optimal gear setting.
ŌĆó Performing a gear change if the current gear setting differs from the identified optim ...
 Electronic Shift Actuator
- Description
Controls the 4 position of P(Parking), R, N, D using the rotation of
the motor of according to the electric signal when the shift button is
operated.
- Specification
ItemSp ...
Other information:
Hyundai Tucson (NX4) 2022-2026 Owner's Manual: Used Vehicle/Digital Key
Maintenance
Purchasing used vehicle
Delete Digital Key Settings When
Purchasing a Used Vehicle
If any digital key (smartphone key or card
key) is already registered when you press
the Push Button Start ignition switch, the
message, ŌĆ£Digital key(s) activeŌĆØ appears
on the instrument cluster once. ...
Hyundai Tucson (NX4) 2022-2026 Service Manual: Smart Key Unit
- Components (1)
Integrated Body Control Unit (IBU)
Connector Pin Information
NoConnector AConnector BConnector CConnector D
1Speed_input-ECU groundBlower motor operate_output
2-Rear washer switch_outputpower ground-
3Front washer switch_inputESCL (+)_outputBattery (+) ECU-
4PDW-R power_ ...
