Hyundai Tucson: Quarter Fixed Glass / Repair procedures

• When removing with a flat-tip screwdriver or remover, wrap protective tape around the tools to prevent damage to components.
• Put on gloves to prevent hand injuries.

• Take care not to bend or scratch the trim and panels.
1.Remove the roof trim.(Refer to Roof Trim - "Roof Trim Assembly")
2.Remove the C pillar garnish (A).
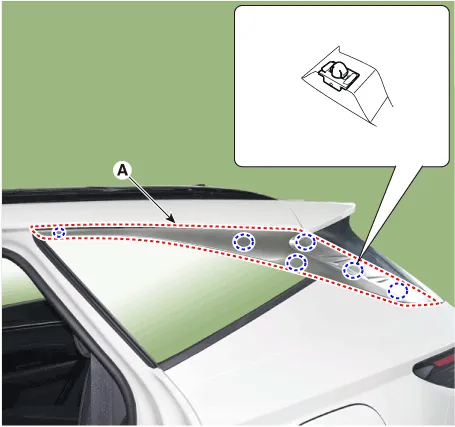
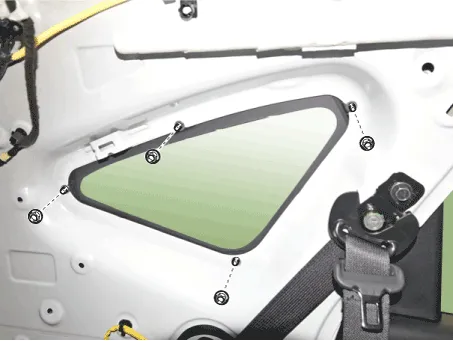
3.Loosen the quarter fixed glass mounting nuts.

4.Cut out the quarter fixed glass sealant using the utility knife.

• Do not scrape down to the painted surface of the body as bonding strength may get diminished on damaged paint.

• Remove the rubber dam and fastereners from the body.
• Mask off surrounding surfaces before painting.
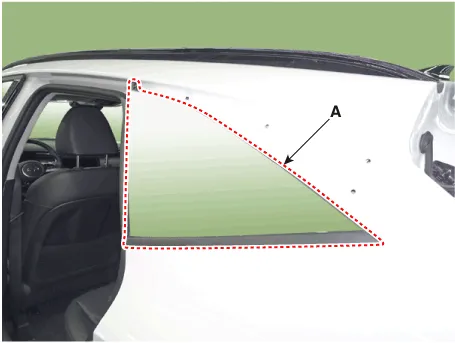
5.Remove the quarter fixed glass (A).

1.With a putt knife, scrape the old adhesive smooth to a thickness of about 2mm (0.08 in.) on the bonding surface around the entire quarter fixed glass flange.

• Do not scrape down to the painted surface of the body as bonding strength may get diminished on damaged paint.
• Mask off surrounding surfaces before painting.
2.Clean the body bonding surface with a sponge dampened in alcohol. After cleaning, keep the surface away from oil, grease and water.
3.With a sponge, apply a light coat of glass primer along the edge of the quarter fixed glass, and then lightly wipe it off with a gauze or cheese cloth.

• Do not apply body primer to the quarter fixed glass, and do not get body and glass primer sponges mixed up.
• Never touch the primed surfaces with your hands. If you do, the adhesive may not bond to the quarter fixed glass properly, causing a leak after the quarter fixed glass in installed.
• Keep water, dust, and abrasive materials away from the primed surface.
4.With a sponge, apply a light coat of body primer to the original adhesive remaining around the flange. Let the body primer dry for at least 10 minutes.

• Do not apply glass primer to the body, and be careful not to mix up glass and body primer sponges.
• Never touch the primed surfaces with your hands.
1.Install the quarter fixed glass and nuts (A).
Tightening torque :3.9 - 4.4 N.m (0.4 - 0.45 kgf.m, 2.9 - 3.3 lb-ft)

• Install the quater fixed glass by tightening the bolts, in the sequence as shown.

2.Install the roof trim.(Refer to Roof Trim - "Roof Trim Assembly")
 Components and Components Location
- Components
1. Quarter fixed glass
...
 Floor Carpet
...
Other information:
Hyundai Tucson (NX4) 2022-2025 Owner's Manual: Reverse Parking Collision-
Avoidance Assist Malfunction
and Limitations
Reverse Parking Collision-
Avoidance Assist malfunction
When Reverse Parking Collision-
Avoidance Assist or other related
functions are not working properly,
the "Check Parking Safety system"
warning message may appear on the
instrument cluster, and Reverse Parking
Collision-Avoidan ...
Hyundai Tucson (NX4) 2022-2025 Owner's Manual: Tires and Wheels
NOTICE
It is permissible to add 3 psi to the standard tire pressure
specification if colder
temperatures are expected soon. Tires typically lose 1 psi (7 kPa) for every
12 °F (7
°C) temperature drop. If extreme temperature variations are expected,
recheck your
tire pressure ...
