Hyundai Tucson: Power Door Mirrors / Power Door Mirror Assembly
1.Disconnect the negative (-) battery terminal.
2.Remove the front door trim.(Refer to Body - "Front Door Trim")
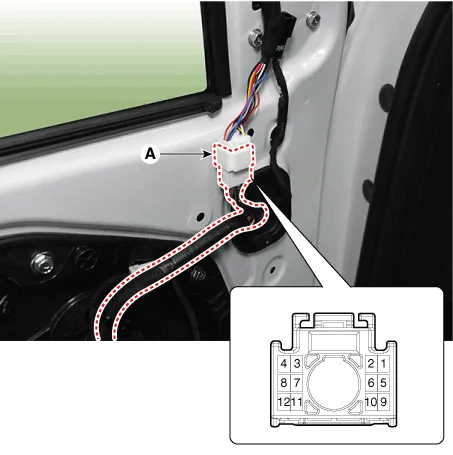
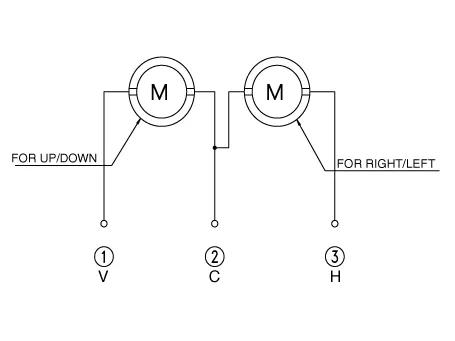
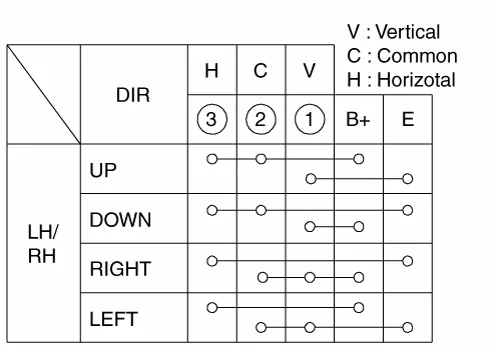
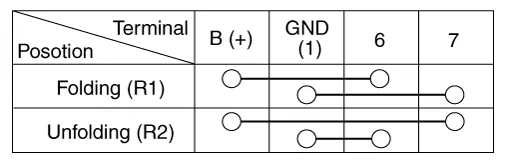
3.Disconnect the power door mirror connector (A) from the harness.Apply battery voltage to each terminal as shown in the table and verify that the mirror operates properly.


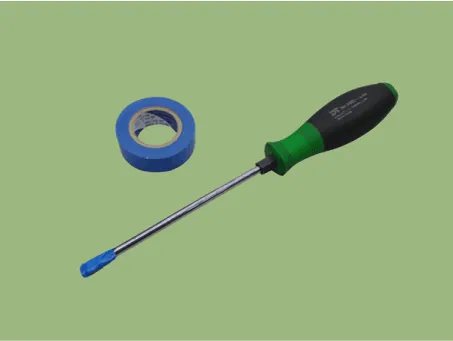
• When removing with a flat-tip screwdriver or remover, wrap protective tape around the tools to prevent damage to components.
• Put on gloves to prevent hand injuries.
1.Disconnect (-) battery terminal.
2.Remove the outside rear view mirror.(Refer to Body - "Outside Rear View Mirror")
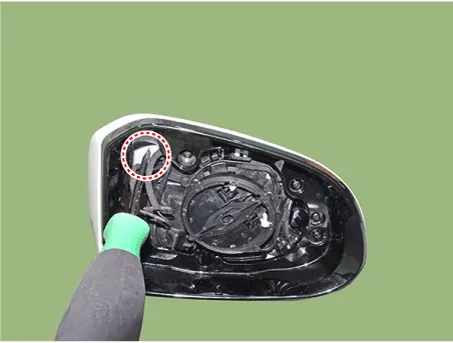
3.Using a fastener remover (C), remove the mirror (A) as illustration below.
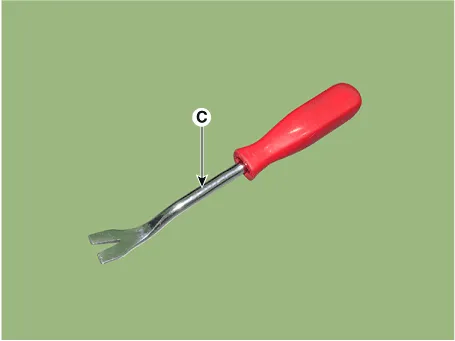
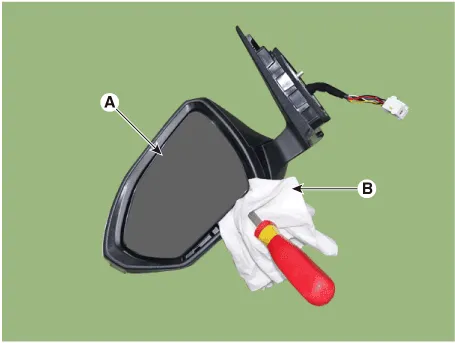

• Protect mirror from removing tool with cloth (B) wrapped.
• Be careful not to damage mirror and mirror housing during removing process.
• Apply force around the center of mirror because to apply force the end of mirror will break it.
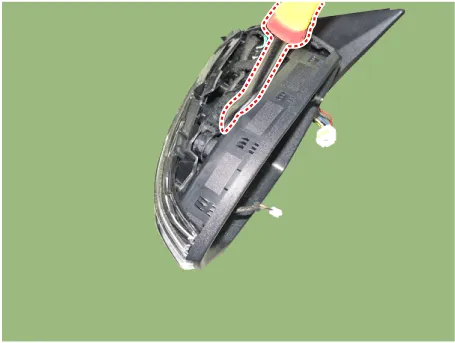
4.isconnect heat wire connectors (B) and BCW warning indicator connector (A).


5.Remove the scalp.
1)Attach protection tape at the end of the screw driver.
2)Insert screw driver in where you can see the back of scalp.

• When inserting screw driver, avoid to touch internal wires in the mirror housing.
3)Hold the mirror assembly with one hand and hold the screwdriver with the other hand and strike it vertically as shown illustration below.


• It is the way that screw driver strikes inner side of scalp cover to remove.
• Lift screw driver and door mirror assembly about 20cm height from floor then smash them vertically.
• Scalp is thrown and removed because screw driver push the back of scalp cover to remove.
• After removing the scalp, make sure that the clip and hook on the back of the scalp are not damaged.
• If clips and hooks are damaged, replace the scalp with a new one as noise may occur in driving.
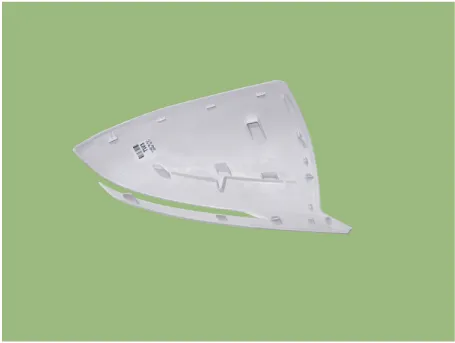
6.Remove the fornt housing cover (A) after loosening mounting screws.
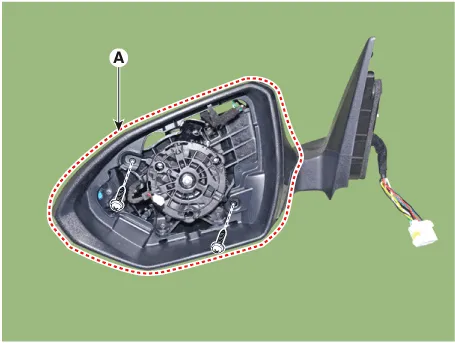

• Insert flat-tip screwdriver between housing cover and housing as shown illustration below.
1.Install the front housing cover.
2.Install the scalp.

• Install the scalp in the vertical direction that the inner fixing hook is not damaged.
• When scalp installing, install the folded area first and then the far area.
• Pushing the around of scalp with both hands and then make sure that it is completely installed.
3.Connect mirror heat wire connector and BSD connector then install the mirror.
4.Install the door mirror assembly.
5.Connect (-) battery terminal then check if door mirror works normally.
 Power Door Mirror Actuator
- Removal
• When removing with a flat-tip screwdriver or remover, wrap protective tape around the tools to prevent damage to components.
• Put on gloves to prevent hand ...
 Power Windows
...
Other information:
Hyundai Tucson (NX4) 2022-2026 Owner's Manual: Radial-Ply Tires
Radial-ply tires provide improved
tread life, road hazard resistance
and smoother high speed ride. The
radial-ply tires used on this vehicle
are of belted construction, and are
selected to complement the ride
and handling characteristics of
your vehicle. Radial-ply tires have
the sam ...
Hyundai Tucson (NX4) 2022-2026 Owner's Manual: Manual Heating and Air
Conditioning
1. Start the engine.
2. Set the mode to the desired position.
For improving the effectiveness of
heating and cooling, select:
- Heating:
- Cooling:
3. Set the temperature control to the
desired position.
4. Set the air intake control to the
outside (fresh) air position.
5. Set the fan ...
