Hyundai Tucson: Crash Pad / Main Crash Pad Assembly
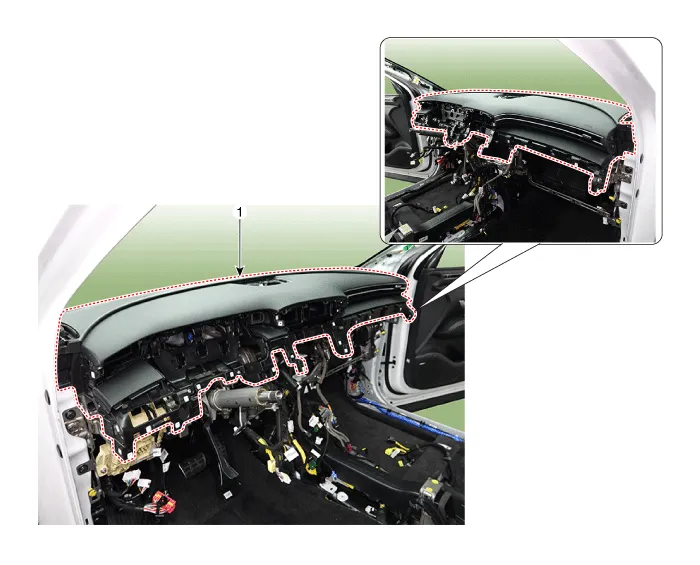
1. Main crash pad assembly

• When removing with a flat-tip screwdriver or remover, wrap protective tape around the tools to prevent damage to components.
• Put on gloves to prevent hand injuries.

• Take care not to bend or scratch the rim and panels.
1.Disconnect the negative (-) battery terminal.
2.Remove the floor console assembly.(Refer to Floor Console - "Floor Console Assembly")
3.Remove the front pillar trim.(Refer to Interior Trim - "Front Pillar Trim")
4.Remove the crash pad lower panel.(Refer to Crash Pad - "Crash Pad Lower Panel")
5.Remove the steering column shroud lower panel.(Refer to Crash Pad - "Steering Column Shroud Panel")
6.Remove the crash pad under cover.(Refer to Crash Pad - "Crash Pad Under Cover")
7.Remove the crash pad center panel.(Refer to Crash Pad - "Crash Pad Center Panel")
8.Remove the instrument cluster.(Refer to Body Electrical System - "Instrument Cluster")
9.Remove the front monitor.(Refer to Body Electrical System - "Front Monitor")
10.Remove the steering wheel.(Refer to Steering System - "Steering Wheel")
11.Remove the multifunction switch assembly.(Refer to Body Electrical System - "Multifunction Switch")
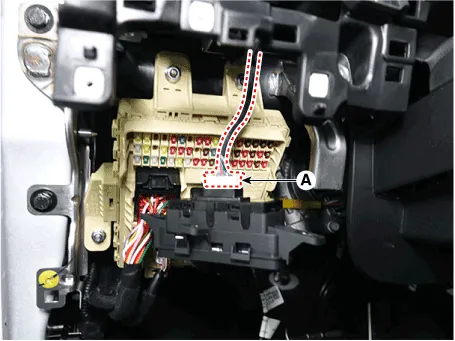
12.Loosen the mounting screws, remove the instrument cluster bracket (A).
13.Loosen the mounting screws, remove the crash pad switch assembly (A).
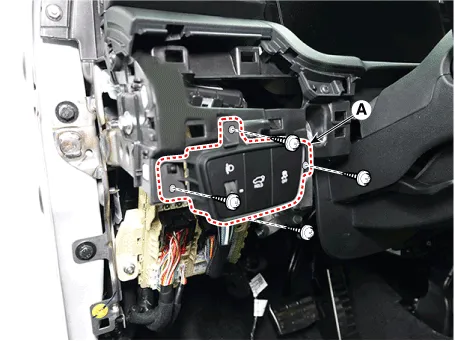
14.Disconnect the connector (A).
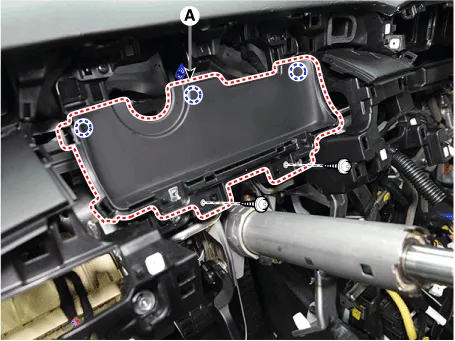
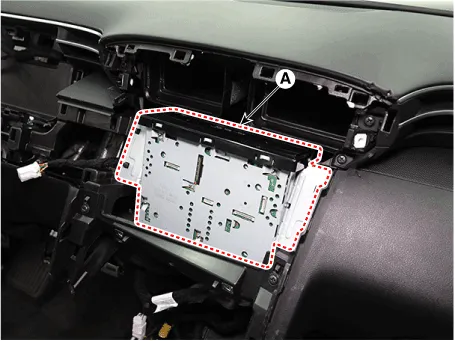
15.Loosen the mounting screws, remove the AVN head unit assembly (A).
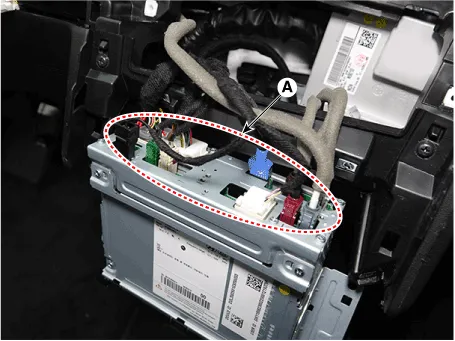
16.Disconnect the AVN head unit connectors (A).
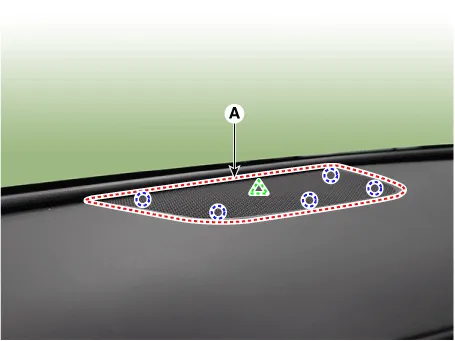
17.Remove the crash pad upper garnish (A).
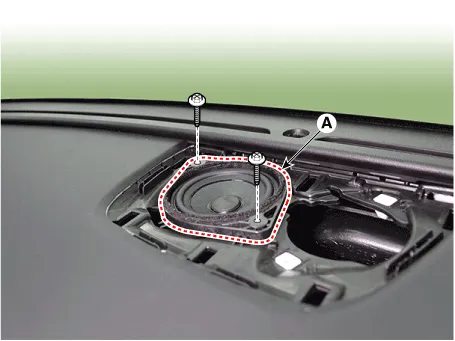
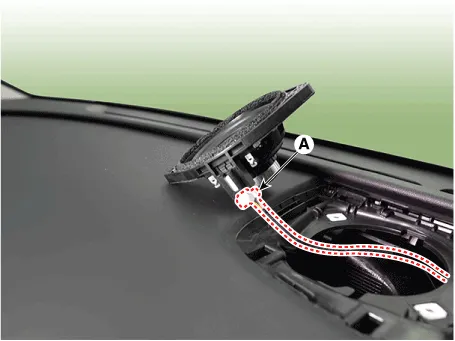
18.Loosen the mounting screws, remove the center speaker (A).
19.Disconnect the center speaker connector (A).
20.After removing the crash pad upper garnish, insert hand and push up the photo sensor (A) from the inside to remove it.
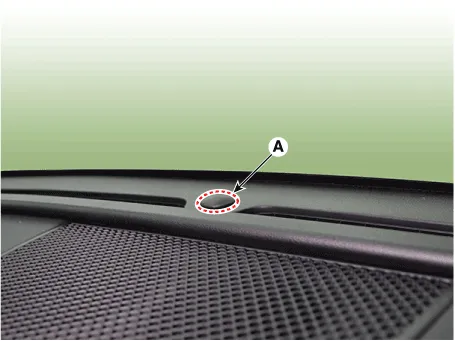
21.Disconnect the photo sensor connector (A).

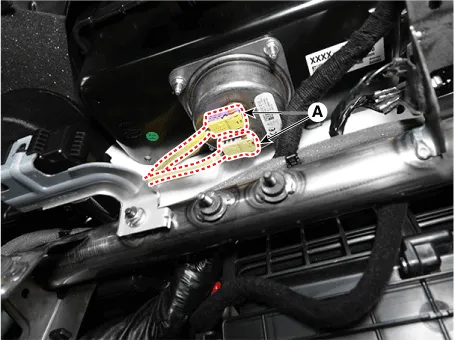
22.Loosn the passenger's airbag(PAB) mounting nuts (A).
Tightening torque : 16.7 - 25.5 N.m (1.7 - 2.6kgf.m, 12.3 - 18.8 lb-ft)

23.Loosen the mounting bolts and nuts and remove the main crash pad assembly (A).
Tightening torque : 16.7 - 25.5 N.m (1.7 - 2.6kgf.m, 12.3 - 18.8 lb-ft)

24.Press the lock pin, separate the passenger's airbag(PAB) connectors (A).
25.To install, reverse removal procedure.

• Make sure the crash pad fits onto the guide pins correctly.
• Before tightening the bolts, make sure the crash pad wire harnesses are not pinched.
• Make sure the connectors are plugged in properly, and the antenna lead is connected properly.
• Make sure that each of the assembly components operates properly.
• Replace any damaged clips (or pin-typ retainers).
 Crash Pad Center Panel
- Component Location
1. Crash pad center panel
- Replacement
• When prying with a flat-tip screwdriver, wrap it with protective
tape, and apply protective tape aro ...
 Cowl Cross Bar Assembly
- Component Location
1. Cowl cross bar assembly
- Replacement
• When removing with a flat-tip screwdriver or remover, wrap protective tape around the tools to prev ...
Other information:
Hyundai Tucson (NX4) 2022-2026 Owner's Manual: User Settings Mode
1. Driver Assistance
2. Cluster
3. Lights
4. Door
5. Convenience
6. Units
These options may differ depending on
which functions are available on your
vehicle.
Quick guide (Help)
This mode provides quick guides for the
systems in the User Settings mode.
Select an item, press and ...
Hyundai Tucson (NX4) 2022-2026 Owner's Manual: Rear Window Defroster
NOTICE
Never use sharp instruments or window
cleaners containing abrasives to clean
the window to prevent damage to the
rear window defroster.
The defroster heats the
window to remove frost, fog,
and thin ice from the interior
and exterior of the rear
window, while the engine is
...
