Hyundai Tucson: Liftgate / Liftgate Trim
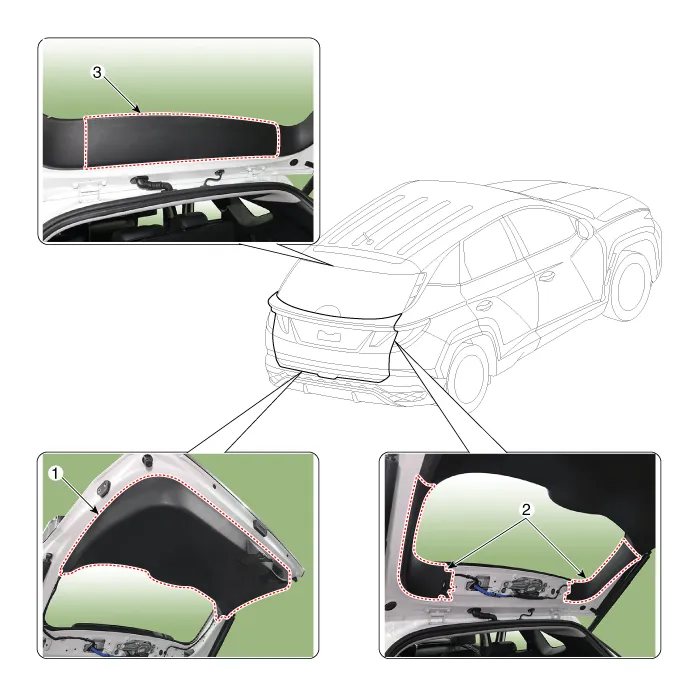
1. Liftgate lower trim
2. Liftgate side trim
3. Liftgate upper trim

• When removing with a flat-tip screwdriver or remover, wrap protective tape around the tools to prevent damage to components.
• Put on gloves to prevent hand injuries.
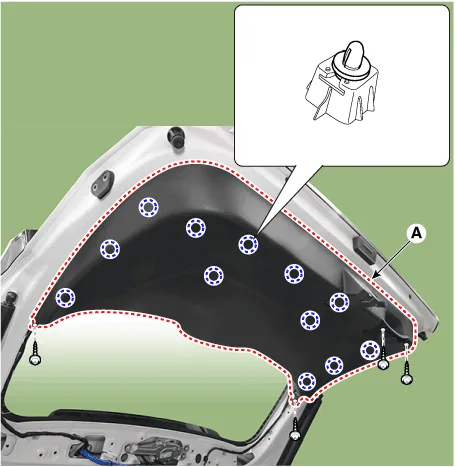
1.Using a screwdriver or remover, remove the liftgate upper trim (A).
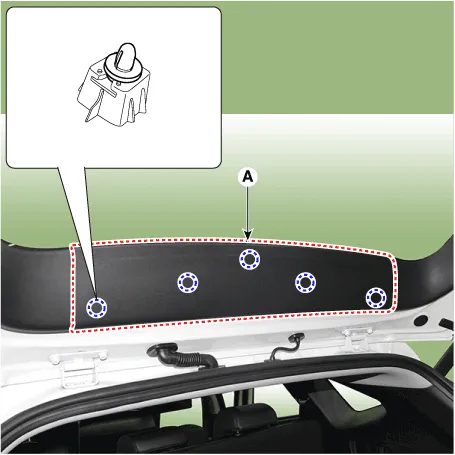
2.To install, reverse removal procedure.

• Replace any damaged clips (or pin-type retainers).

• When removing with a flat-tip screwdriver or remover, wrap protective tape around the tools to prevent damage to components.
• Put on gloves to prevent hand injuries.
1.Remove the liftgate upper trim.
2.Using a screwdriver or remover, remove the side trim (A).
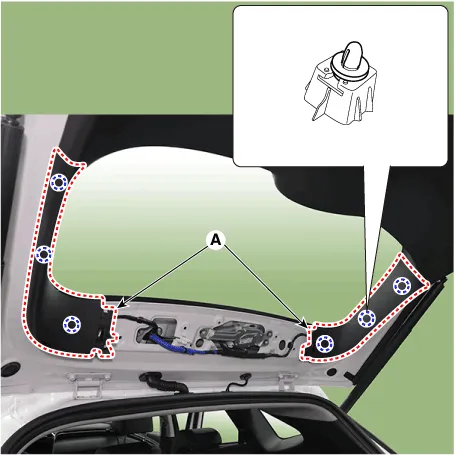
3.To install, reverse removal procedure.

• Replace any damaged clips (or pin-type retainers).

• When removing with a flat-tip screwdriver or remover, wrap protective tape around the tools to prevent damage to components.
• Put on gloves to prevent hand injuries.
1.Disconnect the negative (-) battery terminal.
2.Remove the liftgate side trim.
3.Using a screwdriver or remover, remove the pull handle (A).

4.Using a screwdriver or remover, remove the PTG inner switch (A).
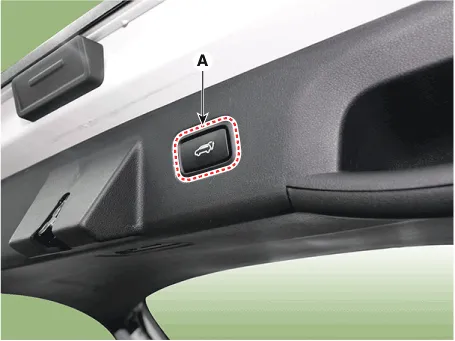
5.Desconnect the PTG inner switch connector (A).
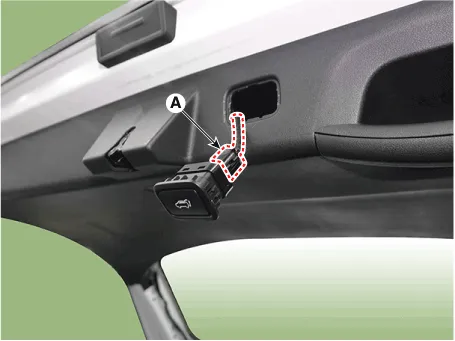
6.After loosening the mounting screws and fastner remove the liftgate lower trim (A).
7.To install, reverse removal procedure.

• Make sure the connectors are connected in properly.
• Replace any damaged clips (or pin-type retainers).
 Liftgate Assembly
- Component Location
1 . Liftgate assembly
- Replacement
• Wear gloves to protect hands from injury.
• Be careful not to damage the liftgate ...
 Liftgate Latch
- Component Location
1 . Liftgate latch assembly
- Replacement
• When removing with a flat-tip screwdriver or remover, wrap protective tape around the tools to preve ...
Other information:
Hyundai Tucson (NX4) 2022-2026 Service Manual: Repair procedures
- Adjustment
Inspect Glass Alignment
1.Inspect the step height between the roof panel (A) and the glass weatherstrip (B) and then adjust it if necessary.Alignment
adjustment Standard value [mm(in.)](1) Front edge : -1 ~ 0 mm (-0.04 ~ 0
in.)(2) Rear edge : 0 ~ 1 mm (0 ~ 0.04 in.)(3) Side edg ...
Hyundai Tucson (NX4) 2022-2026 Service Manual: Repair procedures
- A/S Repair produres
MDPS System A/S Workflow
â‘ Noise / malfunction Inspection
② Warning lamp (DTC) / CAN Line error
2 - 1 Checking Connectors and Wiring
1.Checking Connectors and Wiring.Check for damage, push-back, or improper connection in each connector and wiring.(1)Check the w ...
