
Hyundai Tucson: Cooling System / Integrated Thermal Management Module (ITM)
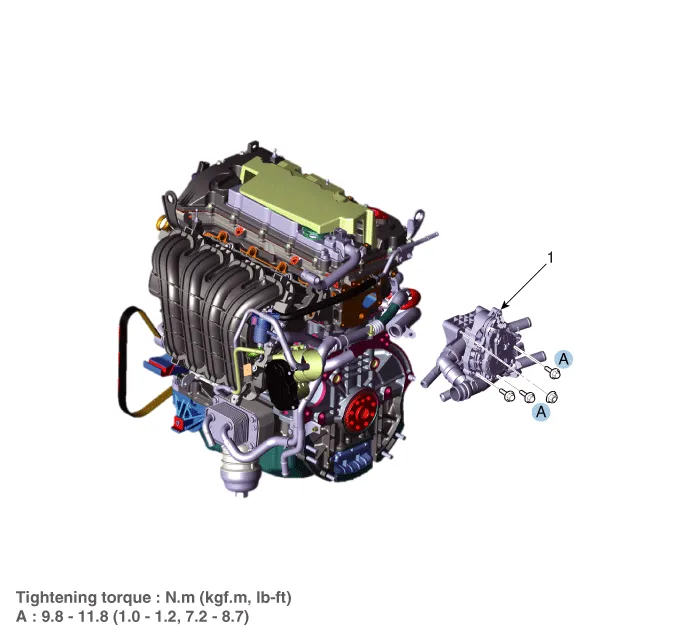
1. Integrated Thermal management Module (ITM)
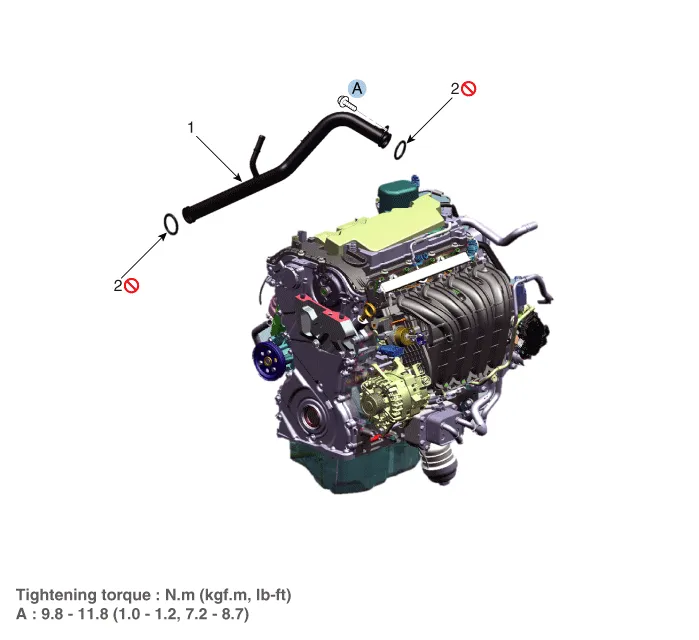
1. Water inlet pipe
2. O-ring

• Be careful not to damage the parts located under the vehicle (floor under cover, fuel filter, fuel tank and canister) when raising the vehicle using the lift.(Refer to General Information - "Lift and Support Points")

• Be careful not to allow the static electricity or any voltage is applied to ITM.
• Keep away the magnetic objects (Ex. magnet) from the ITM.
• When disconnecting the ITM connector, recheck that the engine and all power supplies are shut OFF.
• When connecting the ITM connector, moisture and oil in the connector must be completely removed and foreign materials should not enter.
• When replacing the ITM connector, be sure to use the specified connector.
1.Disconnect the negative battery terminal.
2.Remove the engine cover.(Refer to the Engine And Transaxle Assembly - "Engine Cover")
3.Remove the air intake hose.(Refer to the Intake And Exhaust System - "Air Cleaner")
4.Remove the engine room under cover.(Refer to the Engine And Transaxle Assembly - "Engine Room Under Cover")
5.Drain engine coolant by loosening the drain plug.(Refer to the Cooling System - "Coolant")
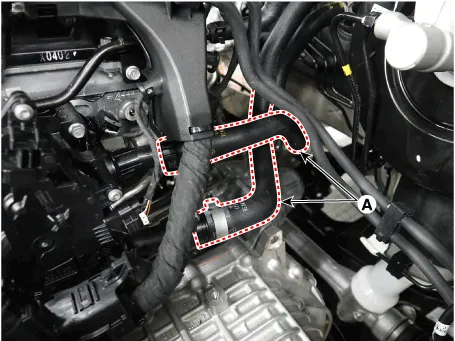
6.Disconnect the radiator upper hose quick connector (A).
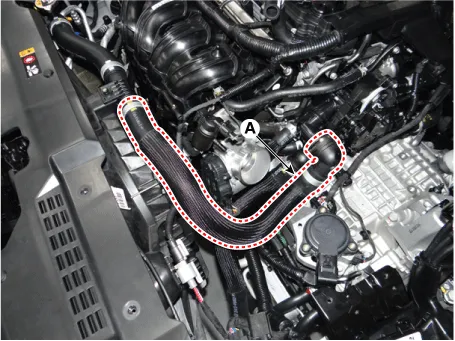
7.Disconnect the radiator lower hose quick connector (A).
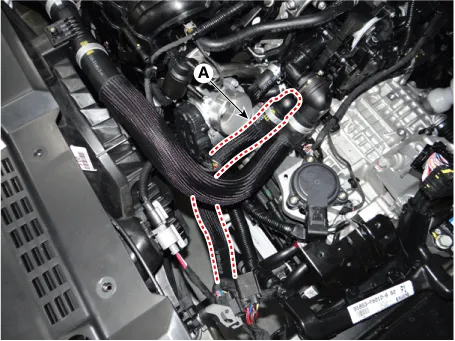
8.Disconnect the heater hose (A).
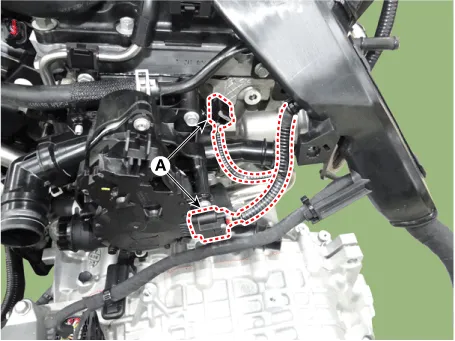
9.Disconnect the ITM connector (A).
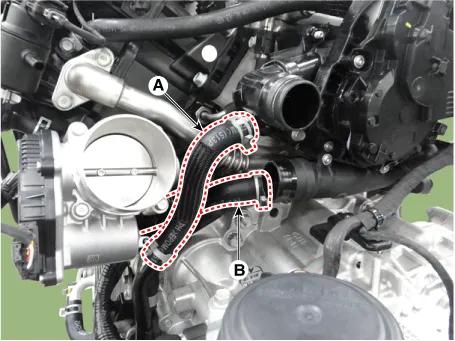
10.First disconnect the ATF warmer hose (A) and then oil cooler hose (B).
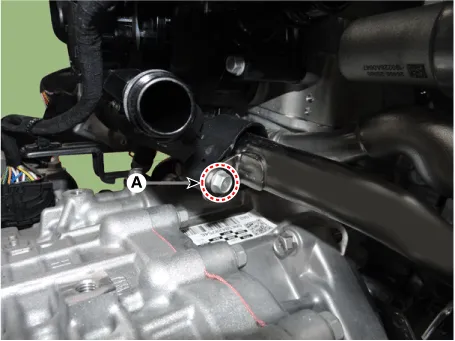
11.Loosen the water inlet pipe mounting bolt (A).
Tightening torque : 9.8 - 11.8 N.m (1.0 - 1.2 kgf.m, 7.2 - 8.7 lb-ft)
12.Remove the ITM (A).
Tightening torque : 9.8 - 11.8 N.m (1.0 - 1.2 kgf.m, 7.2 - 8.7 lb-ft)
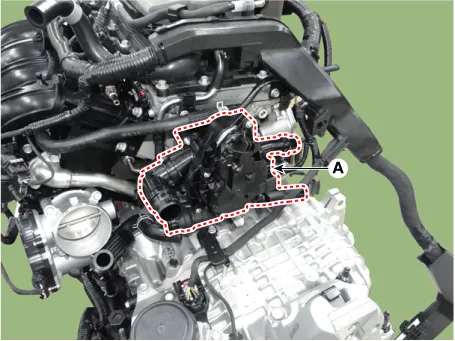

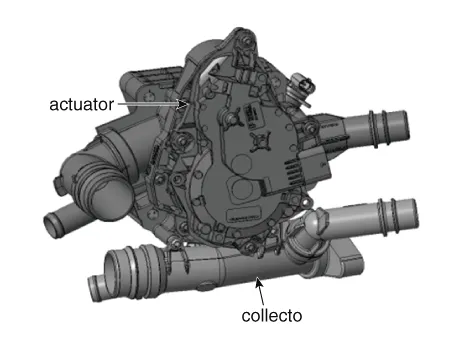
• Do not dismantle the actuator and collector because ITM is supplied as an assembly unit.

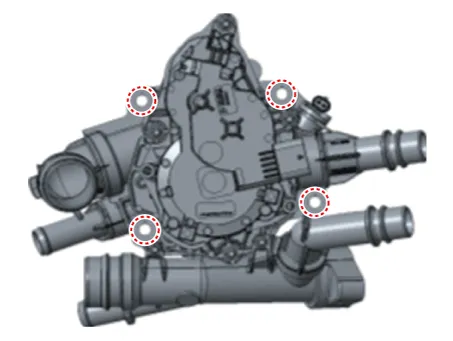
• When removing the ITM, loosen the bolts and nuts shown in the below.
13.Install in the reverse order of removal.

• Always use the new ITM rubber gasket.
• Always use the new water inlet pipe O-ring.
• When installing the water inlet pipe, apply anti-freeze or soapy water to O-ring.
14.Fill engine coolant.(Refer to Cooling System - "Coolant")

• Be sure to fill coolant following the ITM coolant filling method.
15.Check the coolant leakage by starting up the engine.
16.Recheck the coolant level.
1.Disconnect the negative battery terminal.
2.Remove the engine cover.(Refer to the Engine And Transaxle Assembly - "Engine Cover")
3.Remove the air intake hose.(Refer to the Intake And Exhaust System - "Air Cleaner")
4.Remove the engine room under cover.(Refer to the Engine And Transaxle Assembly - "Engine Room Under Cover")
5.Drain engine coolant by loosening the drain plug.(Refer to the Cooling System - "Coolant")
6.Remove the ITM.
7.Disconnect the water return hose (A).

8.Remove the CKPS wiring clip (A).
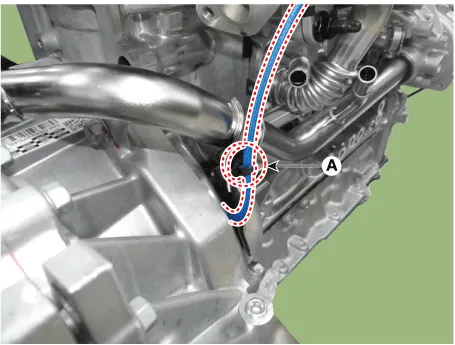
9.Remove the water inlet pipe (A).
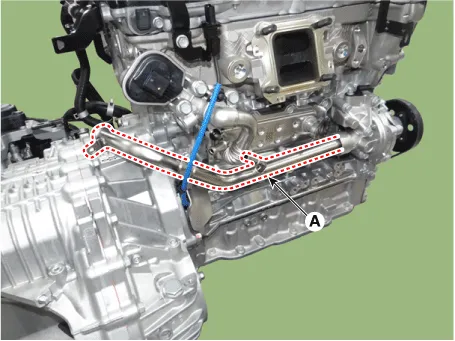
10.Install in the reverse order of removal.

• Always use the new water inlet pipe O-ring.
• When installing the water inlet pipe, apply anti-freeze or soapy water to O-ring.
11.Fill engine coolant.(Refer to the Cooling System - "Coolant")

• Be sure to fill coolant following the ITM coolant filling method.
12.Check the coolant leakage by starting up the engine.
13.Recheck the coolant level.
 Reservoir Tank
- Removal and Installation
1.Remove the reservoir tank.(1)Disconnect the water hose (A).
(2)Disconnect the degassing hose (B).
(3)Remove the reservoir tank (C).Tightening torque :7.8 - 11.7 N.m ...
 Water pump
- Components
1. Water pump pulley2. Water pump3. Water pump gasket4. Water pump housing
- Removal and Installation
• Be careful not to damage the parts located under ...
Other information:
Hyundai Tucson (NX4) 2022-2026 Service Manual: Center Side Air Bag Module(CSAB)
- Components Location
1.Center side airbag (CSAB)
- Removal
1.Disconnect the battery negative terminal.
• After disconnecting the cables, wait at least 3 minutes.
2.Remove the front seat back cover.(Refer to Body - "Front Seat Back Cover")
3.Loosen the CSAB m ...
Hyundai Tucson (NX4) 2022-2026 Service Manual: Description and Operation
- Description
The optimal seat position set by the driver is memorized into the power
seat unit by using IMS switch. In case of the position change, the seat
can restore its preset position by IMS switch.It has safety functions
of restoring process prohibition during driving and of emergenc ...
