Hyundai Tucson: Body (Interior and Exterior) / Hood
Repair procedures
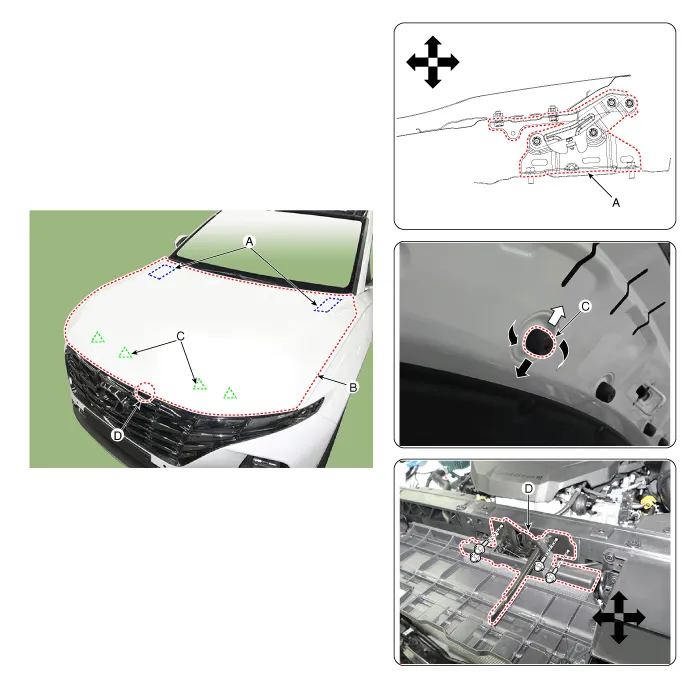
1.After loosening the hinge (A) mounting bolt, adjust the hood (B) by moving it up and down or from side to side and tighten the bolt.
2.Adjust the hood height by moving the hood overslam bumpers (C) up and down.
3.After loosening the hood latch (D) mounting bolts, adjust the latch by moving it up and down or from side to side.
Hood Assembly
1. Hood assembly

• Wear gloves to protect hands from injury.

• Be careful not to damage the hood and body.

• When removing and installing the liftgate, an assistant is needed.
1.After loosening the hood hinge (B) mounting bolts, remove the hood assembly (A).
Tightening torque : 21.6 - 26.5 N.m (2.2 - 2.7 kgf.m, 15.9 - 19.5 lb-ft)
2.To install, reverse removal procedure.

• Make sure the hood locks / unlocks and opens / closes properly.
• Adjust the hood alignment. (Refer yo Hood - Repair procedures")
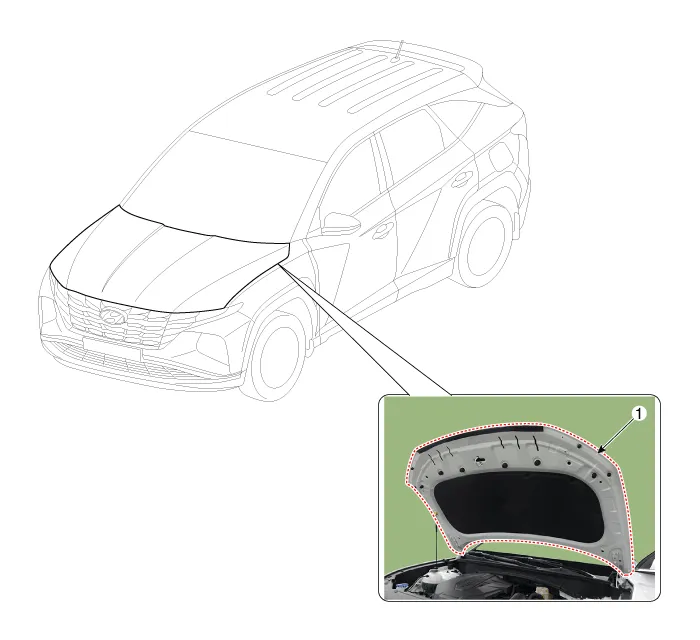
Hood Insulator Pad

• Be careful not to scratch the hood panel.
1.Using a clip remover, remove the clips and then the hood insulator pad (A).
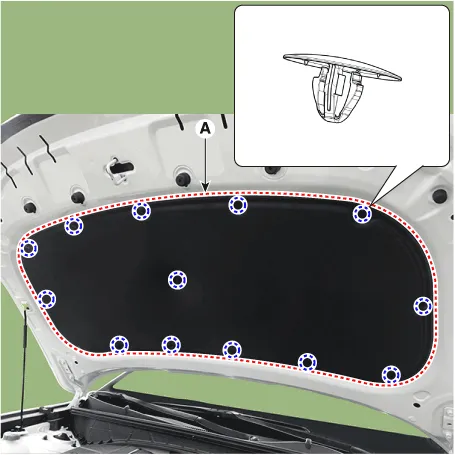
2.To install, reverse removal procedure.

• Replace any damaged clips (or pin-type retainers).
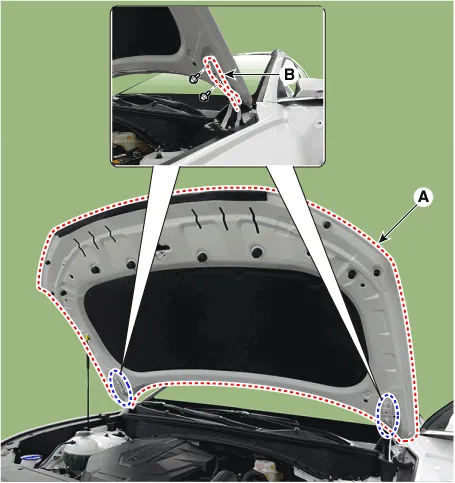
Hood Seal Weatherstrip

• Be careful not to damage the hood seal weahterstrip.
1.Loosen the mounting clips, remove the hood seal weatherstrip (A).
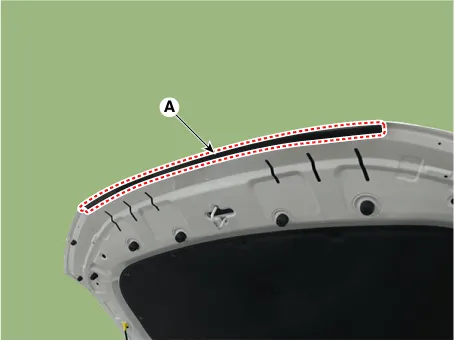
2.To install, reverse removal procedure.

• Replace any damaged clips (or pin-type retainers).
Hood Weatherstrip

• Be careful not to scratch the hood weatherstrip.
1.Remove the hood weatherstrip (A).
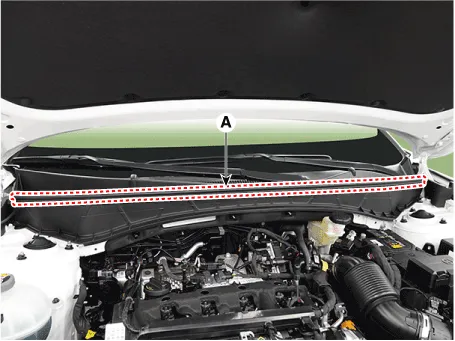
2.To install, reverse removal procedure.

• Replace any damaged clips (or pin-type retainers).
Hood Latch Release Handle
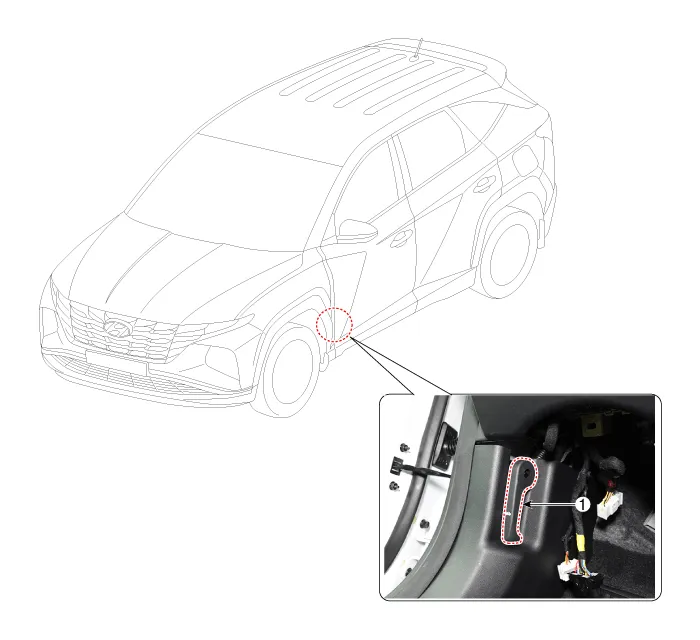
1. Hood latch release handle
1.Using a socket, remove the hood release handle (A).
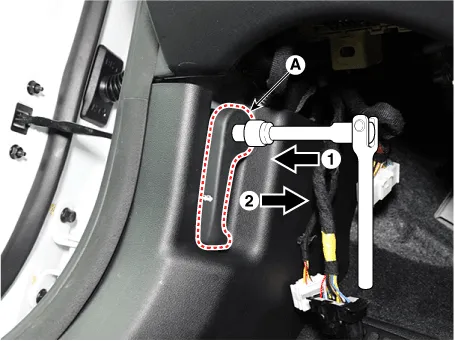
2.To install, reverse removal procedure.

• Make sure the hood latch cable is connected properly.
• Make sure the hood locks / unlocks and opens / closes properly.
Hood Latch
1. Hood Latch Assembly

• Put on gloves to prevent hand injuries
1.Disconnect the negative (-) battery terminal.
2.Remove the front bumper assembly.(Refer to Front Bumper - "Front Bumper Assembly")
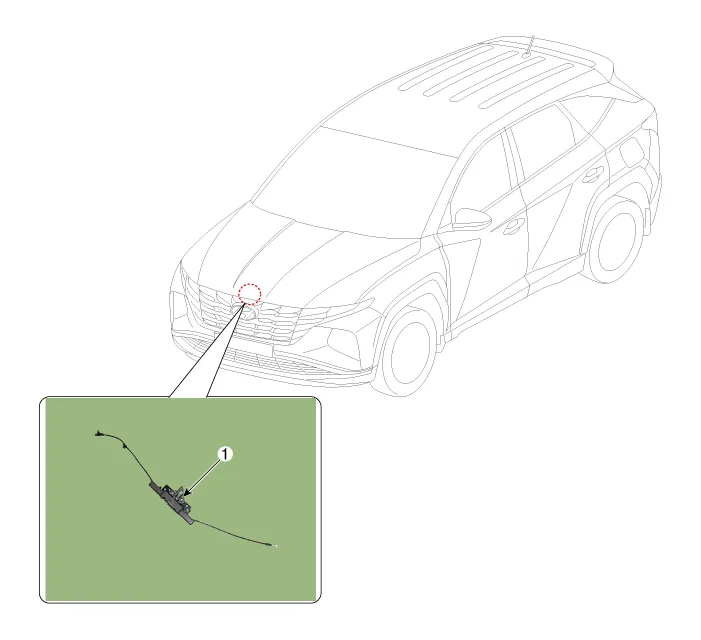
3.Disconnect the hood latch cable (A).
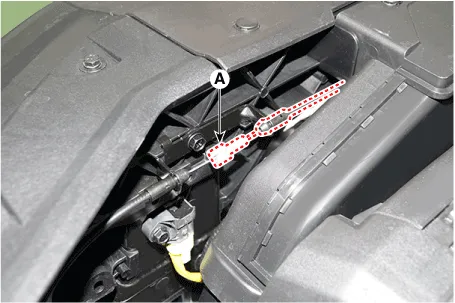
4.Press the rock pin to separate the hood latch connector (A) and disconnect wiring clip.
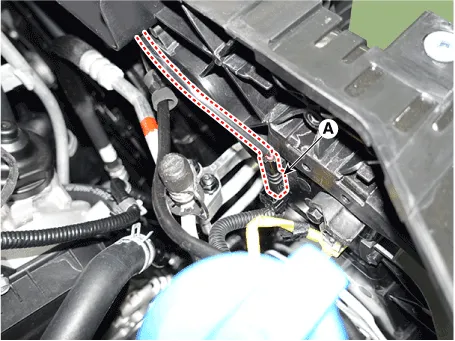
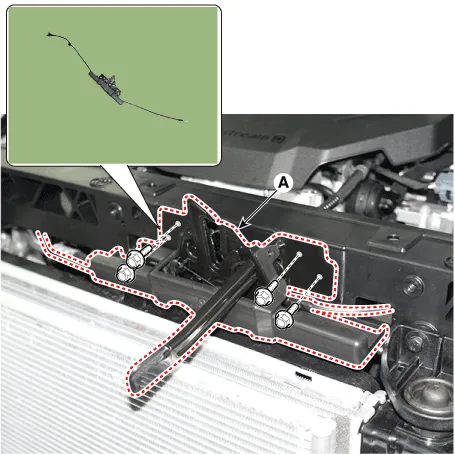
5.Loosen the mounting bolts, remove the hood latch assembly (A).
6.To install, reverse removal procedure.

• Make sure the hood latch release cable is connected properly.
• Make sure the hood locks / unlocks and opens / closes properly.
• Adjust the latch alignment.(Refer yo Hood - Repair procedures")
Other information:
Hyundai Tucson (NX4) 2022-2026 Service Manual: Repair procedures
- Inspection
Operation and Leakage Check
1.Brake Booster (A)(1)Check brake operation by applying the
brake during the test run. If the brake does not operate properly,
replace the brake booster. If brake fluid remains inside the booster
when disassembled, replace the booster and master ...
Hyundai Tucson (NX4) 2022-2026 Service Manual: Fuel Pressure Regulator
- Removal
1.Remove the fuel pump.(Refer to Fuel Delivery System - "Fuel Pump")
2.Disconnect the fuel sender connector (A).
3.Release the fixing hook (A) and then remove fuel sender (B) in the arrow direction.
4.Disconnect the fuel pump motor connector (A).
5.Remove the fixing pin (A) ...
