
Hyundai Tucson: Engine Control System / ETC (Electronic Throttle control) System
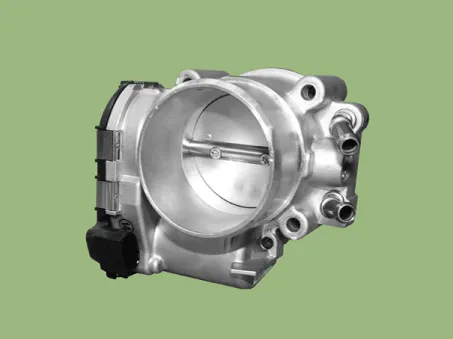
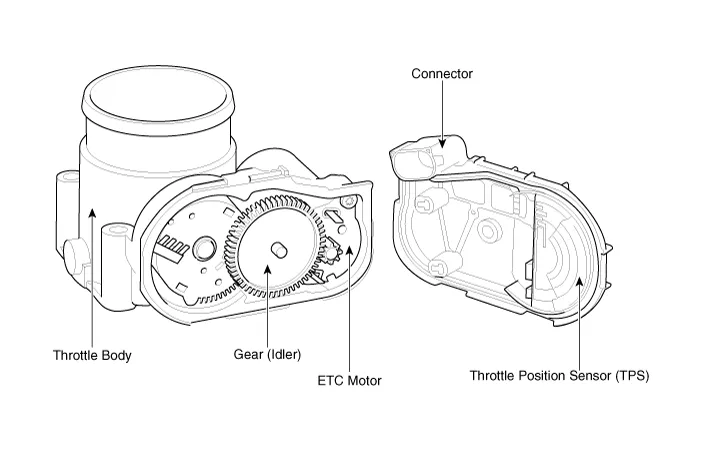
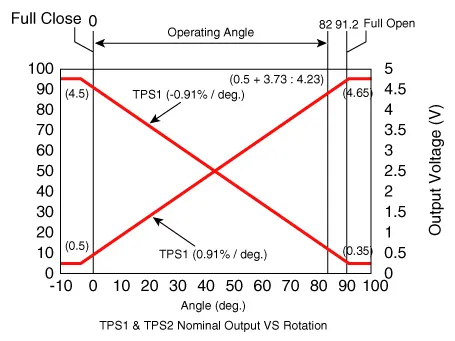
| Throttle angle (Ëš) | Output Voltage (V) [Vref=5V] | |
| TPS1 | TPS2 | |
| 0 | 0.5 | 4.5 |
| 10 | 0.96 | 4.05 |
| 20 | 1.41 | 3.59 |
| 30 | 1.87 | 3.14 |
| 40 | 2.32 | 2.68 |
| 50 | 2.78 | 2.23 |
| 60 | 3.23 | 1.77 |
| 70 | 3.69 | 1.32 |
| 80 | 4.14 | 0.86 |
| 90 | 4.6 | 0.41 |
| 91.2 | 4.65 | 0.35 |
| C.T (0Ëš) | 0.5 | 4.5 |
| W.O.T (82Ëš) | 4.23 | 0.77 |
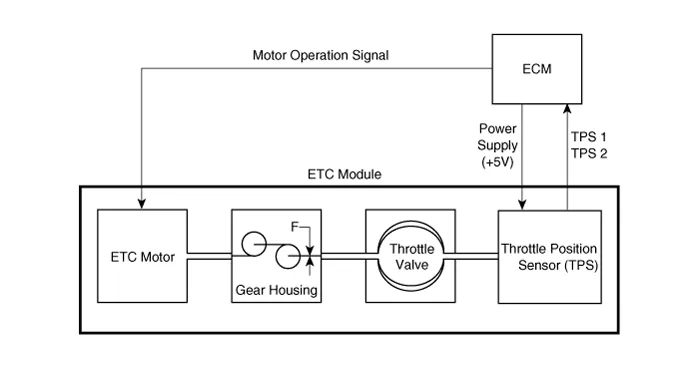
[ETC Motor]
| Item | Specification |
| Type | DC Motor |
| Operating Voltage (V) | 7.5 - 16 |
| Coil Resistance (Ω) | 1.10 - 1.34 (Room Temperature) |
| Item | Fail-Safe | |
| ETC Motor | Throttle valve stuck at 5° | |
| TPS | TPS 1 fault | ECM looks at TPS2 |
| TPS 2 fault | ECM looks at TPS1 | |
| TPS 1, 2 fault | Throttle valve stuck at 5° | |
| APS | APS 1 fault | ECM looks at APS 2 |
| APS 2 fault | ECM looks at APS 1 | |
| APS 1, 2 fault | Throttle valve stuck at 5° | |
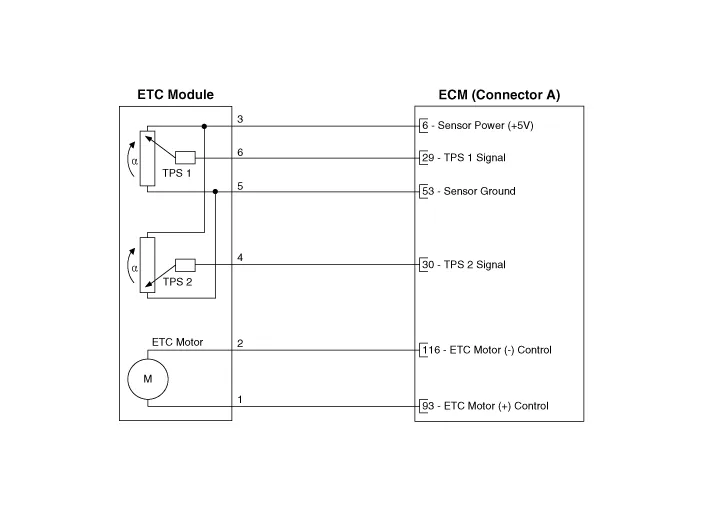
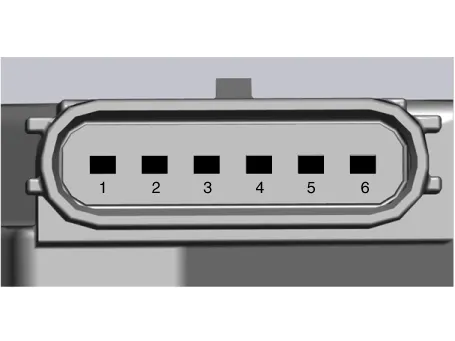
1.In the engine control system, failure can be quickly diagnosed by using the diagnosis tool.
(1)Self diagnosis : Checking failure and code number (DTC).
(2)Current data : Checking the system input/output data state.
(3)Actuation test : Checking the system operation condition.
(4)Additional function : Controlling other features including system option setting and zero point adjustment.
1.Connect a diagnostic tool on the Data Link Connector (DLC).
2.Start engine and check output voltages of TPS 1 and 2 at C.T and W.O.T.
Specification : Refer to Specification Section.
1.Turn the ignition switch OFF.
2.Disconnect the ETC module connector.
3.Measure resistance between the ETC module terminals 1 and 2.
4.Check that the resistance is within the specification.
Specification : Refer to Specification Section.
1.Turn the ignition switch OFF and disconnect the battery negative (-) cable.
2.Remove the resonator and the air intake hose.(Refer to Engine Mechanical System - "Air Cleaner")
3.Disconnect the ETC module connector (A).
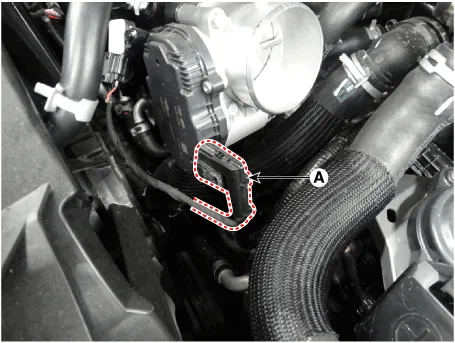
4.Remove the ETC Module (A) after loosening the mounting bolt.
Electronic throttle body Installation bolt :9.8 - 11.8 N.m (1.0 - 1.2 kgf.m, 7.2 - 8.7 lb-ft)
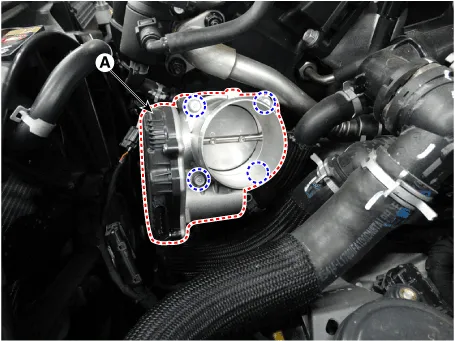
1.Remove the ETC Module.(Refer to ETC System - "Removal")
2.Clean the pollutant in the throttle body using a soft cloth moistened with cleaning fluid.
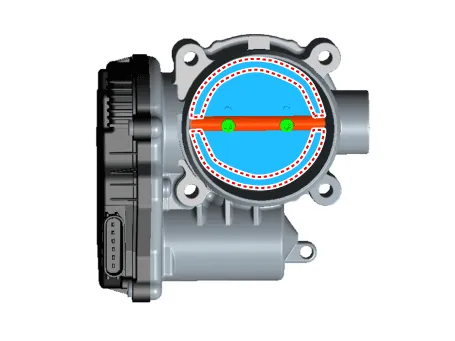

• Do not spray cleaning fluid directly onto ETC. Use a lint free cloth moistened with cleaning fluid.
• Be careful not to clean the coating fluid around the shaft. If coating fluid is removed, idling control failure might occur by foreign substance inflow or excessive air leakage.
3.Remove the ETC Module.(Refer to ETC System - "Installation")
4.Reset the ECM adaptive values after replacing the ETC.
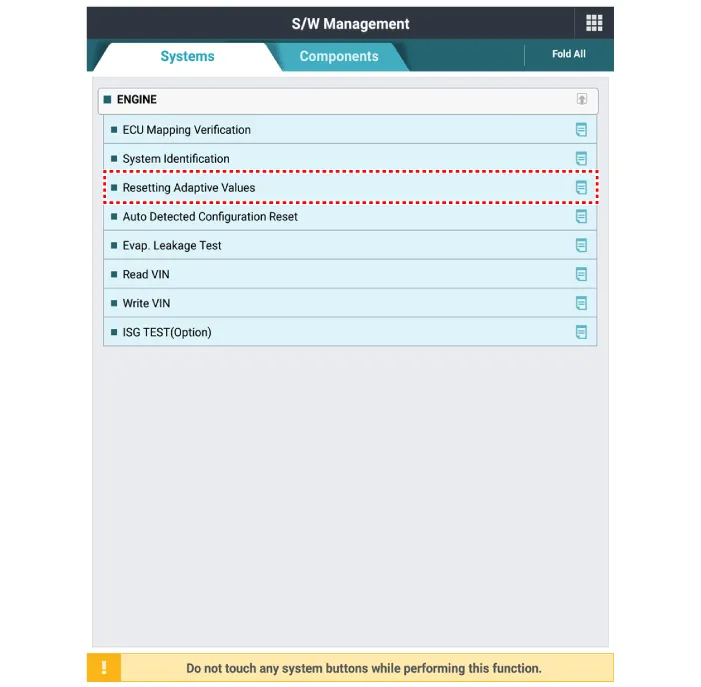
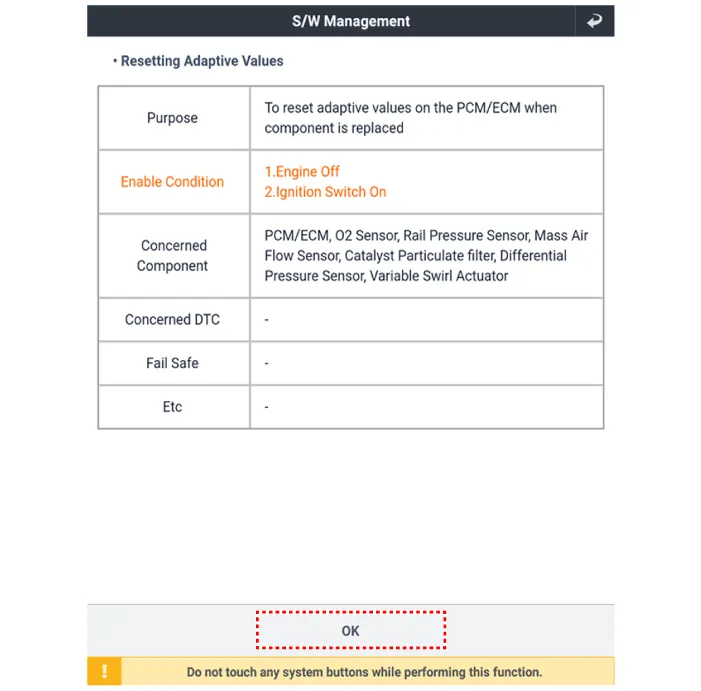
5.Perform the ETC learning procedure.(Refer to ETC System - "Adjustment")

• Install the component with the specified torques.
• Note that internal damage may occur when the component is dropped. If the component has been dropped, inspect before installing.
• When installing the throttle body, be careful not to get foreign material into the throttle body.
1.Install in the reverse order of removal.
2.Reset the ECM adaptive values after replacing the ETC.
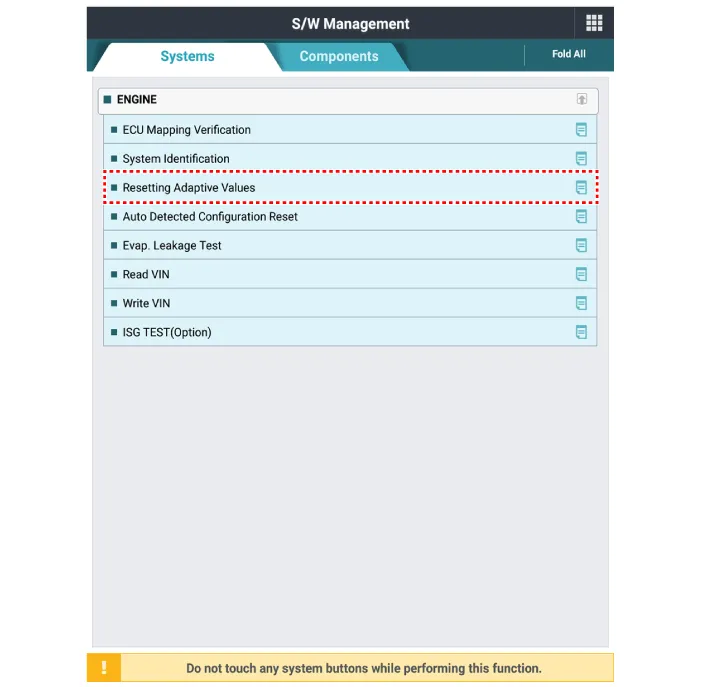
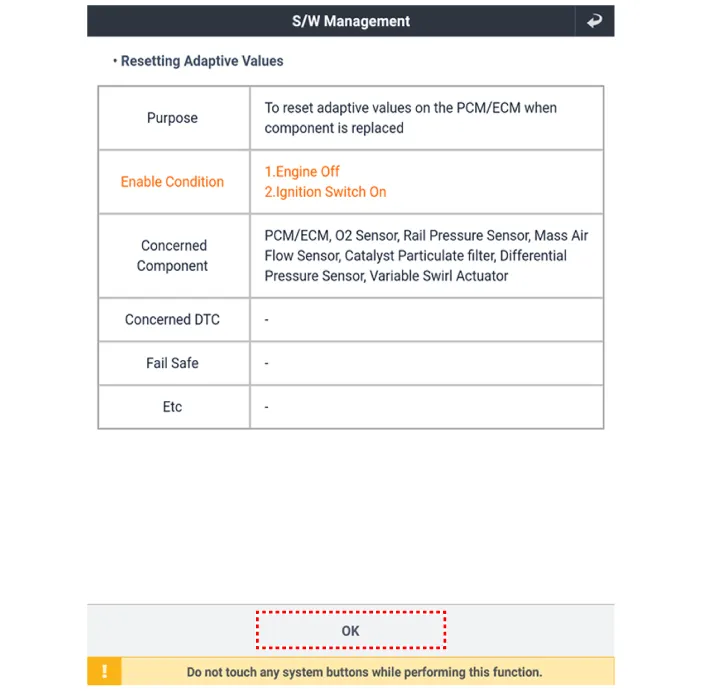
3.Perform the ETC learning procedure(Refer to ETC System - "Adjustment")
1.Wait for 1 minute with the ignition switch ON.
2.Start the engine and hold the idle status for 15 minutes.
3.Waif for 1 minute with the ignition switch OFF.
4.Restart the engine, and check that the idle speed is stable.

• If the ETC module learning procedure is not performed after replacing or reinstalling the ETC module, MIL illumination with DTCs may occur.
 Mass Air Flow Sensor (MAFS)
- Description
MAFS uses a hot-film type sensing element to measure the mass of intake
air entering the engine, and send the signal to ECM.A large amount of
intake air represents acceleration or ...
 Manifold Absolute Pressure Sensor (MAPS)
- Description
Manifold Absolute Pressure Sensor (MAPS) is a speed-density type sensor
and is installed on the surge tank. It senses absolute pressure of the
surge tank and transfers the analog ...
Other information:
Hyundai Tucson (NX4) 2022-2026 Service Manual: General Safety Information and Caution
- General Safety Information and Caution
1.Be careful when driving the vehicle using the smart cruise control system as follows.(1)On curves or inclines/declines • The smart cruise control system may have limits to detect distance to the vehicle ahead due to road and traffic conditions.
• ...
Hyundai Tucson (NX4) 2022-2026 Service Manual: Description and Operation
- Description
The System offers the following features : • Changing the state of engine ignition and power by using the start button.
• Controlling external relays for ACC / IGN1 / IGN2 terminal switching and STARTER, without use of mechanical ignition switch.
• Indicating the vehicle ...
