
Hyundai Tucson: Drive Belt System / Crankshaft Damper Pulley

• Be careful not to damage the parts located under the vehicle (floor under cover, fuel filter, fuel tank and canister) when raising the vehicle using the lift.(Refer to General Information - "Lift and Support Points")
1.Remove the engine room under cover.(Refer to Engine and Transaxle Assembly - "Engine Room Under Cover")
2.Remove the drive belt and water pump belt.(Refer to Drive Belt System - "Drive Belt")
3.Remove the crankshaft damper pulley (A).
Tightening torque :114.7 - 120.6 N.m (11.7 - 12.3 kgf.m, 84.6 - 88.9 Ib.ft) + [68 - 72°]
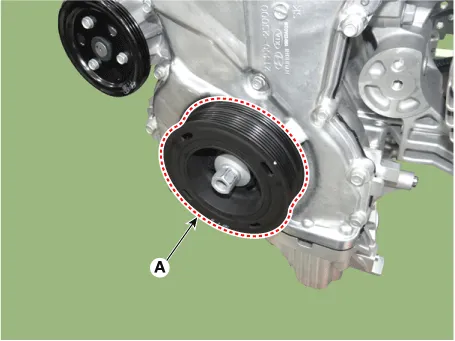

– To prevent deformation of the rubber part of the crankshaft damper pulley, do not pressurizethe pulley part or apply excessive external force.
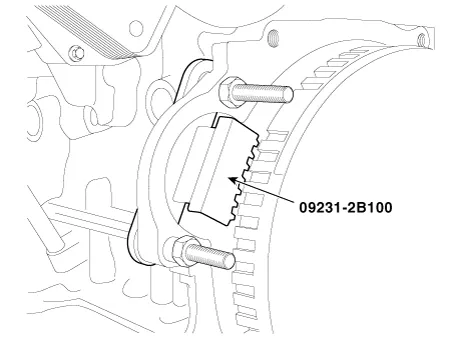
– There are two methods to hold the ring gear when installing or removing the crankshaftdamper pulley.
• When installing and removing the crankshaft damper pulley bolts, use SST (09231-2B100) tohold the ring gear after removing the starter.When removing the starter, (Refer to Engine Electrical System - "Starter")
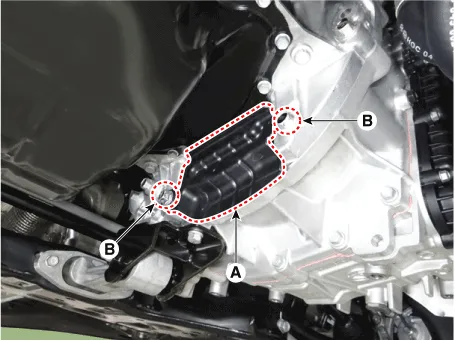
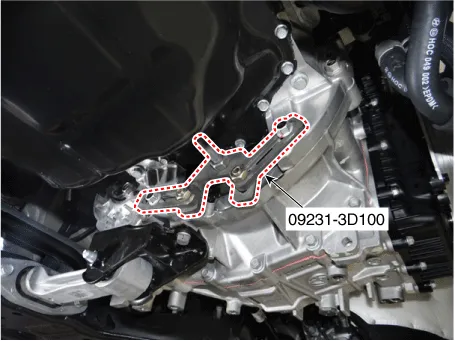
• When installing and removing the crankshaft damper pulley mounting bolts, use SST (09231-3D100) to hold the ring gear after removing the dust cover.
(1)Remove the dust cover (A) and transaxle mounting bolts (B).
Tightening torque :42.1 - 48.0 N.m (4.3 - 4.9 kgf.m, 31.1 - 35.4 Ib.ft)
(2)To put the holder (B) in the ring gear (C) teeth, adjust the length of the holder nuts (A).
(3)Adjust the angle of the arms (D) so that the two transaxle mounting bolts can be fastened tothe original mounted holes.
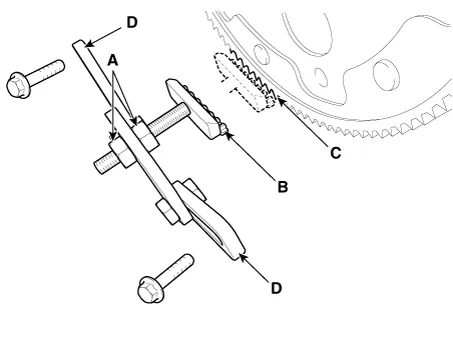
(4)Fully tighten the bolts and nuts for SST (09231-3D100).
4.Installation is in the reverse order of removal.
 Drive Belt Tensioner
- Removal and Installation
• Be careful not to damage the parts located under the vehicle
(floor under cover, fuel filter, fuel tank and canister) when raising
the vehicle ...
 Timing System
...
Other information:
Hyundai Tucson (NX4) 2022-2026 Service Manual: Drive Plate
- Removal and Installation
• Be careful not to damage the parts located under the vehicle
(floor under cover, fuel filter, fuel tank and canister) when raising
the vehicle using the lift.(Refer to General Information - "Lift and
Support Points")
1.Remove the Automati ...
Hyundai Tucson (NX4) 2022-2026 Owner's Manual: Safe Exit Warning Operation
Collision warning when exiting your
vehicle
When an approaching vehicle from
the rear is detected while a door is
being opened, the warning light on the
side view mirror may blink, a warning
message may appear on the instrument
cluster, and an audible warning may
sound.
Safe E ...
