Hyundai Tucson: Audio / Audio Remote Control
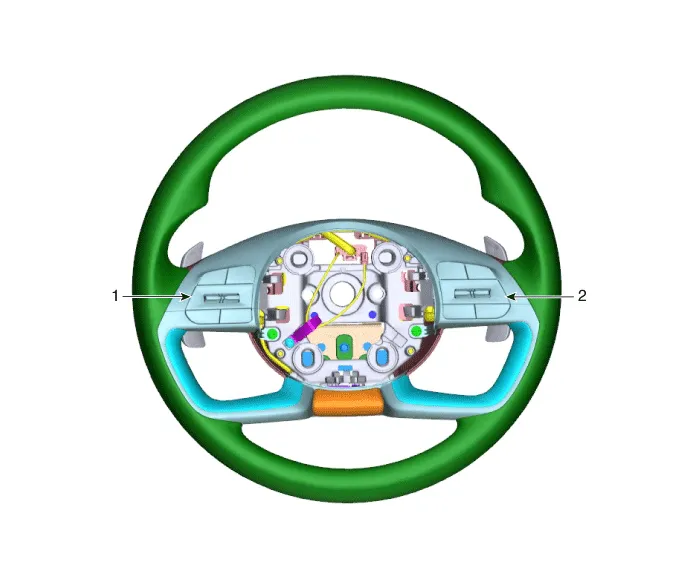
1. Left Remote Control Switch (Audio)
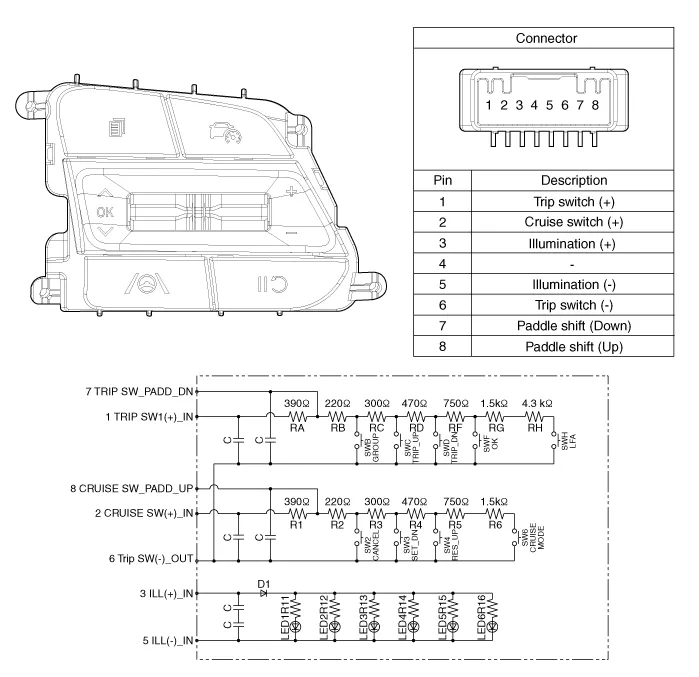
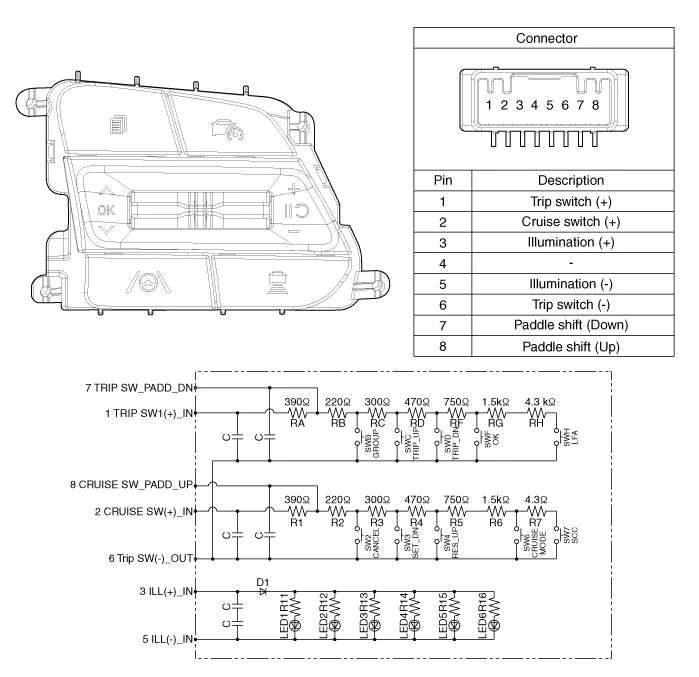
2. Right Remote Control Switch (Cruise)
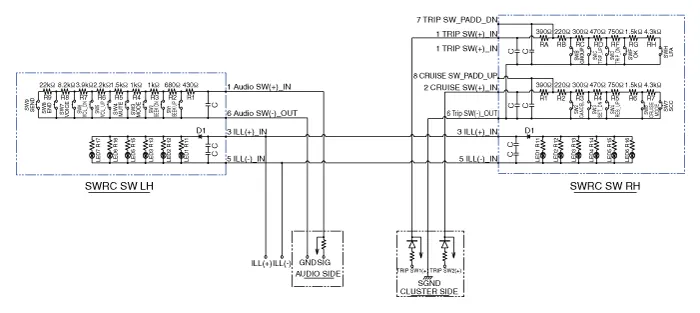
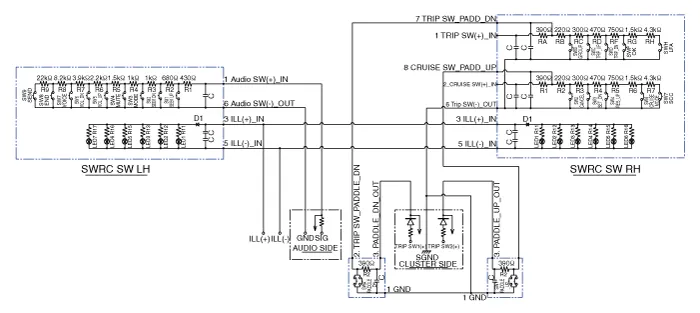
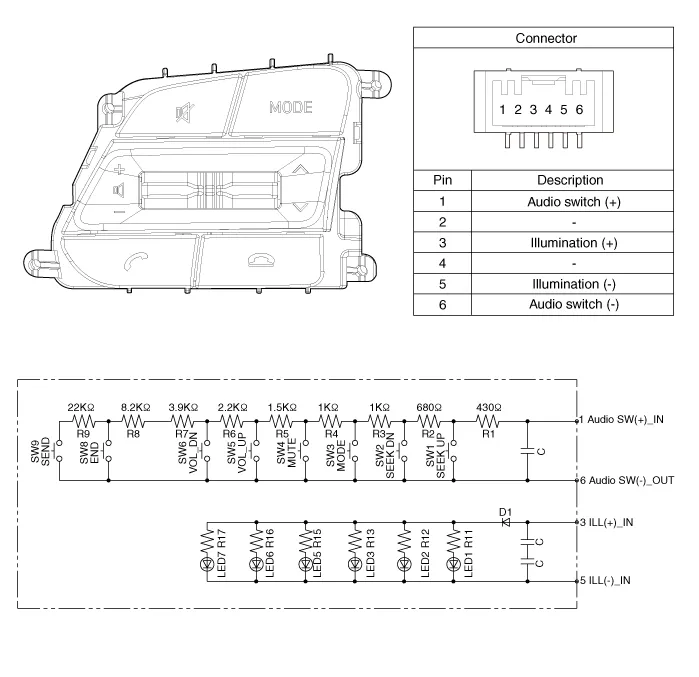
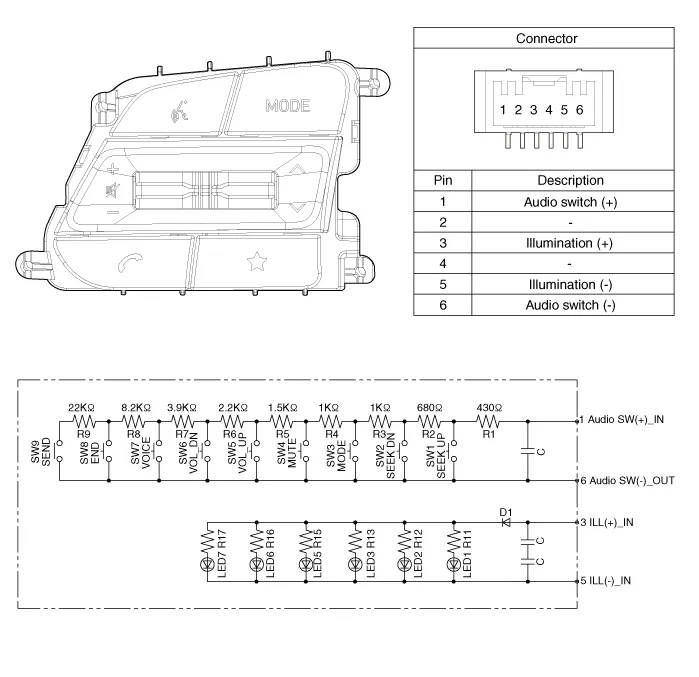
1.Check for resistance between terminals in each switch position (LH).
| Switch | Connector terminal | Resistance (±5%) |
| SEEK Up | 1 ~ 6 | 430 Ω |
| SEEK Down | 1 ~ 6 | 1.1 kΩ |
| MODE | 1 ~ 6 | 2.11 kΩ |
| MUTE | 1 ~ 6 | 3.11 kΩ |
| Volume (+) | 1 ~ 6 | 4.61 kΩ |
| Volume (-) | 1 ~ 6 | 6.81 kΩ |
| Voice | 1 ~ 6 | 10.71 kΩ |
| END | 1 ~ 6 | 18.91 kΩ |
| SEND | 1 ~ 6 | 40.91 kΩ |
| Paddle shift (Up) | 1 ~ 8 | 390 Ω |
2.Check for resistance between terminals in right switch position.
| Switch | Connector terminal | Resistance (± 3%) |
| CANCEL | 2 ~ 6 | 610 Ω |
| SET (-) | 2 ~ 6 | 910 Ω |
| RES (+) | 2 ~ 6 | 1.38 kΩ |
| Cruise ON/OFF | 2 ~ 6 | 2.13 kΩ |
| Cruise & MSLA ON/OFF | 2 ~ 6 | 3.63 kΩ |
| Smart Cruise | 2 ~ 6 | 7.93 kΩ |
| Paddle shift (Down) | 1 ~ 7 | 390 Ω |
| Trip Group | 1 ~ 6 | 610 Ω |
| Trip Up | 1 ~ 6 | 910 kΩ |
| Trip Down | 1 ~ 6 | 1.38 kΩ |
| Trip OK | 1 ~ 6 | 2.13 kΩ |
| LFA | 1 ~ 6 | 7.93 kΩ |
1.Disconnect the negative (-) battery terminal.
2.Remove the steering wheel.(Refer to Steering System - "Steering Wheel")
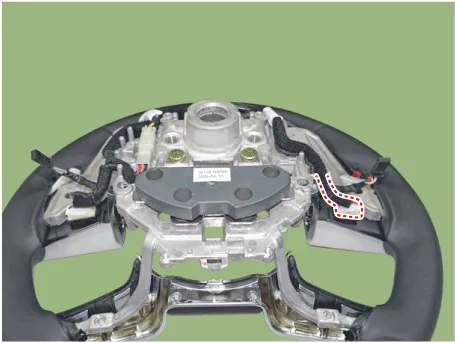
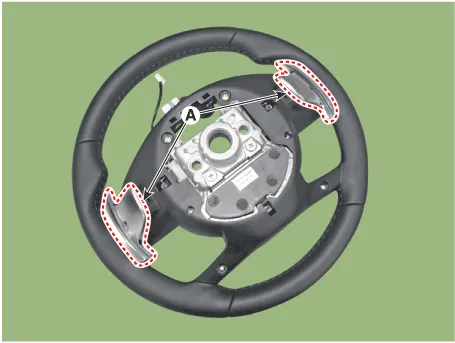
3.Remove the paddle shift lever (A).
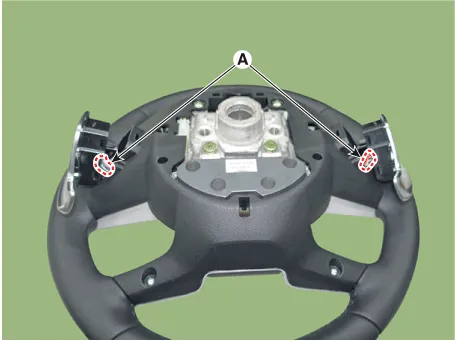
4.Disconnect the paddle shift lever connector (A).
5.Remove the steering wheel lower cover (A).
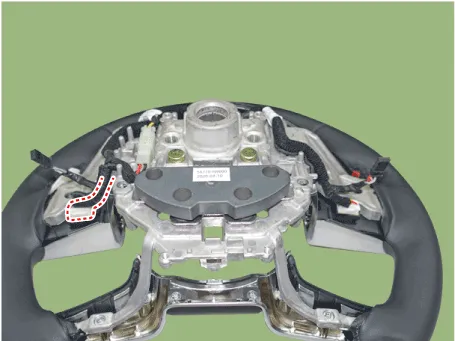
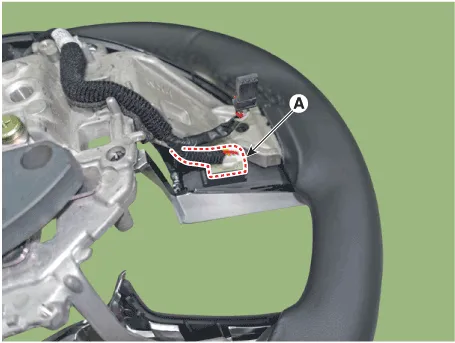
6.Loosen mounting screws and then disconnect the steering wheel switch connector (A).

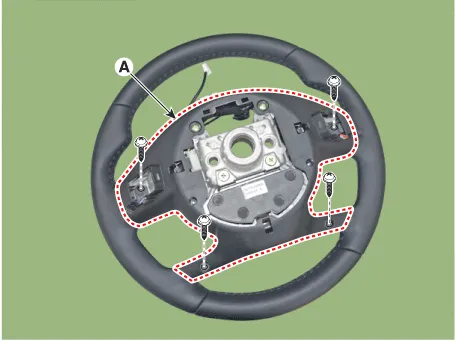
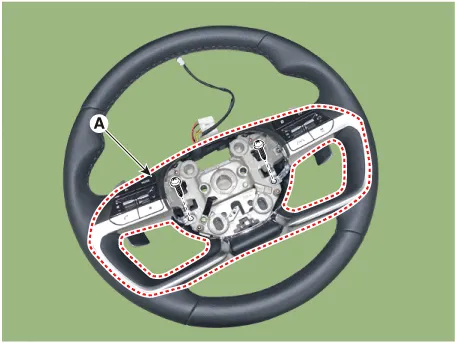
7.Remove the steering wheel control siwtch (A) after loosening mounting screws.
1.Install the remote control switch on the steering wheel.
2.Install the steering wheel.
3.Reconnect the remote control switch connector and airbag connectors.

– Make sure that the switch connector is plugged in properly.
– Check the audio system or radio and USB for normal operation.
4.Install the driver airbag module.

• Check the audio system for normal operation.
• Make sure that the switch connector is plugged in properly.
 Antenna
- Removal
1.Disconnect the negative (-) battery terminal.
2.Remove the rear roof trim.(Refer to Body - "Roof Trim Assembly")
3.Disconnect the antenna connectors (A) and then remove the mounting ...
 USB Jack
- Description
The USB jack on the console upper cover is for customers who like to
listen to external portable music players like the USB, MP3 through the
vehicle's sound system when it is link ...
Other information:
Hyundai Tucson (NX4) 2022-2026 Service Manual: Front Seat Shield Inner Cover
- Component Location
1. Front seat shield inner cover
- Replacement
• When removing with a flat-tip screwdriver or remover, wrap protective tape around the tools to prevent damage to components.
• Put on gloves to prevent hand injuries.
1.Remove the front ...
Hyundai Tucson (NX4) 2022-2026 Service Manual: Front Wiper Motor
- Component Location
1. Cap2. Nut3. Wiper arm & blade4. Cowl top cover5. Bolt6. Wiper motor & linkage assembly7. Wiper motor connector
- Removal
1.Disconnect the negative (-) battery terminal.
2.If necessary, release the wiper blade fixing clip(A) by pulling up
and remove th ...
