Hyundai Tucson: Lighting System / Turn Signal Lamp

• When removing with a flat-tip screwdriver or remover, wrap protective tape around the tools to prevent damage to components.
• Put on gloves to prevent hand injuries.
1.Disconnect the negative (-) battery terminal.
2.Remove the front door trim.(Refer to Body - "Front Door Trim")
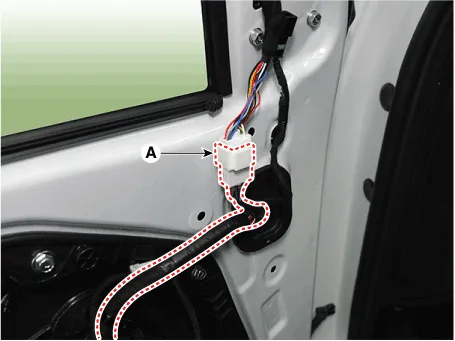
3.Disconnect the rear view mirror connector (A).
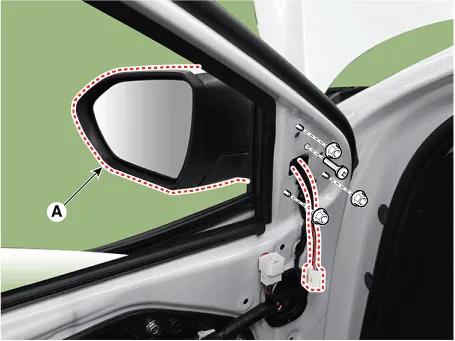
4.Loosen the mounting nuts and then remove the outside rear view mirror (A).
1.Disconnect the negative (-) battery terminal.
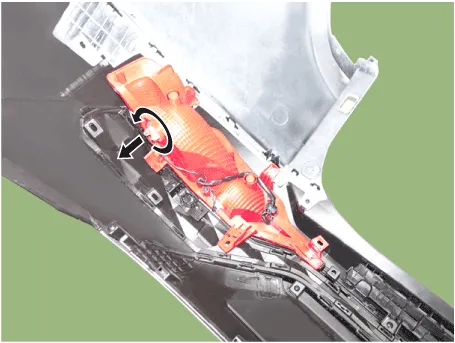
2.Remove the front wheel guard.(Refer to Body - "Front Wheel Guard")
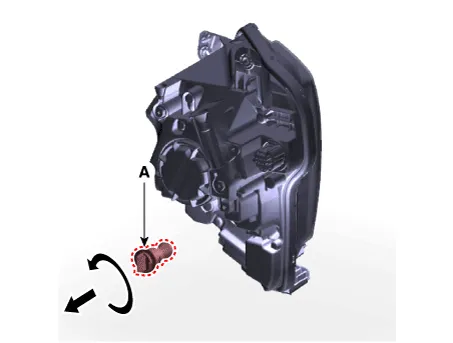
3.Remove the turn signal lamp (A) after turning in the counterclockwise direction.
[Remove]
1.Disconnect the negative (-) battery terminal.
2.Remove the rear bumper assembly.(Refer to Body - "Rear Bumper Assembly")
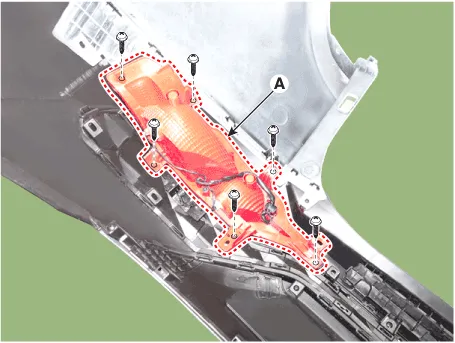
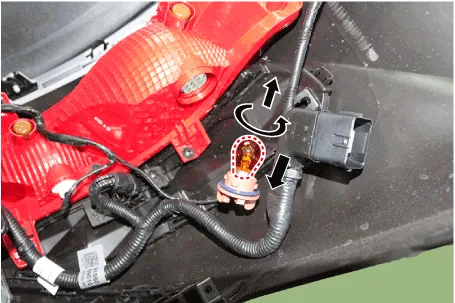
3.Loosen the mounting screws and remove the rear turn signal lamp (A).
4.Remove the bulb after turning in the counterclockwise direction.
[Replacement]
1.Disconnect the negative (-) battery terminal.
2.Loosen the mounting clips and remove the rear side under cover (A).
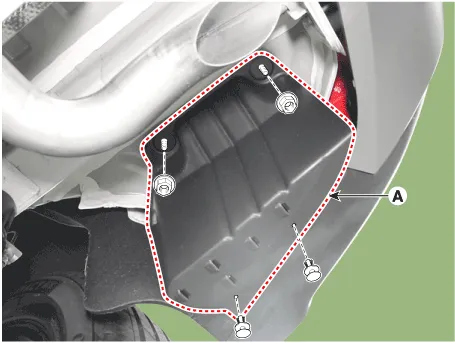
3.Remove the bulb after turning in the counterclockwise direction.

1.Install the outside rear view mirror and connect the connector.
Tightening torque :6.9 - 10.8 N.m (0.7 - 1.1 kgf.m, 5.0 - 8.0 lb-ft)
2.Connect the negative (-) battery terminal.
1.Install the front/rear turn signal lamp.
2.Install the front/rear bumper cover.
3.Connect the negative (-) battery terminal.
 Head Lamps
- Removal
1.Disconnect the negative (-) battery terminal.
2.Remove the front bumper assembly.(Refer to Body - "Front Bumper Assembly")
3.Disconnect the head lamp connector (A).
4.Loosen the ...
 Room Lamp
- Removal
Rear Personal Lamp
1.Disconnect the negative (-) battery terminal.
2.Remove the rear personal lamp (A).
3.Disconnect the rear personal lamp connector (A).
Room Lamp (Without sunr ...
Other information:
Hyundai Tucson (NX4) 2022-2026 Owner's Manual: Lower Anchors and Tether for
Children (LATCH System)
The LATCH system connects a Child
Restraint System to the vehicle during
driving and in a collision. This system
is designed to make installation of the
Child Restraint System easier and reduce
the possibility of improperly installing
your Child Restraint System. The LATCH
system uses ...
Hyundai Tucson (NX4) 2022-2026 Service Manual: General Safety Information and Caution
- General Safety Information and Caution
1.Be careful when driving the vehicle using the smart cruise control system as follows.(1)On curves or inclines/declines • The smart cruise control system may have limits to detect distance to the vehicle ahead due to road and traffic conditions.
• ...
