Hyundai Tucson: Front Radar System / Smart Cruise Control (SCC) Switch
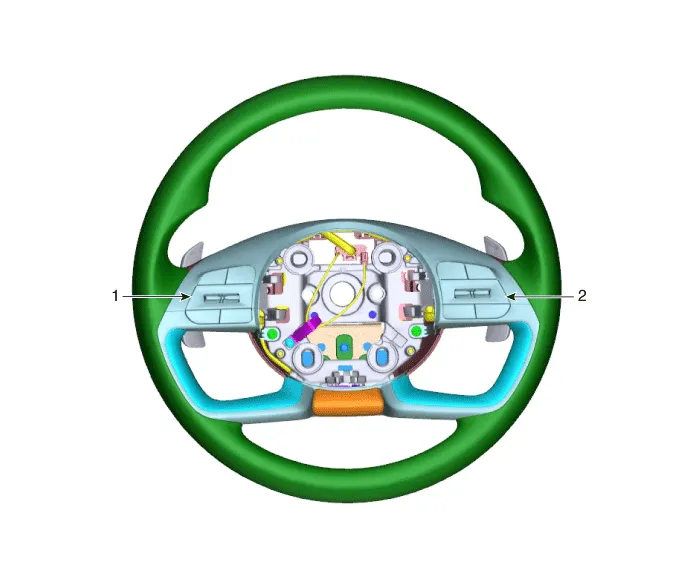
1. Remote control switch (LH : Audio)
2. Remote control switch (RH : Trip + Cruise)
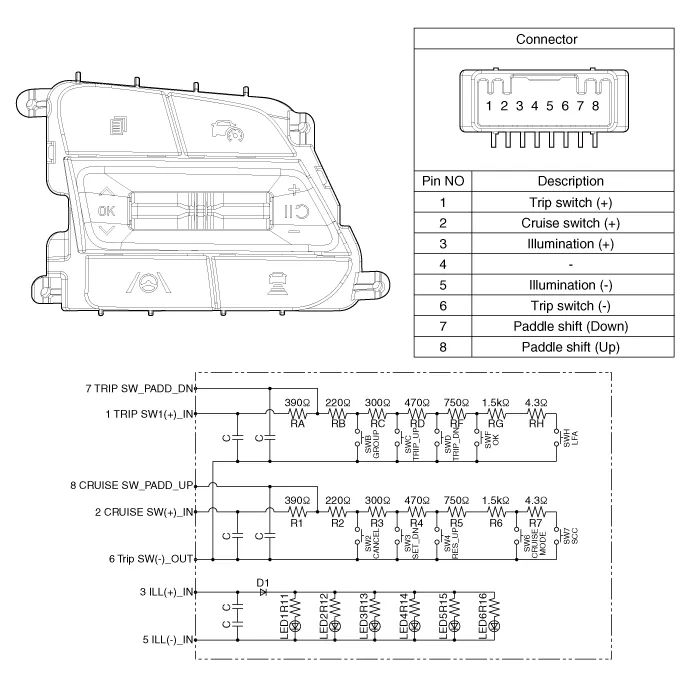
1.Check for resistance between terminals in right switch position.
| Switch | Connector terminal | Resistance (± 3%) |
| CANCEL | 2 ~ 6 | 610 Ω |
| SET (-) | 2 ~ 6 | 910 Ω |
| RES (+) | 2 ~ 6 | 1.38 kΩ |
| Cruise ON/OFF | 2 ~ 6 | 2.13 kΩ |
| Cruise & MSLA ON/OFF | 2 ~ 6 | 3.63 kΩ |
| Smart Cruise | 2 ~ 6 | 7.93 kΩ |
| Paddle shift (Down) | 1 ~ 7 | 390 Ω |
| Trip Group | 1 ~ 6 | 610 Ω |
| Trip Up | 1 ~ 6 | 910 kΩ |
| Trip Down | 1 ~ 6 | 1.38 kΩ |
| Trip OK | 1 ~ 6 | 2.13 kΩ |
| LFA | 1 ~ 6 | 7.93 kΩ |
1.Disconnect the negative (-) battery terminal.
2.Remove the steering wheel.(Refer to Steering System - "Steering Wheel")
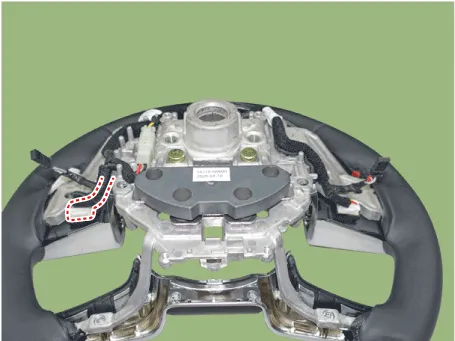
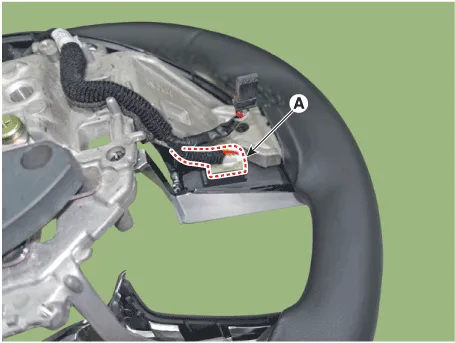
3.Remove the paddle shift lever (A).
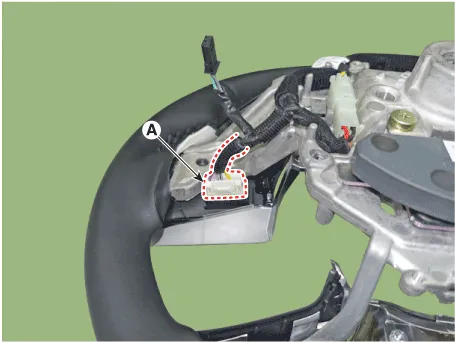
4.Disconnect paddle shift lever connector (A).
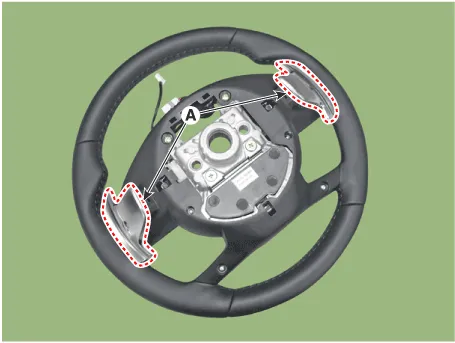
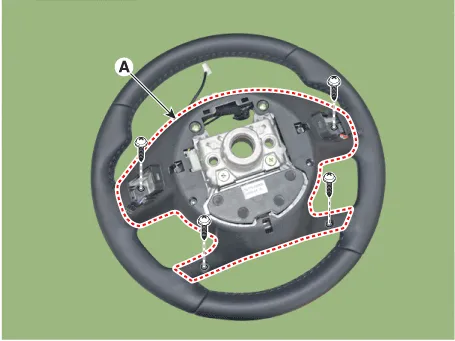
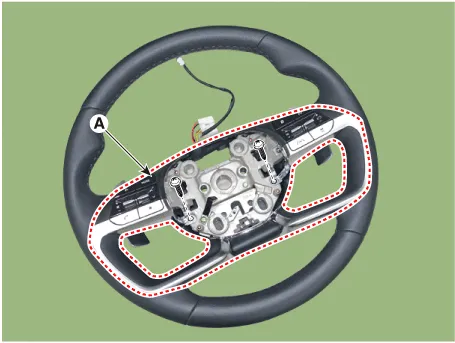
5.Remove the steering wheel cover (A) after loosening mounting screws.
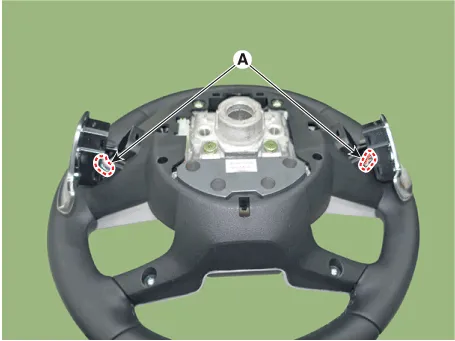
6.Discoonect remote control switch connector (A) after loosening mounting screws.
7.Remove the remote control switch (A) after loosening mounting screws.
1.Install the remote control switch on the steering wheel.
2.Install the steering wheel lower cover.
3.Install the paddle shift lever.
4.Install the steering wheel.
5.Connect the negative (-) battery terminal.

• Make sure that the cables and connectors are plugged in properly.
• Check the AVN system for normal operation.
 Front Radar Unit
- Specification
ItemSpecification
Power supply (V)12
Operation voltage (V)9 - 16
- Circuit Diagram
- Inspection
Inspection procedure for vehicle with Forward Collision-Avoidance A ...

Other information:
Hyundai Tucson (NX4) 2022-2026 Owner's Manual: System Maintenance
Air Conditioning Performance and
Maintenance at Your HYUNDAI
Dealer
If the amount of refrigerant is too low
or too high, the performance of the air
conditioning is reduced. Have the system
be inspected by an authorized HYUNDAI
dealer.
NOTICE
The refrigerant system should only
be ...
Hyundai Tucson (NX4) 2022-2026 Service Manual: Seat Heater (Non-Air Ventilation)
- Components
1. Seat heater unit2. Seat cushion heater 3. Seat back heater
1. Second line seat heater unit2. Second line seat cushion heater3. Second line seat back heater
- Components
Driver/Passenger Seat Heater
Second Line Seat Heater
- Inspection
Driver/Passe ...
