Hyundai Tucson: Body (Interior and Exterior) / Roof Trim
Components and Components Location
[General type]
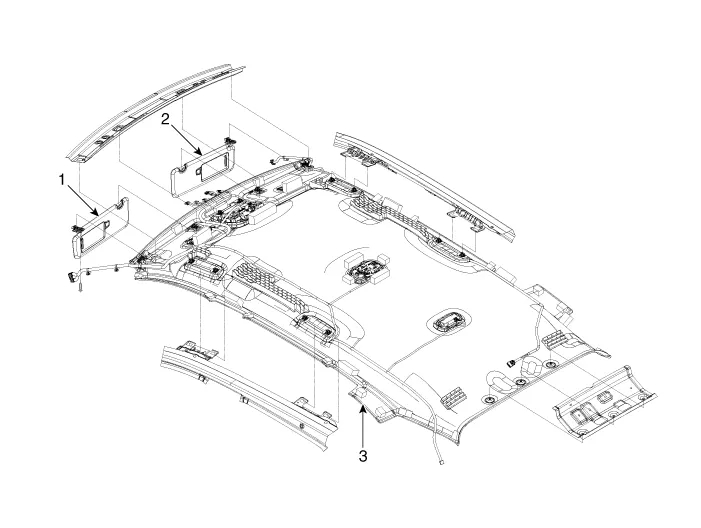
1. Sunvisor [LH]
2 . Sunvisor [RH]
3 . Roof trim
[Panorama sunroof type]
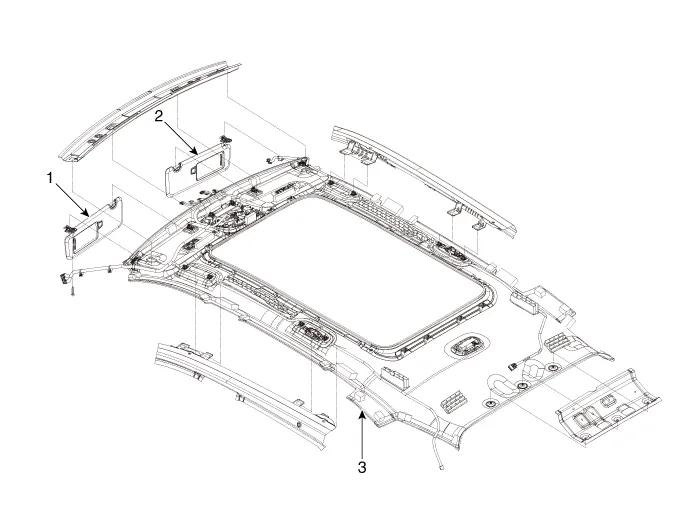
1. Sunvisor [LH]
2 . Sunvisor [RH]
3 . Roof trim
Sunvisor
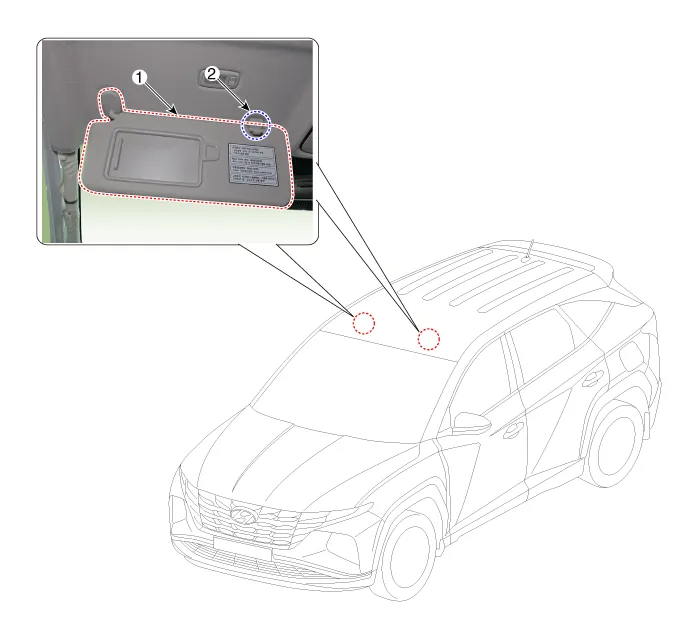
1. Sunvisor
2. Retainer
1.Remove the sunvisor pivot cover (A).
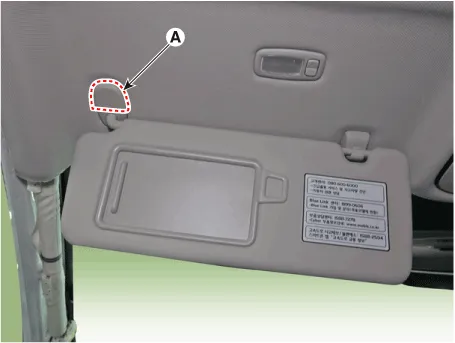
2.Loosen the mounting screw and remove the sunvisor (A).
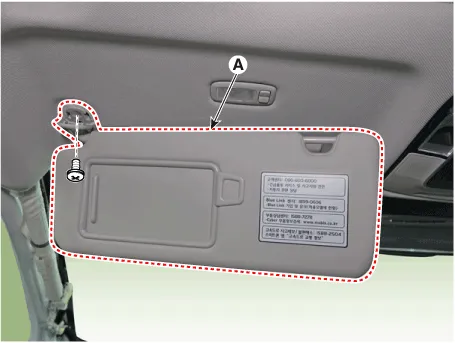
3.To install, reverse removal procedure.
1.Loosen the mounting screws and remove the retainer (A).
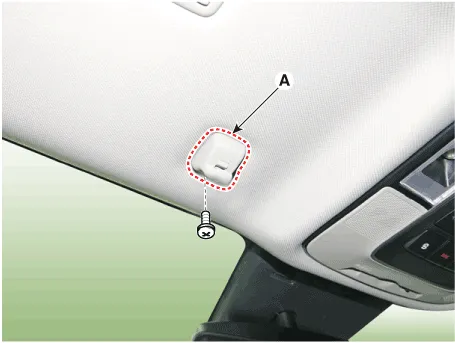
2.To install, reverse removal procedure.
Assist Handle
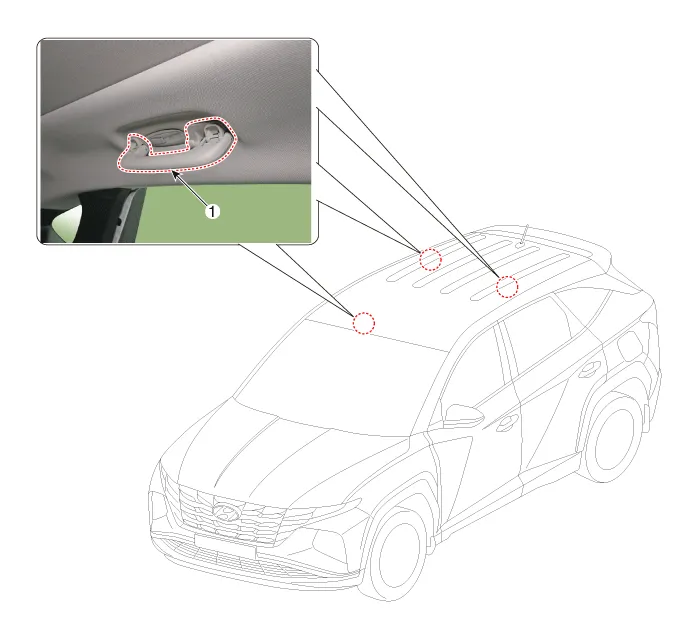
1. Assist handle
1.After lifting up the assist handle caps and loosening the mounting screws, remove the assist handle (A).
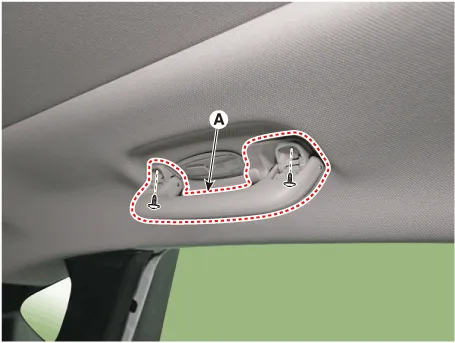
2.To install, reverse removal procedure.
Roof Trim Assembly
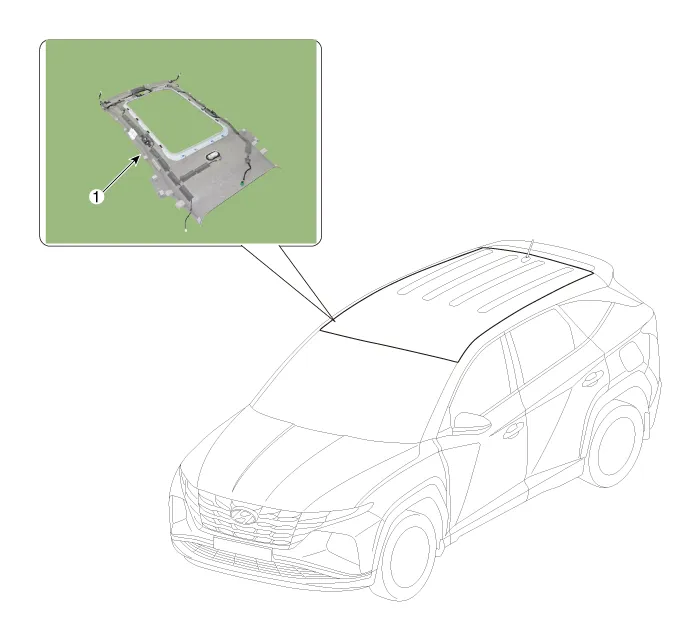
1. Roof trim assembly

• When removing with a flat-tip screwdriver or remover, wrap protective tape around the tools to prevent damage to components.
• Put on gloves to prevent hand injuries.

• Take care not to bend or scratch the trim and panels.
1.Remove the front seat.(Refer to Front Seat - "Front Seat Assembly")
2.Remove the rear seat.(Refer to Rear Seat - "Rear Seat Assembly")
3.Remove the front pillar trim.(Refer to Interior Trim - "Front Pillar Trim")
4.Remove the center pillar upper trim.(Refer to Interior Trim - "Center Pillar Trim")
5.Remove the rear pillar trim.(Refer to Interior Trim - "Rear Pillar Trim")
6.Remove the sunvisor and retainer.(Refer to Roof Trim - "Sunvisor")
7.Remove the assist handle.(Refer to Roof Trim - "Assist Handle")
8.Remove the overhead console lamp.(Refer to Body Electrical System - "Overhead Console Lamp")
9.Remove the room lamp.(Refer to Body Electrical System - "Room Lamp")
10.Remove the ECM mirror connector.(Refer to Body Electrical System - "Electro Chromic Inside Rear View Mirror")
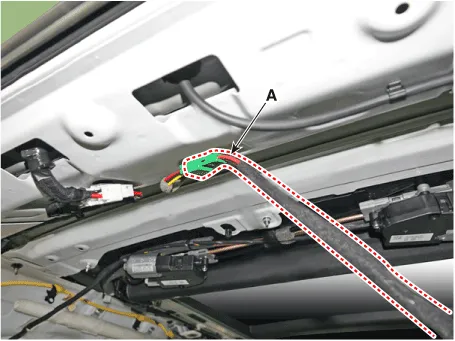
11.Separate the roof trim main connector (A) from the front pillar section.
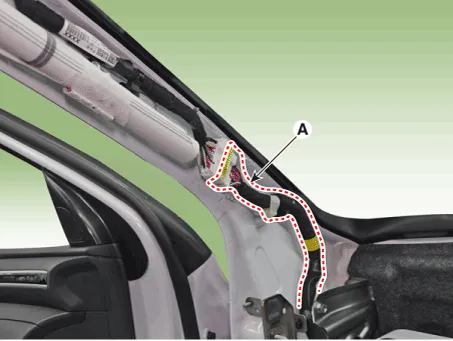
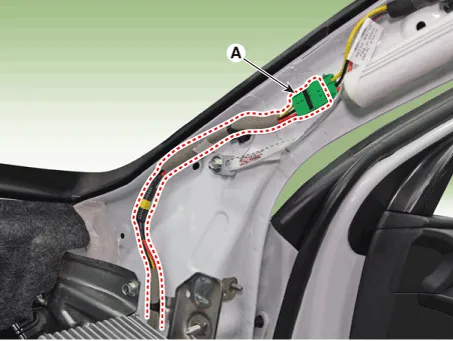
12.Separate the roof trim main connector (A) from the rear pillar section.

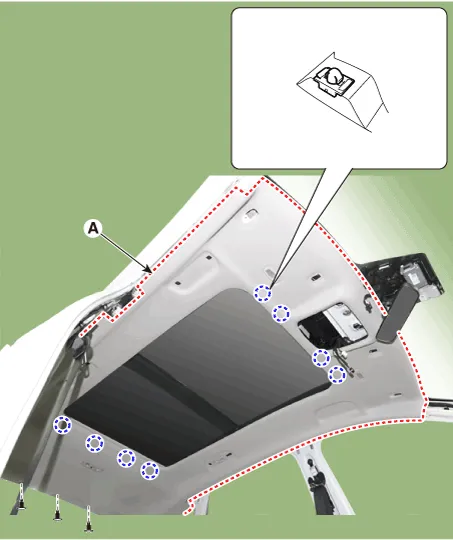
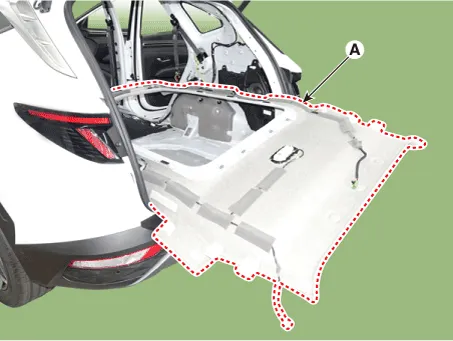
13.Remove the roof trim mounting clip and remove the roof trim assembly (A).

• Be careful not to wrinkle on the roof trim.
14.Press the lock pin, separate the roof trim connector (A).
15.Remove the roof trim assembly (A) from the vehicle through the liftgate.
16.Remove roof trim wiring harness (A) from the roof trim (B).

• Take care not to damage the roof trim wiring harness (A) when removing.
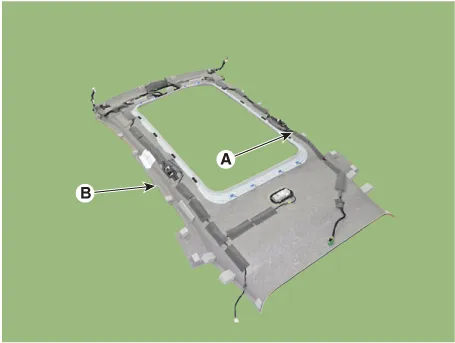

1)When installing the roof trim wiring harness (A) on the roof trim, apply the hot melt continuously by using the hot melt gun tool.
2)Put anti-noise pad on roof trim to prevent the noise.
17.To install, reverse removal procedure.

• Make sure the connector is connected in properly.
• Replace any damaged clips.
 Cowl Cross Bar Assembly
- Component Location
1. Cowl cross bar assembly
- Replacement
• When removing with a flat-tip screwdriver or remover, wrap protective tape around the tools to prev ...
Other information:
Hyundai Tucson (NX4) 2022-2026 Service Manual: Compressor
- Description
The compressor is the power unit of the A/C system.It is located on the
side of engine block and driven by a V-belt of the engine.The
compressor changes low pressure and low temperature refrigerant gas into
high pressure and high temperature refrigerant gas.Variable Swash Plat ...
Hyundai Tucson (NX4) 2022-2026 Owner's Manual: Reverse Parking Collision-
Avoidance Assist Settings
With the ignition switch ON, go to User
Settings > Driver Assistance > Parking
Safety (for cluster type) or Setup >
Vehicle > Driver Assistance > Parking
Safety (for infotainment system type)
from the Settings menu to select the
following:
If Rear Active Assist is se ...
