
Hyundai Tucson: Liftgate Glass / Repair procedures

• Put on gloves to prevent hand injuries.

• Use seat covers to avoid damaging any surfaces.
1.Remove the liftgate trim.(Refer to Liftgate - "Liftgate Trim")
2.Remove the rear spoiler.(Refer to Body Side Molding - "Rear Spoiler")
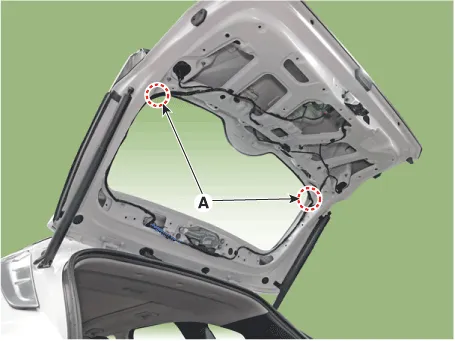
3.Disconnect the hot wire connector (A).
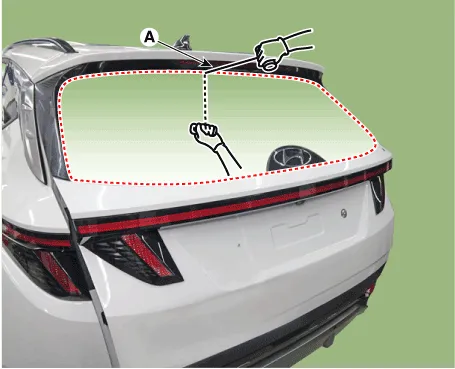
4.Cut off the sealant on the edge (B) while pulling the piano wire (A) to the left and right.

• Put on gloves to protect your hands.
• Heat may occur when working on the wires. Be careful not to burn your hands.
• Be careful not to disconnect the piano wire.
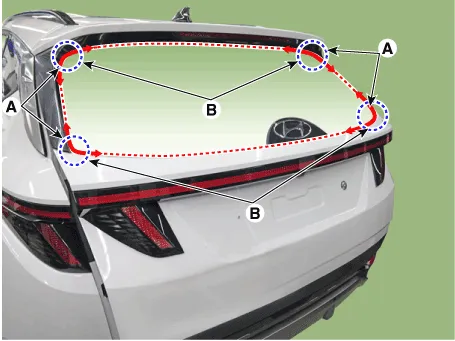
5.Put in a piano wire (A) through the corner of the liftgate window glass and insert wire grips into both ends of the wire.
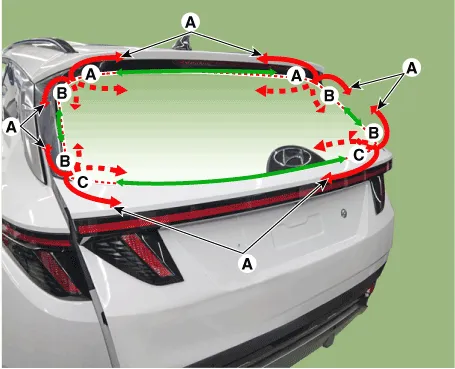
6.Cut off the sealant on (A-A), (B-B), (C-C), while pulling a piano wire (A) to the left and right.

• Put on gloves to protect your hands.
• Heat may occur when working on the wires. Be careful not to burn your hands.
• Be careful not to disconnect the piano wire.
7.Remove the liftgate window glass (A).
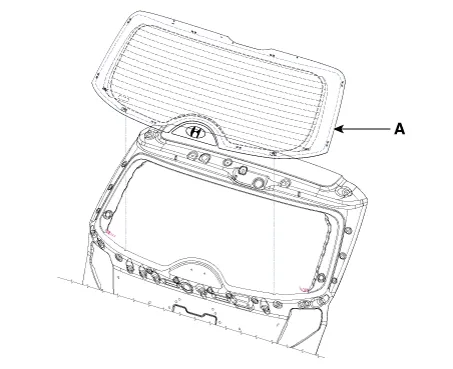
1.Using a cutting knife (A), remove the remaining sealant (B) on the body panel.
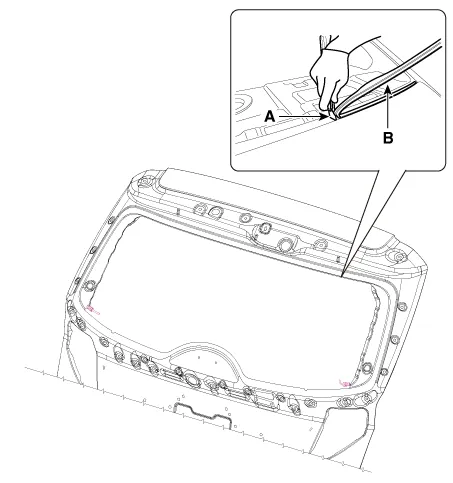
2.Apply the body primer to the bonding surface of body panel.

• Be careful not to touch the surface covered with the primer because touching it may lead to water leaks after installing the liftgate window glass.
• Do not apply the body primer to the glass.
• Remove any foreign materials from the primer-covered surface.
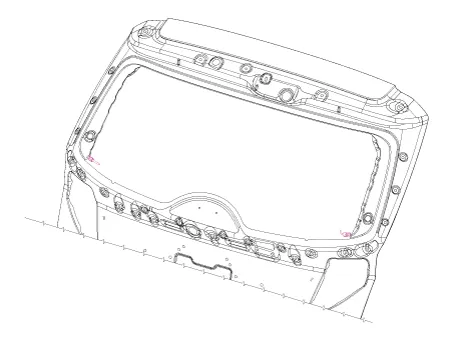
3.Apply the glass primer to the outer edge of liftgate window glass.

• Be careful not to touch the surface covered with the primer because touching it may lead to water leaks after installing the liftgate window glass.
• Remove any foreign materials from the primer-covered surface.
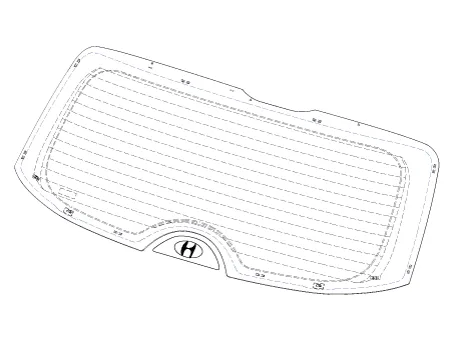
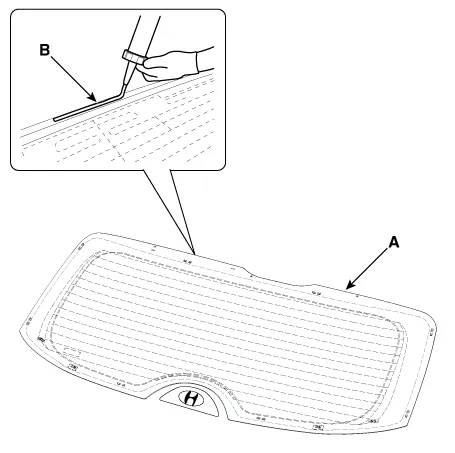
4.Using a sealant gun, apply the sealant (B) to the edge of rear liftgate window glass (A).
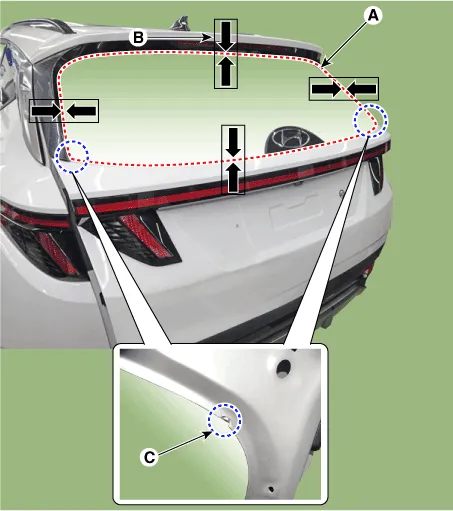
5.Using the glass holder, adjust the liftgate window glass (A) to fit the alignment marks (B) on the body and lightly push the liftgate window glass to make the edges fully seated on the bonding surface of body.

• When installing the liftgate window glass (B), be sure to fit the protruding part (C) on the reverse side of the glass into the groove on the body frame.
6.To make sure that the applied sealant is completely hardened, leave the car on a flat surface for at least 3 to 4 hours after installing the liftgate window glass.

• If driving the car is inevitable, drive at a low speed for at least 8 hours.
• Advise the driver to avoid aggressive driving or driving on rough roads for 2-3 days after installing the liftgate window glass.
7.Conduct a leak testing.

• The leak testing shall be conducted at least 4 hours after the liftgate window glass installation is completed.
• Do not directly spray the high-pressure water to the joint area.
8.Install the rear spoiler.(Refer to Body Side Molding - "Rear Spoiler")
9.Install the liftgate trim.(Refer to Liftgate - "Liftgate Trim")

• Put on gloves to prevent hand injuries.

• When using Heat blower, ensure that the entire is evenly heated.
• Use seat covers to avoid damaging any surfaces.
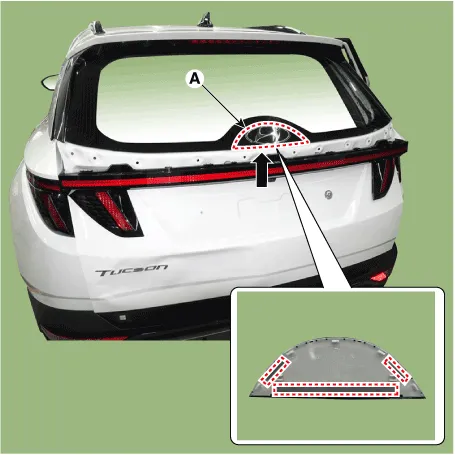
1.Cut the tape from the bottom and replace the emblem assembly (A).
 Components and Components Location
- Components
1. Liftgate window glass
...
 Quarter Fixed Glass
Components and Components Location
- Components
1. Quarter fixed glass
Repair procedures
- Removal
• When removing with a flat-tip screwdriver or remover, wrap prot ...
Other information:
Hyundai Tucson (NX4) 2022-2026 Owner's Manual: Parking brake warning light
This warning light illuminates:
When the ignition switch is in the ON
position. The Parking Brake warning
light illuminates for about 3 seconds
and then goes off once the parking
brake is released.
Whenever the parking brake is
applied.
Whenever the brake fluid level in the ...
Hyundai Tucson (NX4) 2022-2026 Owner's Manual: AUTO STOP indicator light. Turn signal indicator light
AUTO STOP indicator light
This indicator light illuminates:
When the engine enters the Idle Stop
mode of ISG (Idle Stop and Go) system.
When the engine automatically starts,
the AUTO STOP indicator on the cluster
Illuminates to white.
For more information, refer to the "ISG
(Idle Stop ...
