Hyundai Tucson: Rear Seat / Rear Seat Back Cover
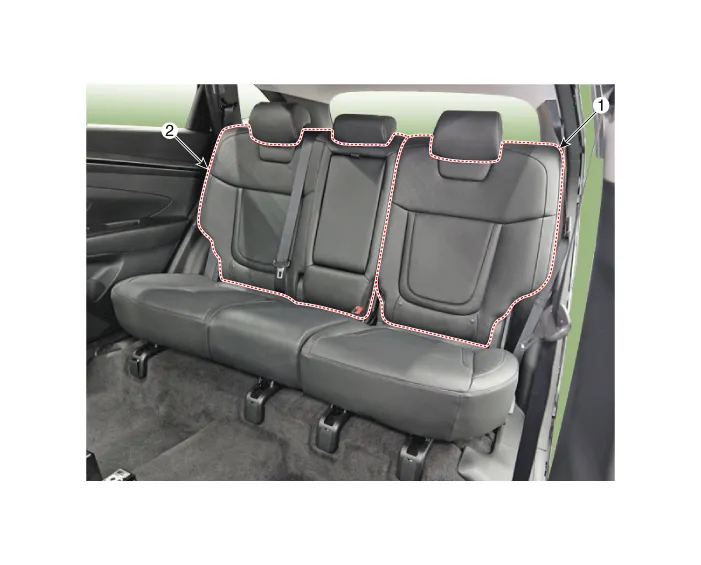
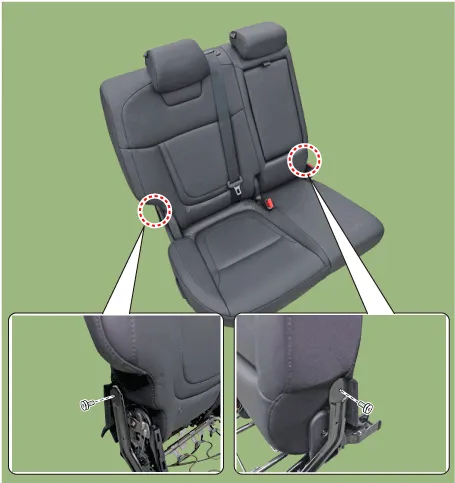
1. Rear seat back cover [LH]
2. Rear seat back cover [RH]

• Put on gloves to prevent hand injuries.

• Take care not to bend or scratch the rear seat assembly.
1.Remove the rear seat assembly [LH].(Refer to Rear Seat - "Rear Seat Assembly")
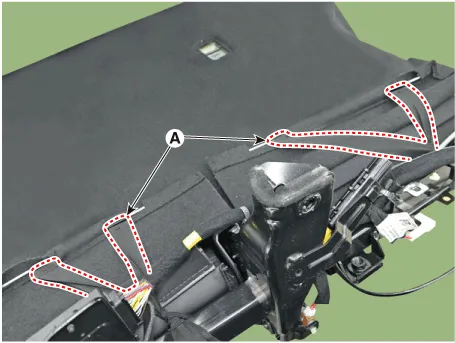
2.Remove the rear back hinge cover [LH] (A).
3.Loosen the mounting screw, remove the rear seat slide knob (A).
4.Loosen the mounting screw, remove the rear seat recliner (A).
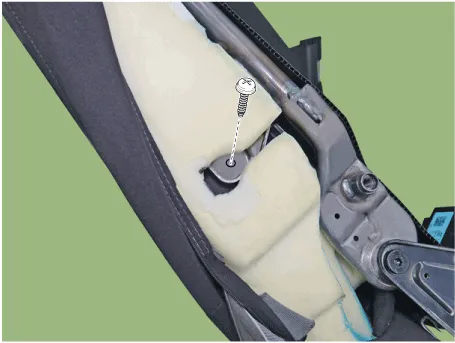
5.Loosen the mounting screw, remove the rear back hinge cover [RH] (A).
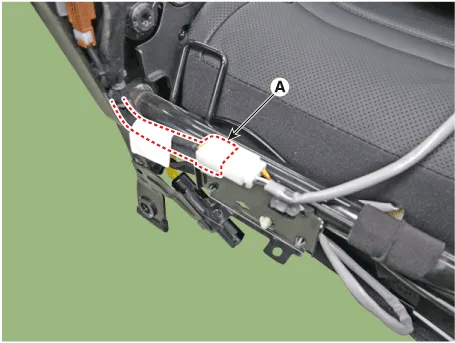
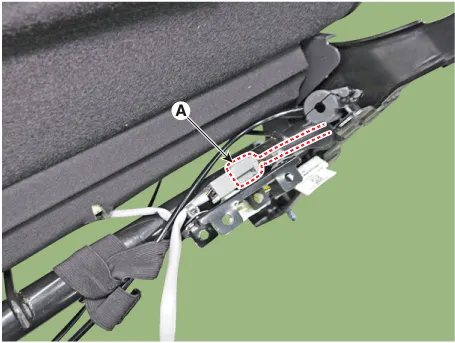
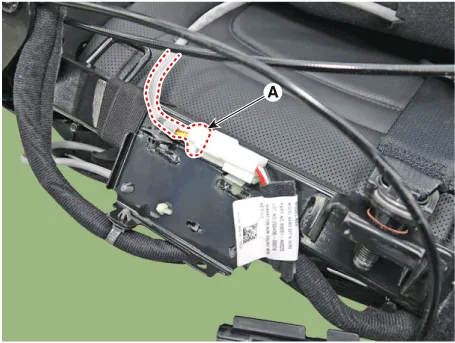
6.Disconnect the seat heater connector (A).
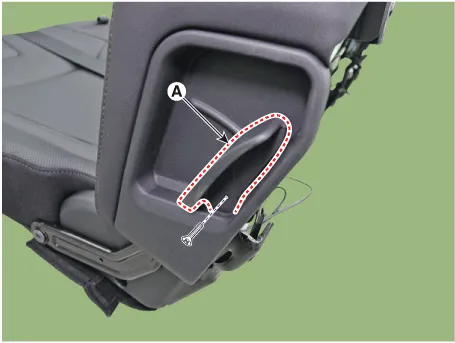
7.Loosen the mounting screw, remove the rear seat shield outer cover (A).
8.Loosen the mounting screw, remove the rear seat shield inner cover (A).
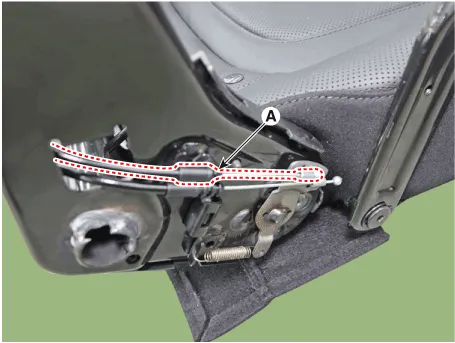
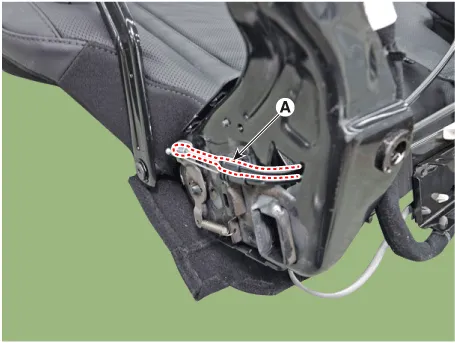
9.Separate the rear seat folding cable (A).
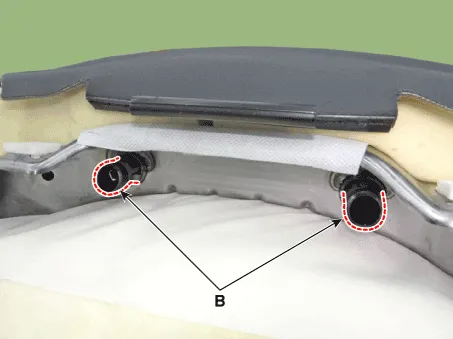
10.Loosen the mounting bolts, separate the rear seat back assembly and rear seat cushion assembly.
Tightening torque :44.1 - 53.9 N.m (4.5 - 5.5 kgf.m , 32.5 - 39.8 lb-ft)
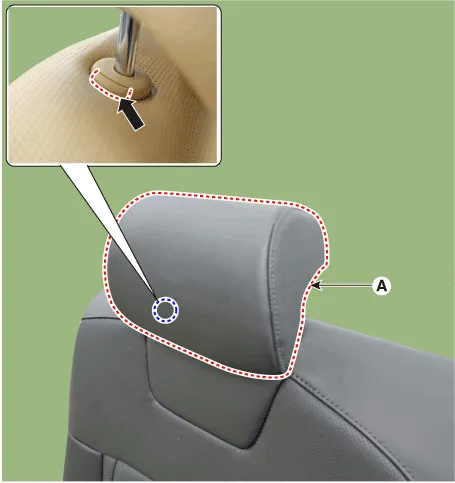
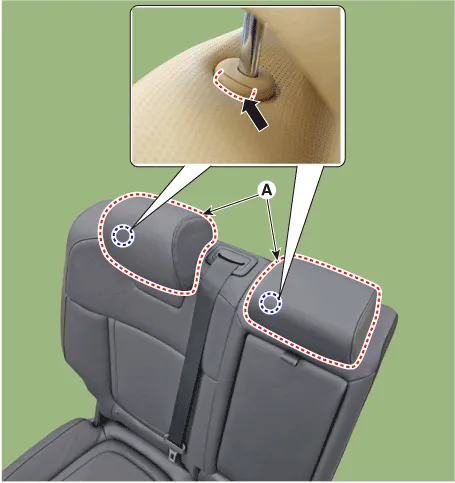
11.Press the lock pin, remove the rear seat headrest (A).
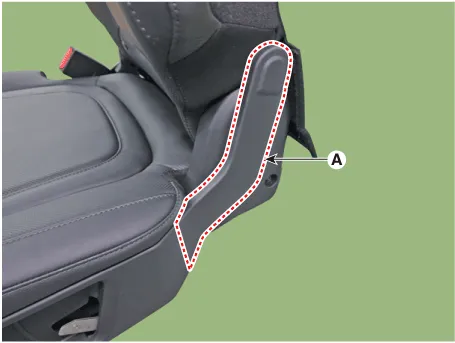
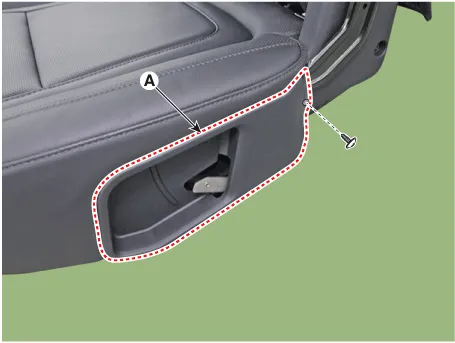
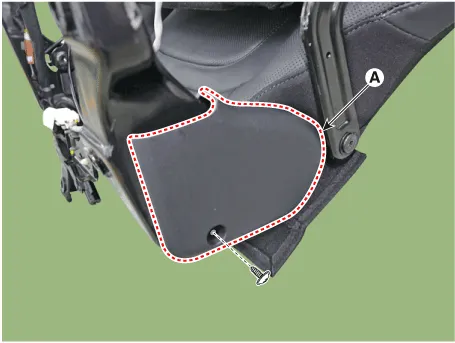
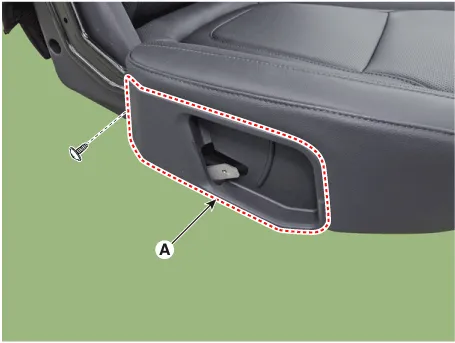
12.Remove the rear seat lower protector (A).
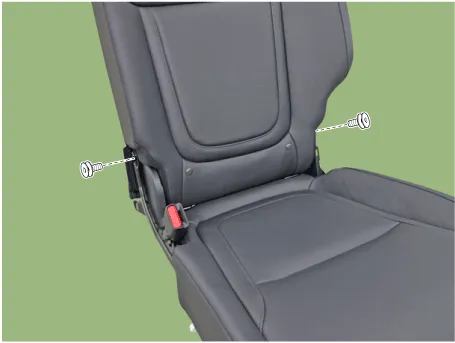
13.Disconnect the connector (A).
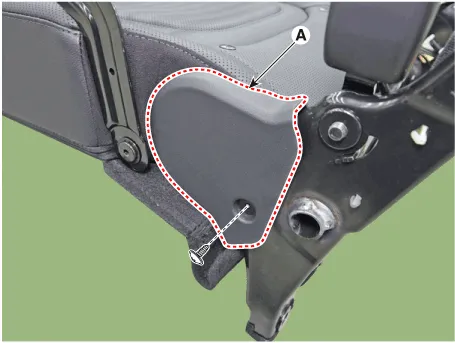
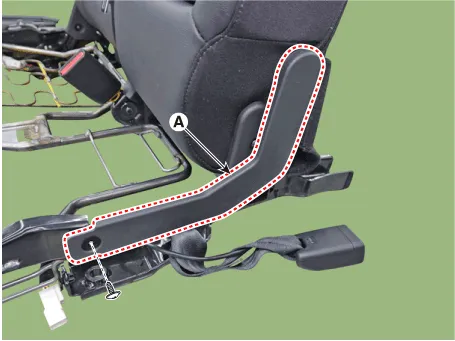
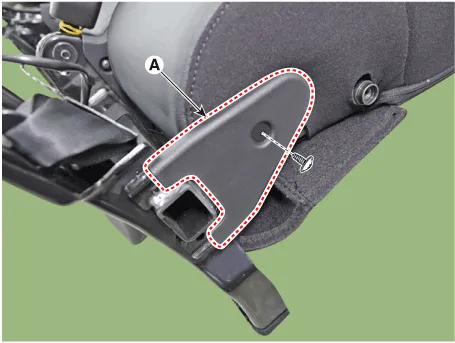
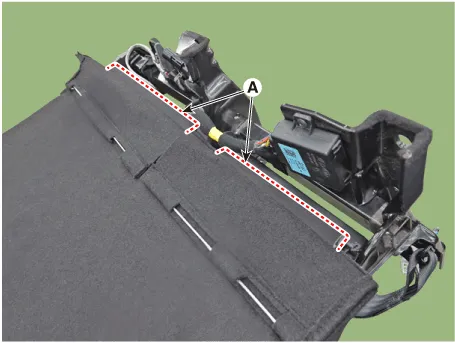
14.Remove the rear seat back protcetor (A).
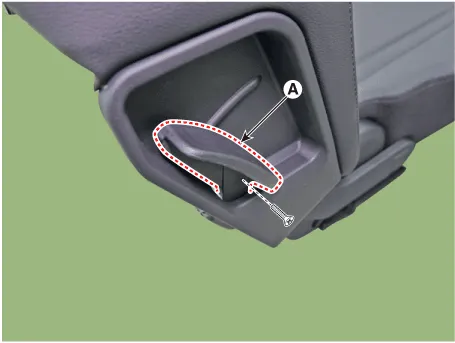
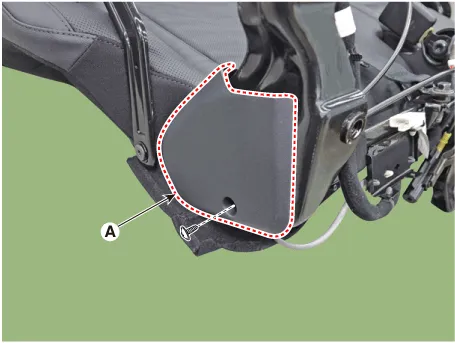
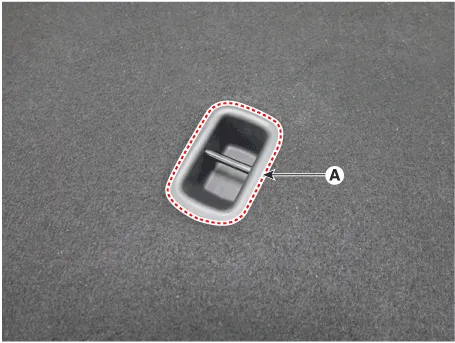
15.Remove the child anchor cover (A).

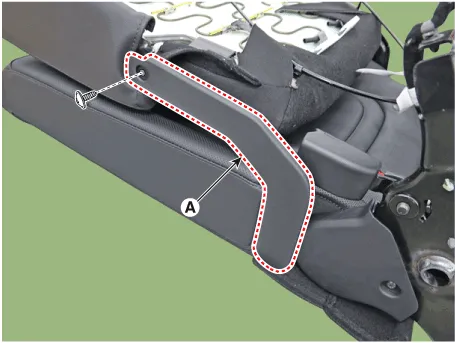
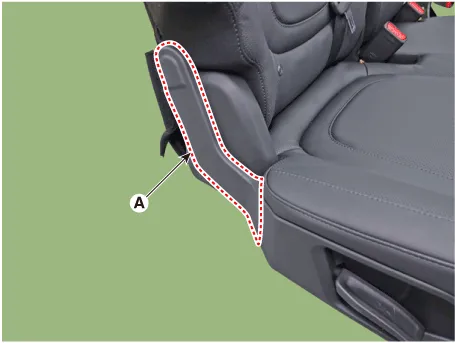
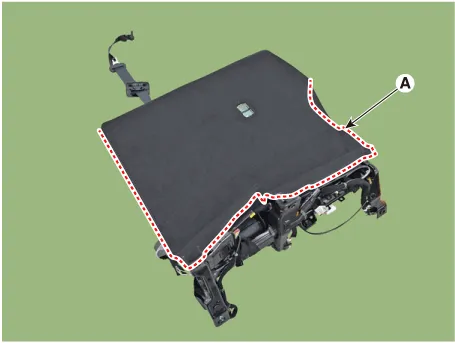
16.Separate the rear seat back cover (A).
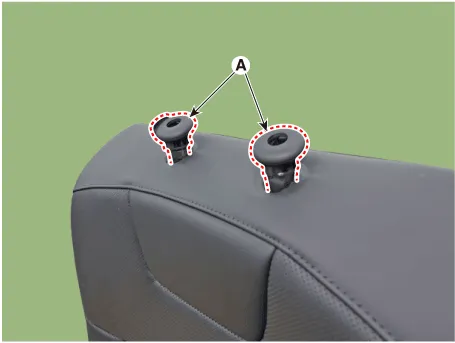
17.Press the hooks (B) and remove the headrest guide (A).
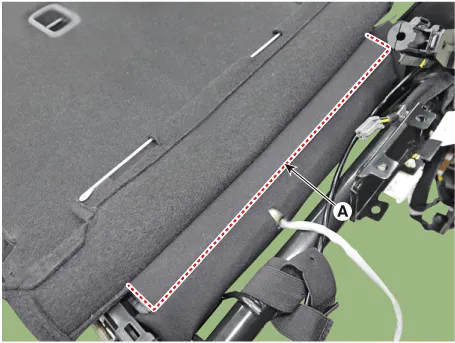
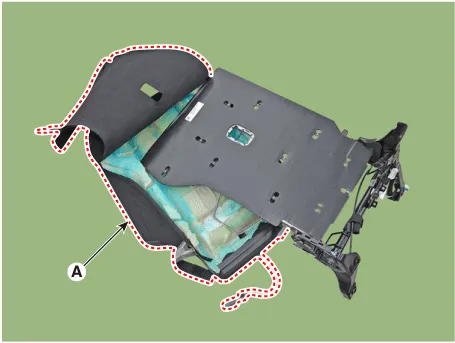
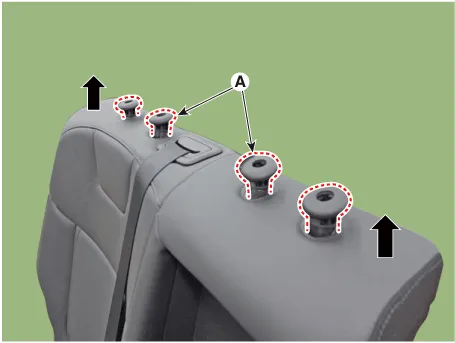
18.Remove the rear seat back cover assembly (A) from the rear seat frame.
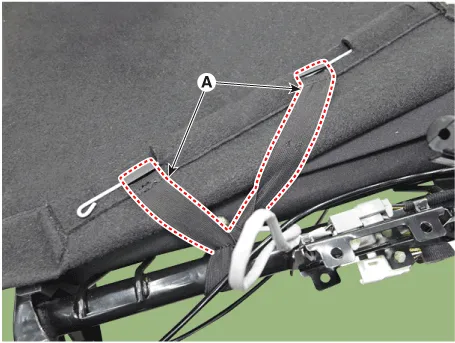
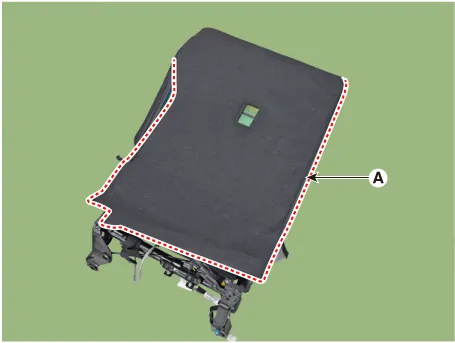
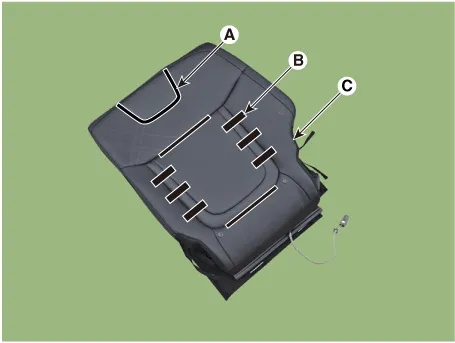
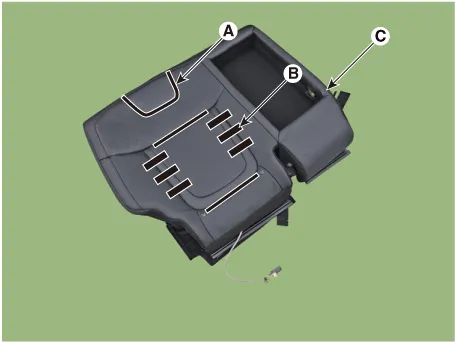
19.After removing the Velcro tape (A) and tie-down clips (B) inside the rear seat back cover, remove the rear seat back cover (C).

• Be careful not to deviate from the pads, insert wires, and aplix.
20.To install, reverse the removal procedure.

• Make sure that the connectors are connected completely.
1.Remove the rear seat assembly [RH].(Refer to Rear Seat - "Rear Seat Assembly")
2.Loosen the mounting screw, remove the rear back hinge cover [RH] (A).
3.Loosen the mounting screw, remove the rear seat slide knob (A).
4.Loosen the mounting screw, remove the rear seat recliner (A).
5.Remove the rear back hinge cover [LH] (A).
6.Loosen the mounting screw, remove the rear seat shield outer cover (A).
7.Separate the rear seat folding cable (A).
8.Disconnect the seat heater connector (A).
9.Loosen the mounting bolts, separate the rear seat back assembly and rear seat cushion assembly.
Tightening torque :44.1 - 53.9 N.m (4.5 - 5.5 kgf.m , 32.5 - 39.8 lb-ft)
10.Loosen the mounting screw, remove the rear seat cover (A).
11.Press the lock pin, remove the rear seat headrest (A).
12.Remove the headrest guide (A).
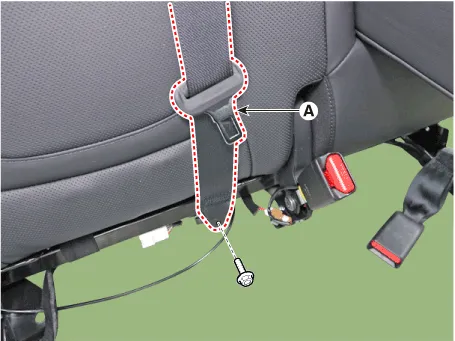
13.Loosen the mounting bolt, separate the rear center seat belt lower anchor (A).
14.Separate the rear center seat belt cover (A).
15.Remove the child anchor cover (A).
16.Remove the rear seat lower protector (A).
17.Remove the rear seat back protcetor (A).
18.Separate the rear seat back cover (A).
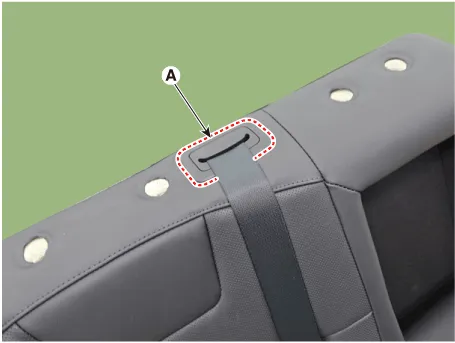
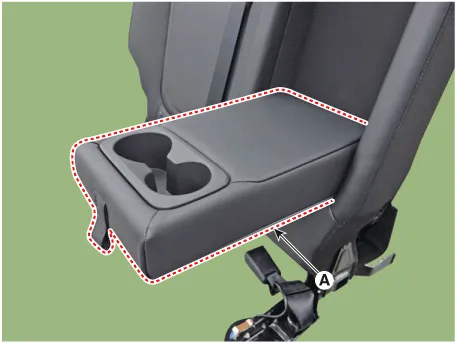
19.Loosen the mounting screw, remove the rear back armrest (A).
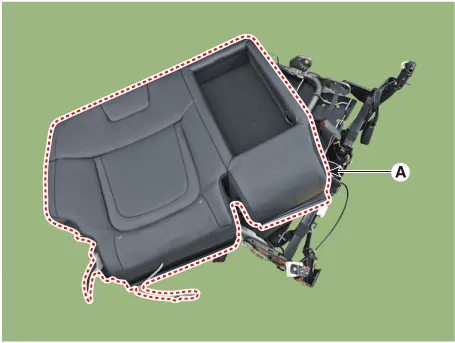
20.Remove the rear seat back cover assembly (A) from the rear seat frame.
21.After removing the Velcro tape (A) and tie-down clips (B) inside the rear seat back cover, remove the rear seat back cover (C).

• Be careful not to deviate from the pads, insert wires, and aplix.
22.To install, reverse the removal procedure.

• Make sure that the connectors are connected completely.
 Rear Seat Assembly
- Component Location
1. Rear seat cushion assembly2. Rear seat back assembly
- Replacement
• Put on gloves to prevent hand injuries.
• Take ...
 Rear Seat Cushion Cover
- Component Location
1. Rear seat cushion cover [LH]2. Rear seat cushion cover [RH]
- Replacement
• Put on gloves to prevent hand injuries.
†...
Other information:
Hyundai Tucson (NX4) 2022-2026 Service Manual: Specifications
- Specification
Air Conditioner
ItemSpecification
CompressorTypeDVE16C
Oil type & CapacityPAG30 120 ± 10g (3.85 ± 0.3oz.)
Pulley type6PK-TYPE
Displacement60cc/rev
Expansion valveTypeBlock type
RefrigerantTypeR-134aR-1234yf
Capacity550 ± 25g (17.68 ± 0.88oz)550 ± 25g (17.68 ± 0.8 ...
Hyundai Tucson (NX4) 2022-2026 Service Manual: Description and Operation
- OBD-II Review
1. Overview
The California Air Resources Board (CARB) began regulation of On Board
Diagnostics (OBD) for vehicles sold in California beginning with the
1988 model year. The first phase, OBD-I, required monitoring of the fuel
metering system, Exhaust Gas Recirculation (EGR) ...
