Hyundai Tucson: Driveshaft Assembly / Joint Assembly (Wheel side)
1.Remove the front drive shaft.(Refer to Driveshaft Assembly - "Front Driveshaft")
2.Remove the trans axle side joint.(Refer to Driveshaft Assembly - "Transaxle Joint")
3.Remove the dynamic damper.(Refer to Driveshaft Assembly - "Dynamic Damper")
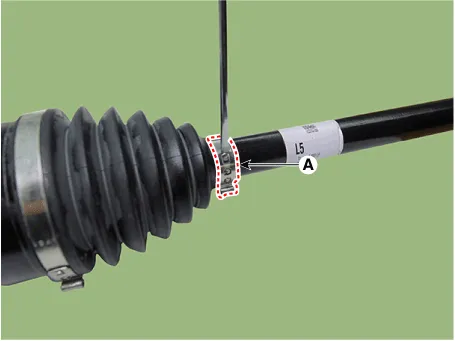
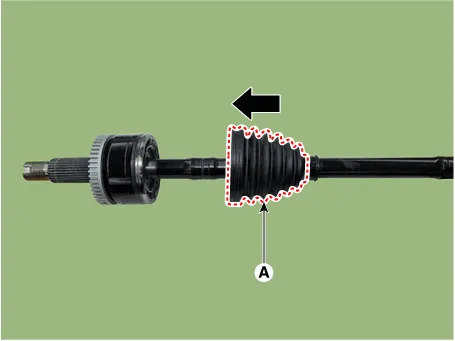
4.Remove the wheel side joint small diameter (A) and large diameter (B) boot band using driver (-).
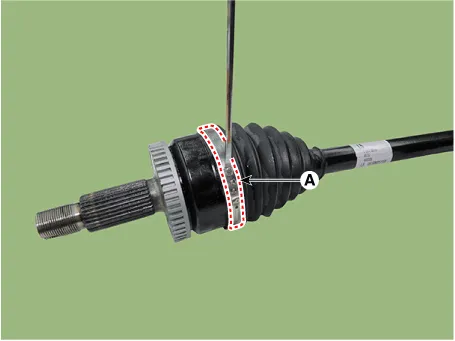
5.Remove the wheel side joint boot (A).

ŌĆó Do not remove the wheel side joint housing (A).
ŌĆó Reinstall the wheel side joint housing (A) may cause leakage, so replace it with the shaft (B) as an assembly.
1.Remove the front drive shaft.(Refer to Driveshaft Assembly - "Front Driveshaft")
2.Remove the trans axle side joint.(Refer to Driveshaft Assembly - "Transaxle Joint")
3.Remove the dynamic damper.(Refer to Driveshaft Assembly - "Dynamic Damper")
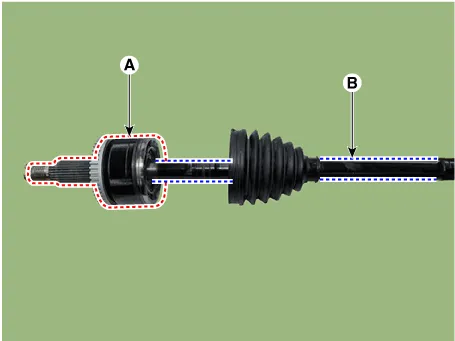
4.Replace the wheel side joint assembly (A) and shaft (B).


ŌĆó The wheel side joint boot can not be replaced, so replace the wheel side joint assembly (A) and shaft (B) together as an assembly.
1.Check the boot for water or foreign objects.
2.Replace any defective parts.

ŌĆó When assembling, be careful not to let dust and foreign substances enter.
ŌĆó Driveshaft joints require special grease, so do not add any other type of grease.
ŌĆó Boot bands must use the new one.
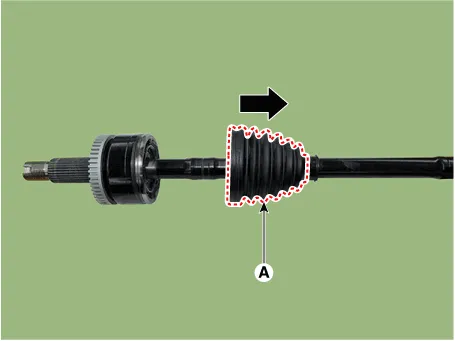
1.Install the new boot (A) in the direction of the arrow.
2.Apply the grease specified inside the boot.
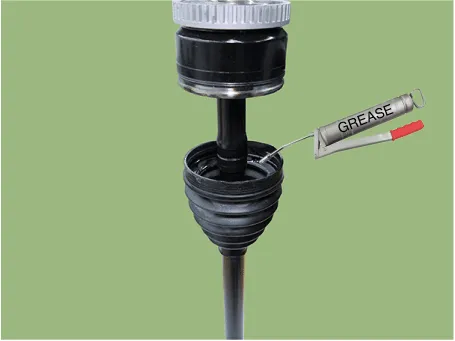

ŌĆó Use the grease provided with the joint/boot kit.
ŌĆó Apply about 50 - 60% grease inside the boot.
ŌĆó Driveshaft joints require special grease, so do not add any other type of grease.
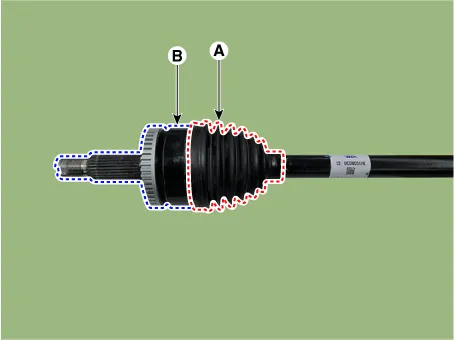
3.Install the wheel side boot (A) into the housing (B).
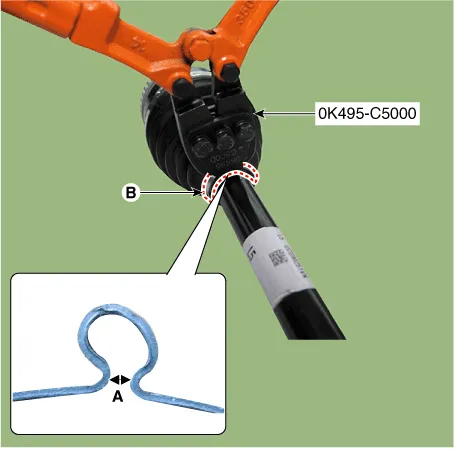
4.Install the large diameter boot band (B) using SST (0K495-C5000).
Clearance (A) : 2.0 mm or less.
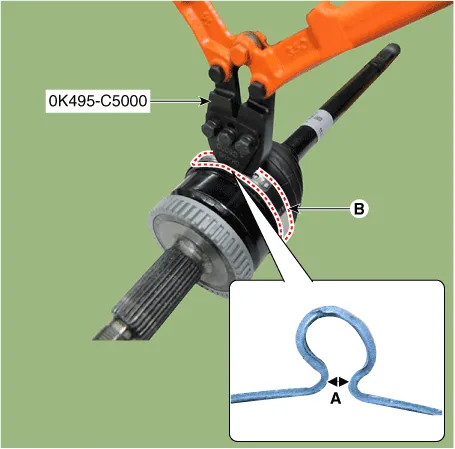
5.Install the small diameter boot band (B) using SST (0K495-C5000).
Clearance (A) : 2.0 mm or less.
6.Install the dynamic damper. [If equipped](Refer to Driveshaft Assembly - "Dynamic Damper")
7.Install the transaxle side joint.(Refer to Driveshaft Assembly - "Transaxle Joint")
8.Install the front drive shaft.(Refer to Driveshaft Assembly - "Front Driveshaft")

ŌĆó When assembling, be careful not to let dust and foreign substances enter.
ŌĆó Driveshaft joints require special grease, so do not add any other type of grease.
ŌĆó Boot bands must use the new one.
1.Replace the wheel side joint assembly (A) and shaft (B).
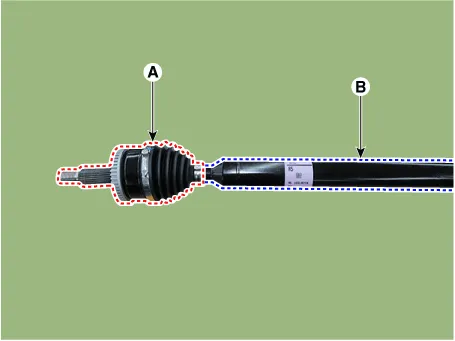

ŌĆó The wheel side joint boot can not be replaced, so replace the wheel side joint assembly (A) and shaft (B) together as an assembly.
2.Remove the dynamic damper.(Refer to Driveshaft Assembly - "Dynamic Damper")
3.Install the transaxle side joint.(Refer to Driveshaft Assembly - "Transaxle Joint")
4.Install the front drive shaft.(Refer to Driveshaft Assembly - "Front Driveshaft")
 Joint Assembly (Transaxle side)
- Removal
ŌĆó Drive shaft joints require special grease, so do not add any other type of grease.
ŌĆó When replacing the boot band, it must be a new one.
1.Remove the front ...
 Rear Axle Assembly. Rear Hub - Carrier
Rear Hub - Carrier
- Components
1. Rear brake disc2. Rear hub assembly3. Dust cover4. Rear carrier assembly
- Removal
[2WD]
ŌĆó When lifting a vehicle using a lift, ...
Other information:
Hyundai Tucson (NX4) 2022-2026 Service Manual: USB Jack
- Description
The USB jack on the console tray assembly is for customers who like to
listen to external portable music players like the MP3, earphone, USB
memory stick through the vehicle's sound system when it is linked to
this jack. If sound distortion occurs it may be due to a mismatch o ...
Hyundai Tucson (NX4) 2022-2026 Service Manual: Rear Seat Cushion Cover
- Component Location
1. Rear seat cushion cover [LH]2. Rear seat cushion cover [RH]
- Replacement
ŌĆó Put on gloves to prevent hand injuries.
ŌĆó Take care not to bend or scratch the rear seat assembly.
[LH]
1.Remove the rear seat assembly [ ...
