Hyundai Tucson: Body (Interior and Exterior) / Fuel Filler Door
Components and Components Location
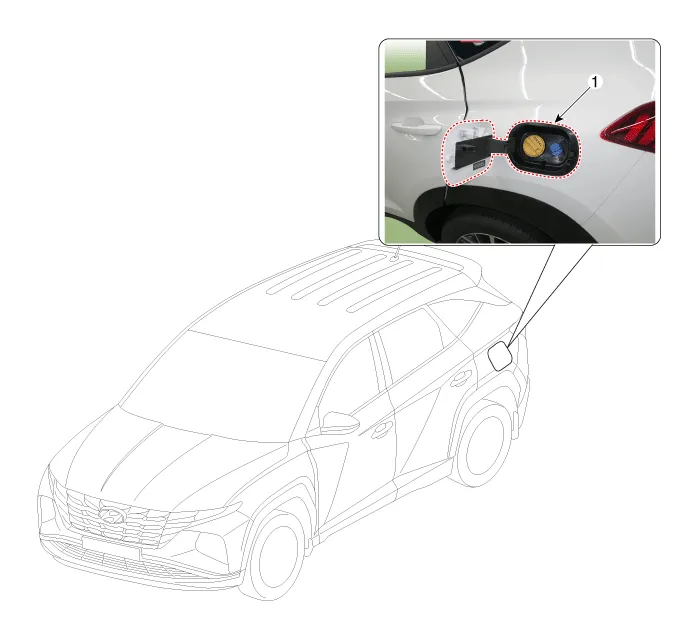
1. Fuel filler door
Repair procedures

• When removing with a flat-tip screwdriver or remover, wrap protective tape around the tools to prevent damage to components.
• Put on gloves to prevent hand injuries.
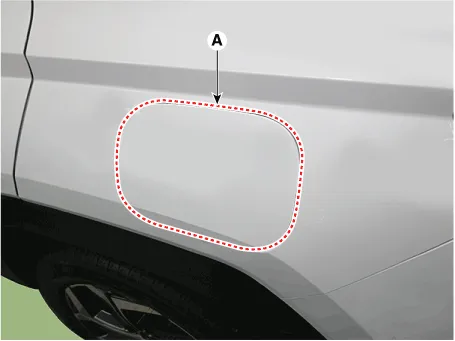
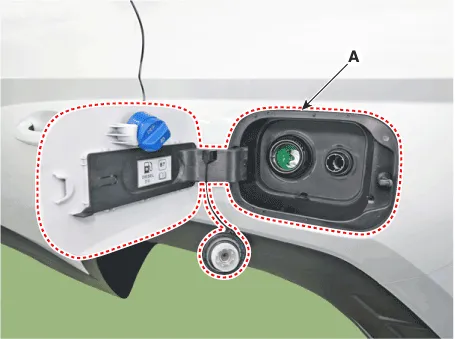
1.Open the fuel filler door (A).

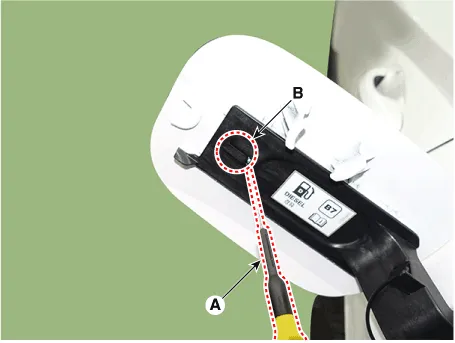
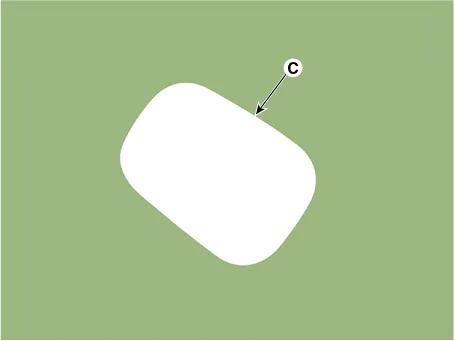
2.Using a flat tip driver (A) unlock the lock pin (B) and then remove the fuel filler door cover (C).
3.To install, reverse removal procedure.

• When removing with a flat-tip screwdriver or remover, wrap protective tape around the tools to prevent damage to components.
• Put on gloves to prevent hand injuries.
1.Disconnect the negative (-) battery terminal.
2.Remove the rear wheel guard.(Refer to Body Side Molding - "Rear Wheel Guard")
3.Open the fuel filler door (A).
4.Open the fuel filler door cap (A) and urea cap (B).

5.Loosen the mounting nuts, separate the filler neck assembly (A).
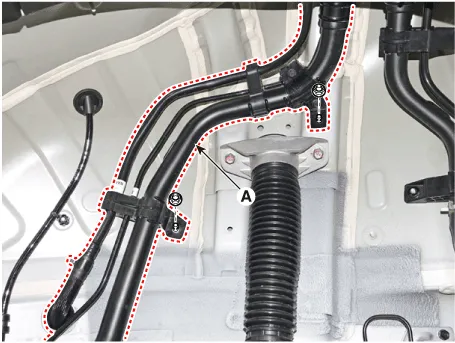
6.Using a screwdriver or remover, remove the fuel filler door assembly (A).
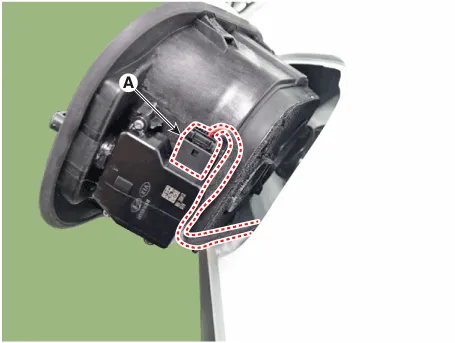
7.Disconnect the fuel filler door connector (A).

8.To install, reverse removal procedure.
 Liftgate Back Panel Molding
- Component Location
1. Liftgate back panel molding
- Replacement
• Put on gloves to prevent hand injuries.
• Take care not to scratch the li ...
Other information:
Hyundai Tucson (NX4) 2022-2026 Service Manual: Troubleshooting
- Failure Inspection
Diagnosis with diagnostic tool
1.In the body electrical system, failure can be quickly diagnosed by
using the vehicle diagnostic system (diagnostic tool).The diagnostic
system (diagnostic tool) provides the following information.(1)Fault Code Searching : Checking failure ...
Hyundai Tucson (NX4) 2022-2026 Service Manual: Components and Components Location
- Components (1)
With Smart Key
Connector Pin Information
NoConnector AConnector BConnector CConnector D
1Speed_input-ECU groundBlower motor operate_output
2-Rear washer switch_outputpower ground-
3Front washer switch_inputESCL (+)_outputBattery (+) ECU-
4PDW-R power_inputESCL (-)_output ...
