Hyundai Tucson: Air Conditioning System / Condenser
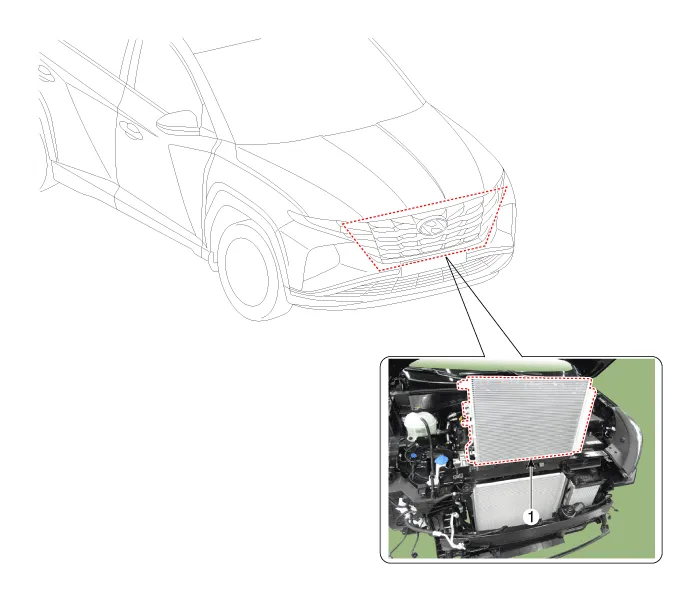
1. Condensor
1.Check the condenser fins for clogging and damage. If clogged, clean them with water, and blow them with compressed air. If bent, gently bend them using a screwdriver or pliers.
2.Check the condenser connections for leakage, and repair or replace it, if required.
1.Recover the refrigerant with a recovery/recycling/charging station.(Refer to Air conditioning System - "Repair procedures")
2.Disconnect the negative (-) battery terminal.
3.Remove the front bumper assembly.(Refer to Body - "Front Bumper Assembly")
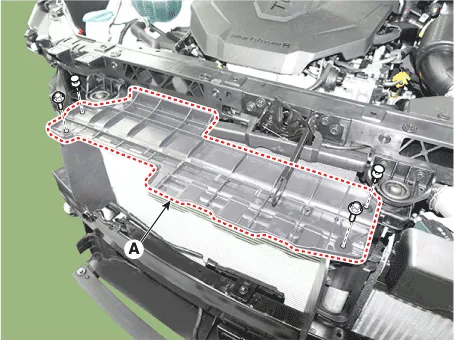
4.Loosen the mounting botls and clips, remove the radiator upper guard (A).
Tightening torque : 3.9 - 5.9 N.m (0.8 - 1.2 kgf.m, 2.9 - 4.3 lb-ft)
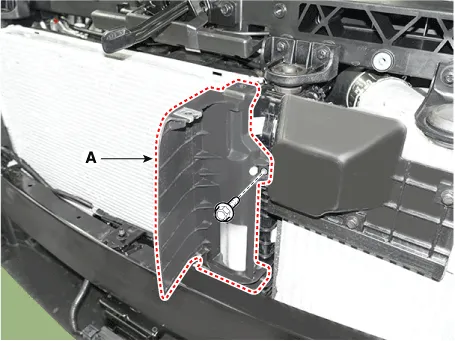
5.Loosen the mounting bolt, remove the upper air guard (A).
Tightening torque : 3.9 - 5.9 N.m (0.8 - 1.2 kgf.m, 2.9 - 4.3 lb-ft)
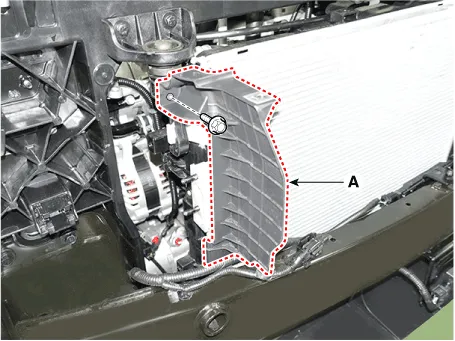
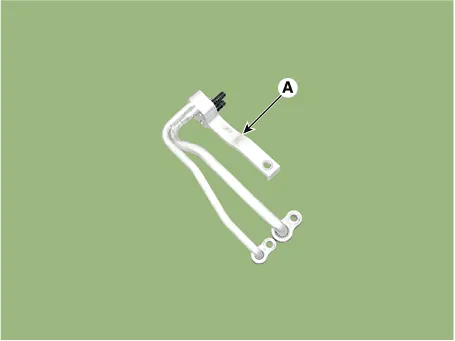
6.Loosen the mounting nuts and separate liquid line (A).
Tightening torque :7.8 - 11.8 N.m (0.8 - 1.2 kgf.m, 5.8 - 8.7 lb-ft)
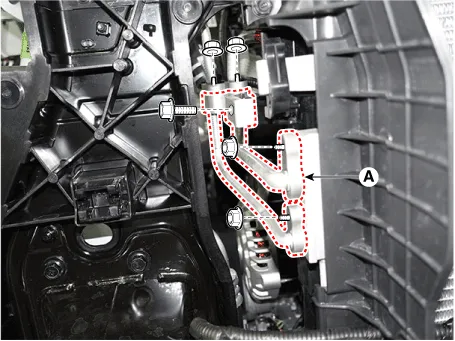
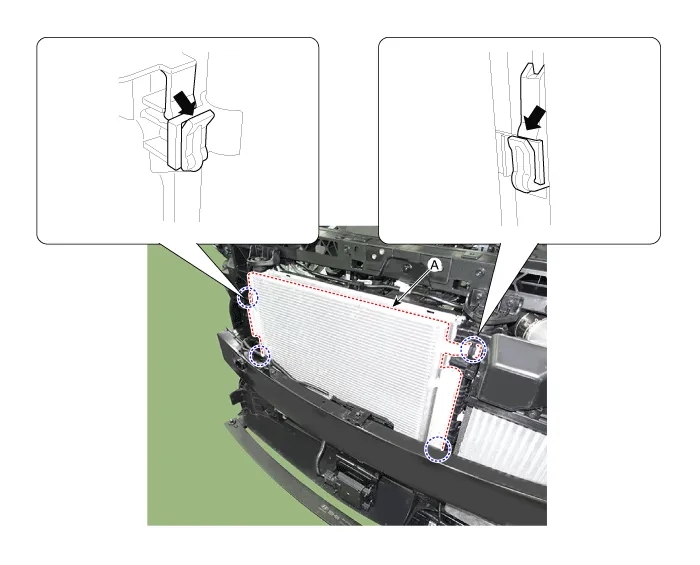
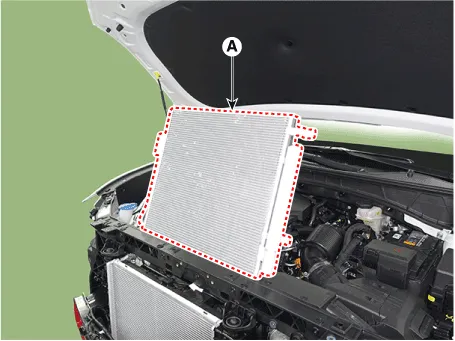
7.Press the lock pin and remove the condenser assembly (A) from radiator assembly.
8.Install in the reverse order of removal.

• If you're installing a new condenser, add refrigerant oil.
• Replace the O-rings with new ones at each fitting, and apply a thin coat of refrigerant oil before installing them. Be sure to use the right O-rings for R-134a or R-1234yf to avoid leakage.
• Be careful not to damage the radiator and condenser fins when installing the condenser.
• Charge the system, and test its performance.
 Compressor
- Description
The compressor is the power unit of the A/C system.It is located on the
side of engine block and driven by a V-belt of the engine.The
compressor changes low pressure and low tempe ...
 Receiver-Drier
- Replacement
1.Remove the condensor.(Refer to Air conditioning System - "Condensor")
2.Using a Lwrench, remove the cap (A) on the bottom of the receiver-drier.
3.Remove the receiver-drier (A) ...
Other information:
Hyundai Tucson (NX4) 2022-2026 Owner's Manual: Limitations of Navigation-based
Smart Cruise Control
Navigation-based Smart Cruise Control
may not operate normally if:
The navigation system is not working
properly.
Map information is not transmitted
due to an issue with the infotainment
system.
Speed limit and road information in
the navigation system has not been
updated.
...
Hyundai Tucson (NX4) 2022-2026 Service Manual: Description and Operation
- Description
Burglar Alarm State [B/A State]
B/A StateDescription
DISARM1)
In "DISARM" state, no vehicle start inhibition. So, when door, hood, or
Liftgate is opened, there is no alarm sound and flashing.
2) If the battery is disconnected while the state is not "ARM/ARMWAIT/ALARM/REARM" ...
