
Hyundai Tucson: Charging System / Alternator
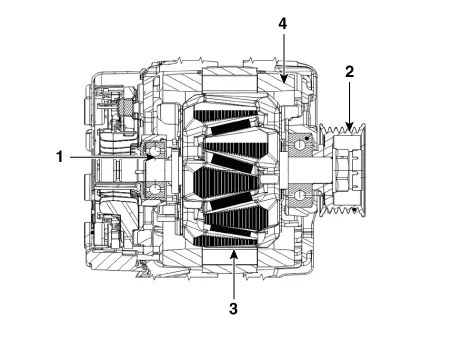
1. Brush
2. Drive belt pully
3. Rotor
4. Stator
| Item | Specification |
| Rated voltage | 13.5V, 150A |
| Speed in use | 1,000 - 18,000RPM |
| Pin | 1 (LIN) |
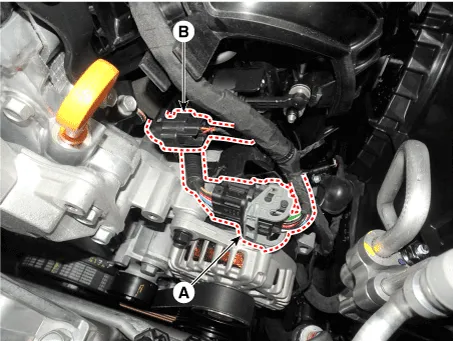
1.Turn the ignition switch OFF and disconnect the battery (-) terminal.
2.Remove the drive belt.(Refer to Engine Mechanical System - "Drive Belt")
3.Disconnect the injector extension connector (A) and variable intake solenoid (VIS) valve connector (B).
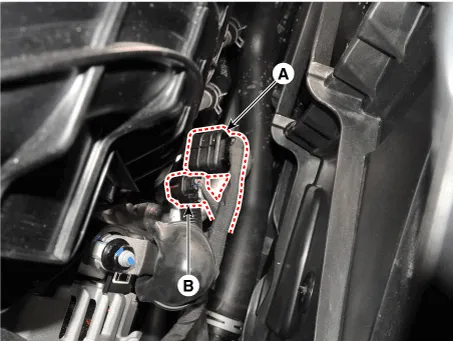
4.Disconnect the extension connector (A) and oil pressure control solenoid valve connector (B).
5.Disconnect the A/C compressor connector.
6. Disconnect the alternator connector (A).
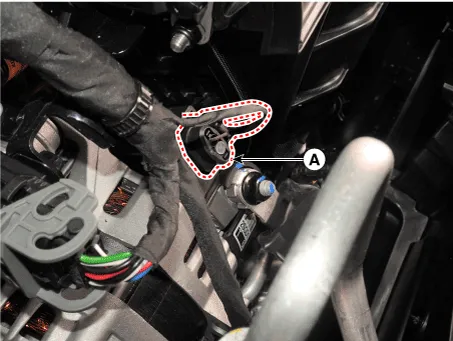
7. Remove the cable nut (A) from the alternator "B" terminal.
Tightening torque :18.6 - 24.5 N.m (1.9 - 2.5 kgf.m, 13.7 - 18.1 Ib-ft)
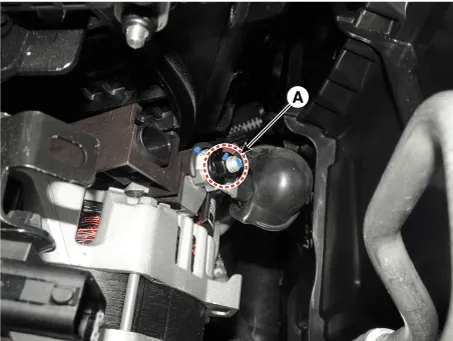
8. Remove the injector extension wiring bracket mounting bolt (A).
Tightening torque :9.8 - 11.8 N.m (1.0 - 1.2 kgf.m, 7.2 - 8.7 Ib-ft)
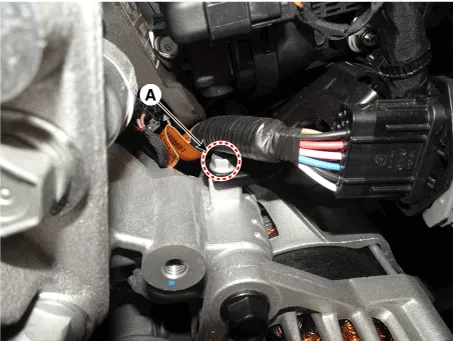
9.Remove the wiring (A).
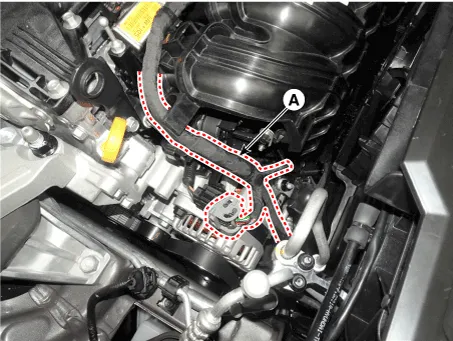
10.Remove the alternator mounting bolts.
Tightening torque :49.0 - 63.7 N.m (5.0 - 6.5 kgf.m, 36.2 - 47.0 Ib-ft)
11.Remove the alternator (A).
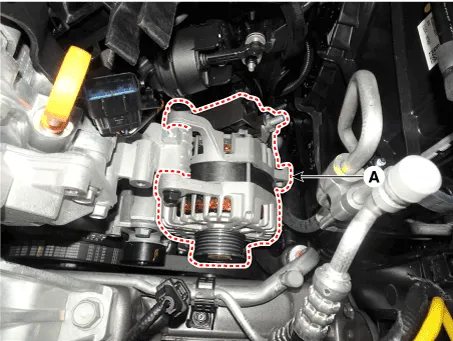
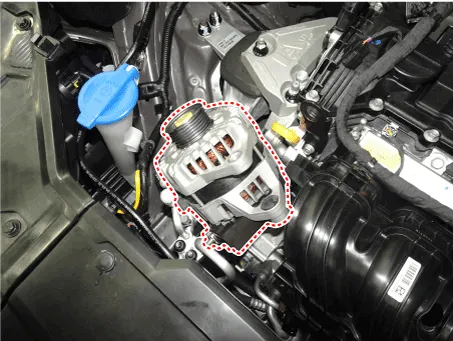
1.Install in the reverse order of removal.
1.Remove the shaft cap (A).
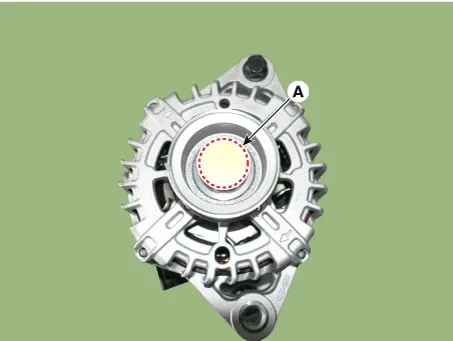

• When installing, replace with new shaft cap.
2.Remove the alternator pulley (A).
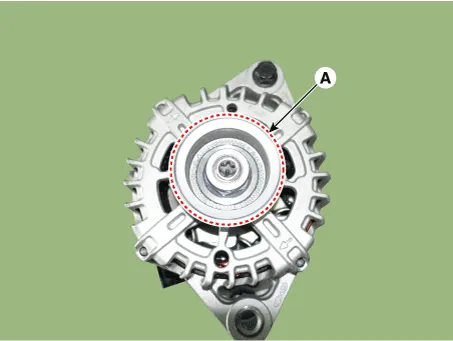
3.Remove the alternator cover (A) after loosening the mounting nut.
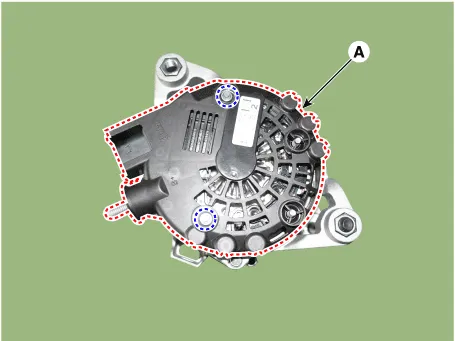
4.Remove the regulator assembly (A).
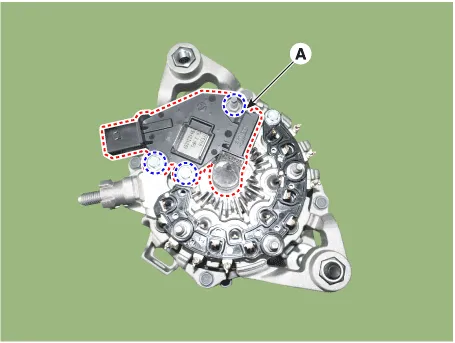
5.Unsolder the stator leads (A).
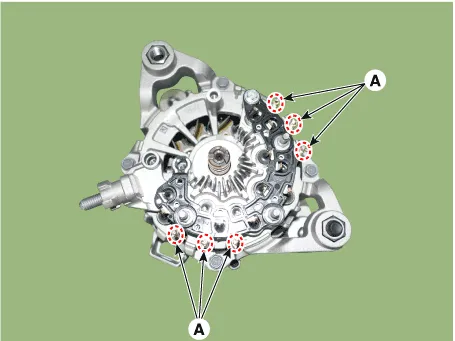
6.Remove the rectifier assembly (A).
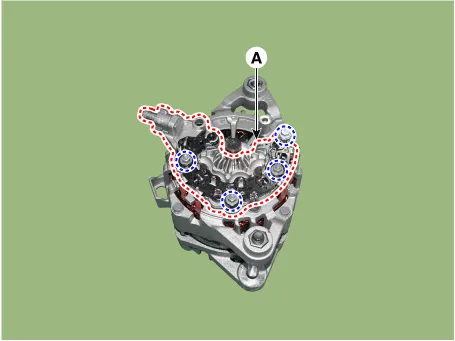
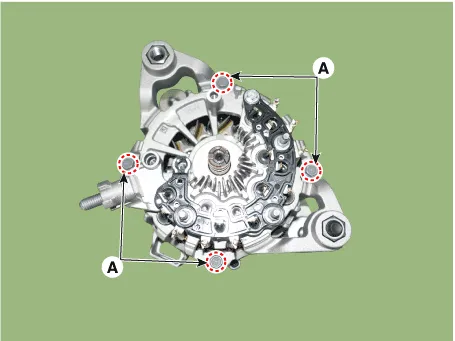
7.Remove the 4 through bolts (A).
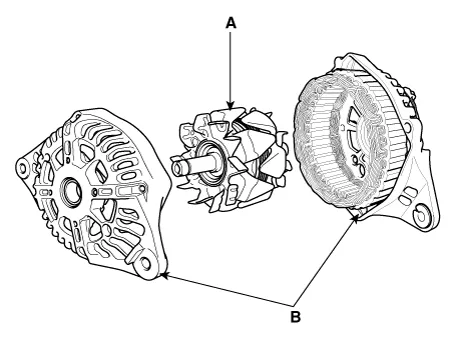
8.Separate the rotor (A) and cover (B).
1.Reassemble in the reverse order of disassembly.

• When installing, replace with new shaft cap.
1.Check that there is continuity between the slip rings (C).
2.Check that there is no continuity between the slip rings and the rotor (B) or rotor shaft (A).
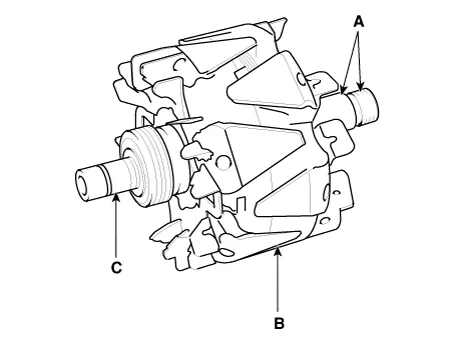
3.If the rotor fails either continuity check, replace the alternator.
1.Check that there is continuity between each pair of leads (A).
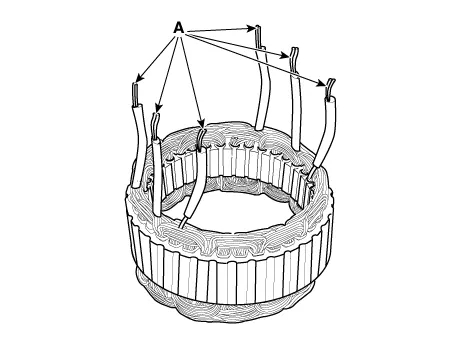
2.Check that there is no continuity between each lead and the coil core.
3.If the coil fails either continuity check, replace the alternator.
 Repair procedures
- Inspection
Inspection Item
• Battery efficiency inspection
• Battery voltage inspection
• Charging voltage insptection
• General inspection
• Terminal tightening state in ...
 Battery
- Description
CMF Battery
The CMF (Closed Maintenance Free) battery is, as the name implies,
totally maintenance free and has no removable battery cell caps.The CMF
(Closed Maintenance Free) b ...
Other information:
Hyundai Tucson (NX4) 2022-2026 Service Manual: General Safety Information and Caution
- General Safety Information and Caution
1.Be careful when driving the vehicle using the smart cruise control system as follows.(1)On curves or inclines/declines • The smart cruise control system may have limits to detect distance to the vehicle ahead due to road and traffic conditions.
• ...
Hyundai Tucson (NX4) 2022-2026 Service Manual: Heated Oxygen Sensor (HO2S)
- Description
Heated Oxygen Sensor (HO2S) consists of zirconium and alumina and is
installed on upstream and downstream of the Warm up Catalytic Converter
(WCC).After it compares oxygen consistency of the atmosphere with the
exhaust gas, it transfers the corresponding voltage signal to the ...
