Hyundai Tucson: Sunroof / Repair procedures
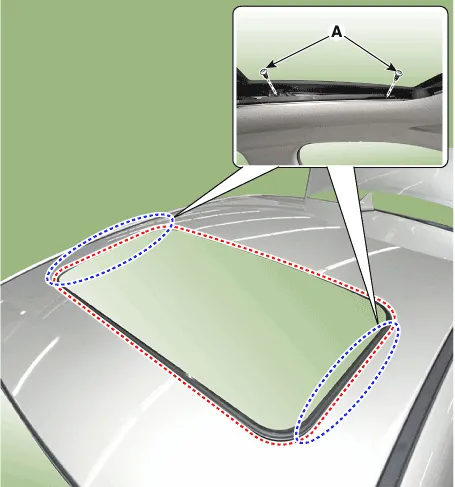
Inspect Glass Alignment
1.Inspect the step height between the roof panel (A) and the glass weatherstrip (B) and then adjust it if necessary.
Alignment adjustment Standard value [mm(in.)](1) Front edge : -1 ~ 0 mm (-0.04 ~ 0 in.)(2) Rear edge : 0 ~ 1 mm (0 ~ 0.04 in.)(3) Side edge : 0 ± 0.5 mm (0 ± 0.02 in.)
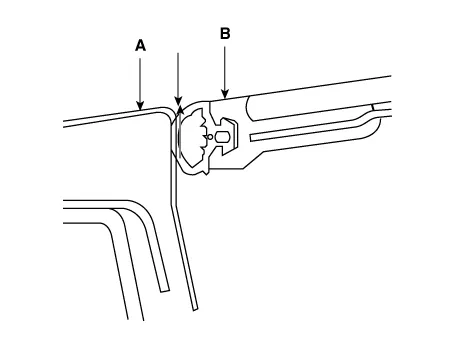
2.Adjust the height of the glass by slighly loosening the screws (A).
When To Initialize The Motor
1.After initial vehicle assembly.
2.If the initial value is erased or damaged because of short power electric discharge during operation.
3.After using the manual handle.
Operating The Sunroof Emergency Handle
1.Use the sunroof emergency handle to close or open the sunroof manually if the sunroof cannot be closed electronically due to motor or controller electrical malfunction.
2.If needed, initialize the sunroof according to the initialization method.Whenever the vehicle battery is disconnected or discharged, or you use the emergency handle to operate the sunroof, you have to reset your sunroof system as follows :
(1)Turn the ignition key to the ON position and then close the sunroof completely.
(2)Release the sunroof control lever.
(3)Press and hold the CLOSE button for more than 10 seconds until the sunroof closed and it has moved slightly.
(4)Release the sunroof control lever.
(5)Press and hold the CLOSE button once again within 3 seconds until the sunroof does as follows:
• Tilt down → Slide Open → Slide Close
Then release the lever.(6)Reset procedure of sunroof system is finished.
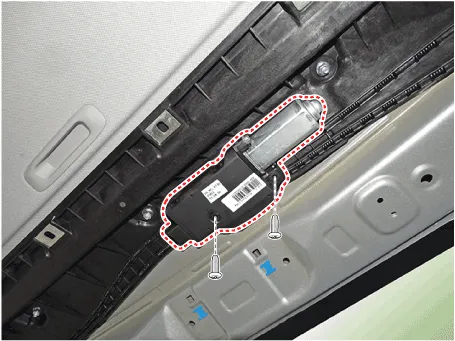
 Components and Components Location
- Components
1. Glass panel assembly2. Deflector3. Motor assembly4. Spring base assembly5. Seth plate assembly6. Guide assembly7. Frame sub assembly8. Seal tape9. Rear drip 10. Stopper11. Sunsha ...
 Sunroof Glass
- Components Location
1. Sunroof glass
- Replacement
• Put on glove to protect your hands.
1.Close the sunroof glass completely by pressing the sunroof switch.
...
Other information:
Hyundai Tucson (NX4) 2022-2026 Owner's Manual: Rear Cross-Traffic Collision-
Avoidance Assist Settings
Rear Cross-Traffic Safety
With the ignition switch ON, go to User
Settings > Driver Assistance > Parking
Safety > Rear Cross-Traffic Safety (for
cluster type) or Setup > Vehicle > Driver
Assistance > Parking Safety > Rear
Cross-Traffic Safety (for infotainment
sys ...
Hyundai Tucson (NX4) 2022-2026 Service Manual: Front Disc Brake
- Removal
• Be careful not to damage the parts located under the vehicle
(floor under cover, fuel filter, fuel tank and canister) when raising
the vehicle using the lift.(Refer to General Information - "Lift and
Support Points")
1.Loosen the wheel nuts slightly.Raise ...
